You can create an email campaign for automation with these instructions however you need a workspace you would like to create the campaign in.
Getting Started On How To Create Email Campaign For Automation
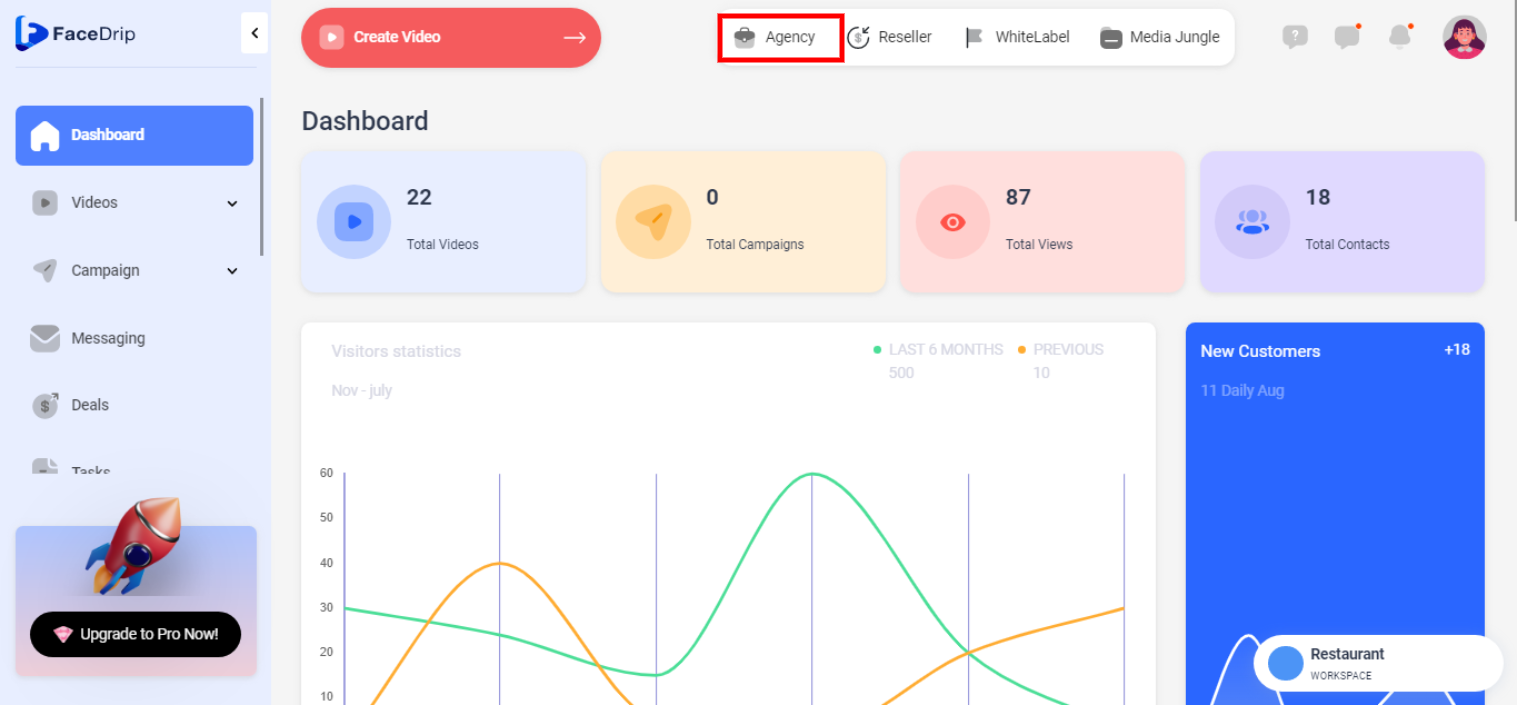
Log in to your Facedrip account.
STEP 1:Click on the “Agency”
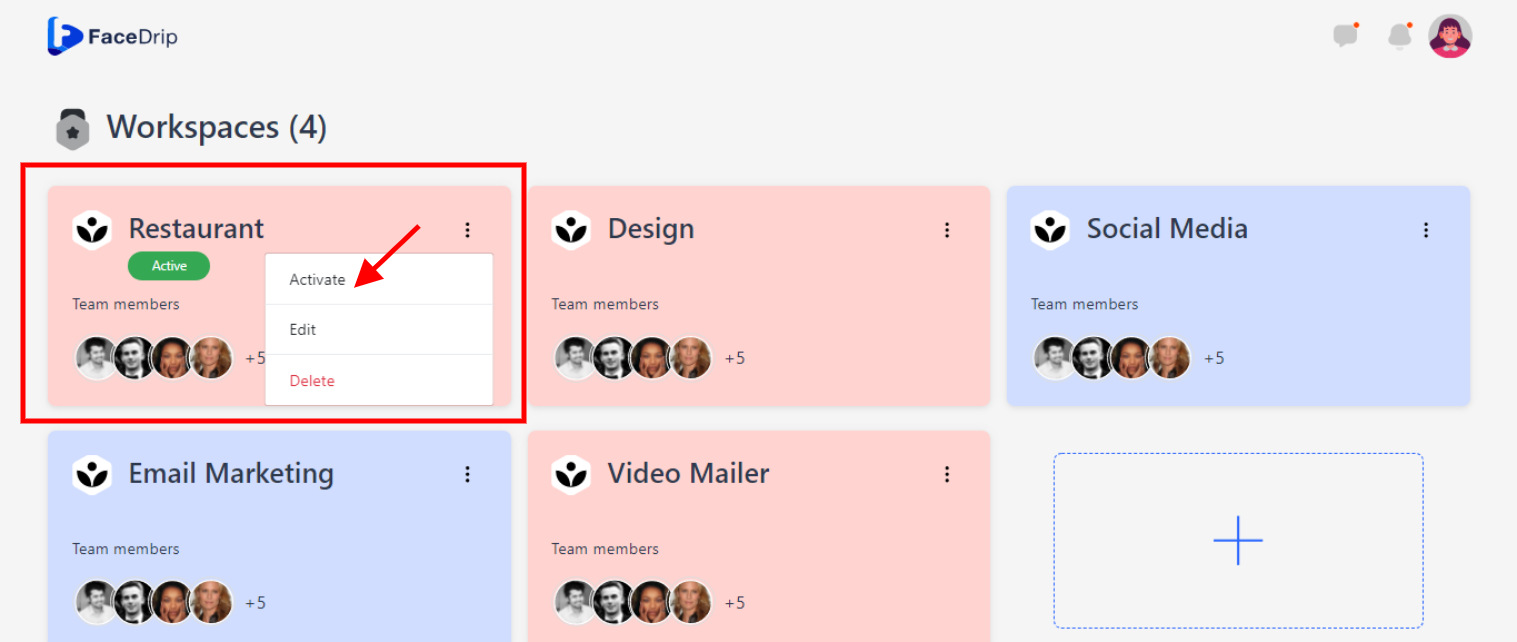
STEP 2: Click on “Workspace”
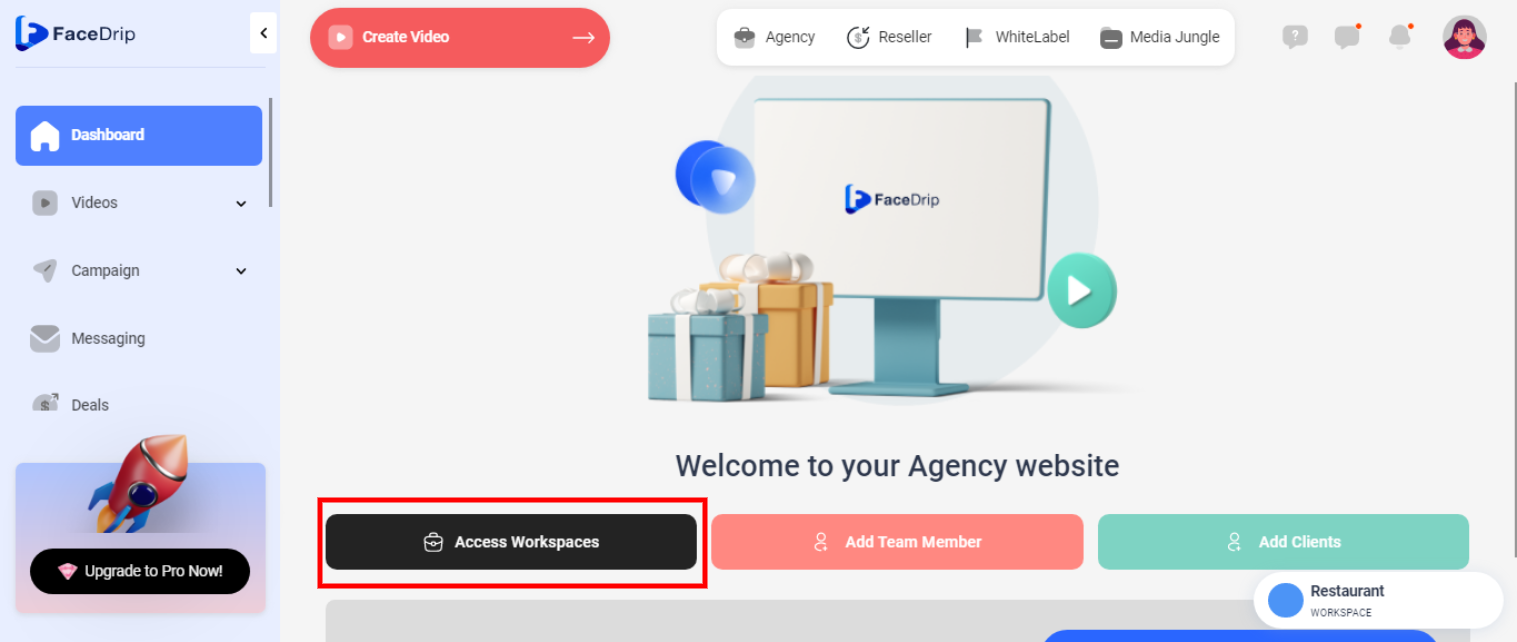
STEP 3: Choose the workspace you want to create an email campaign for automation and click the “activate workspace” button. (follow this link on How To Create New Workspace)
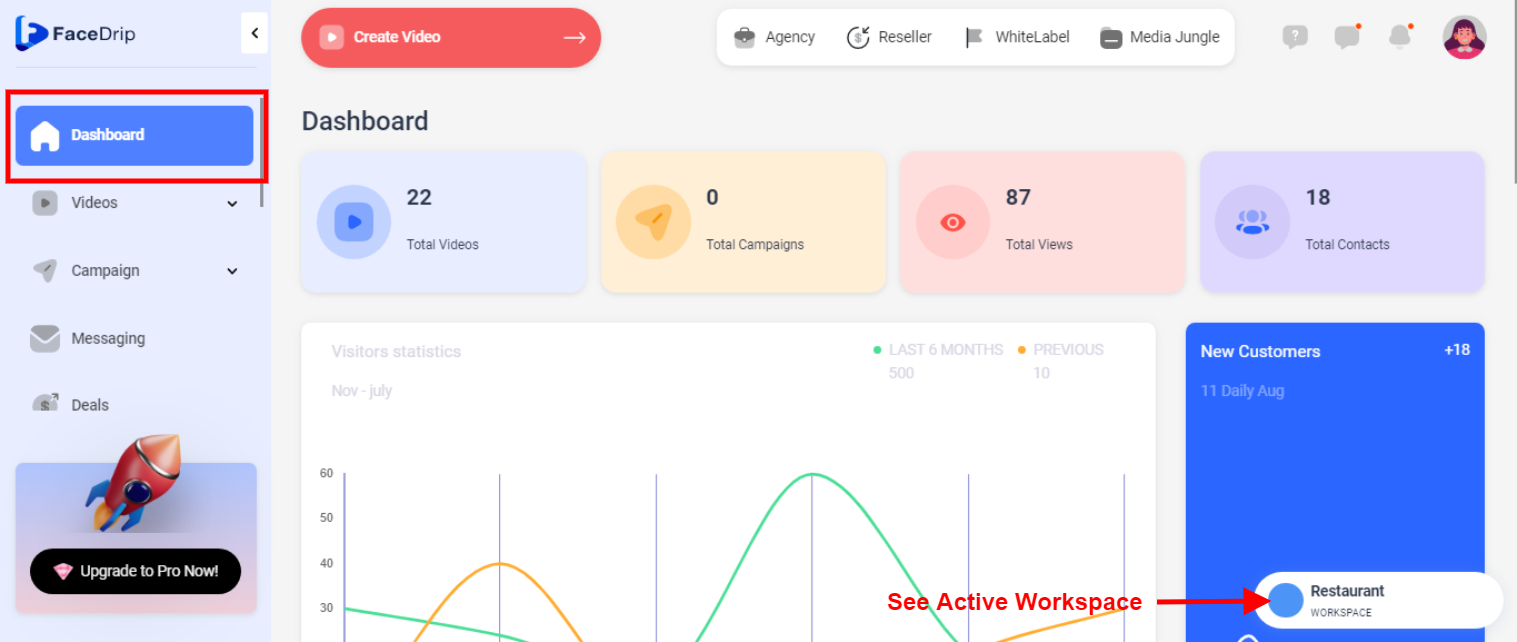
Your workspace will be activated successfully! (PS: Go back to your dashboard module to see the active workspace).
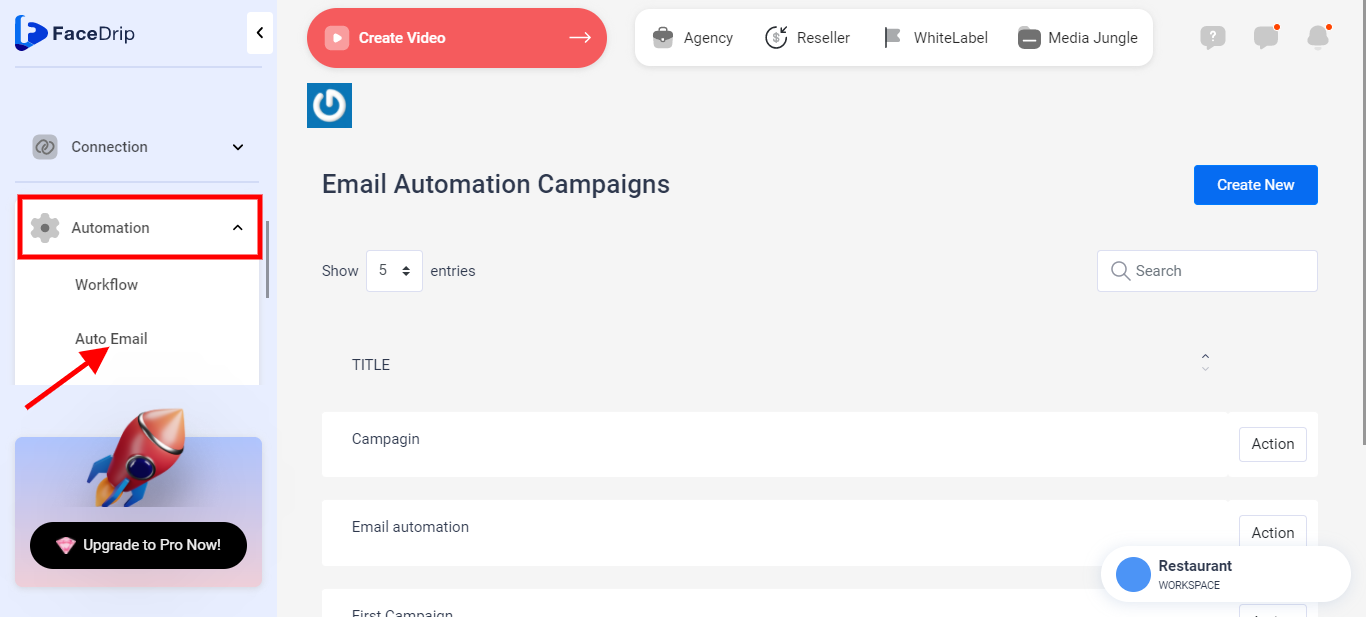
STEP 4: Click on the “automation” menu on the left-hand side menu bar of your dashboard then click on “auto-email” in the drop-down option.
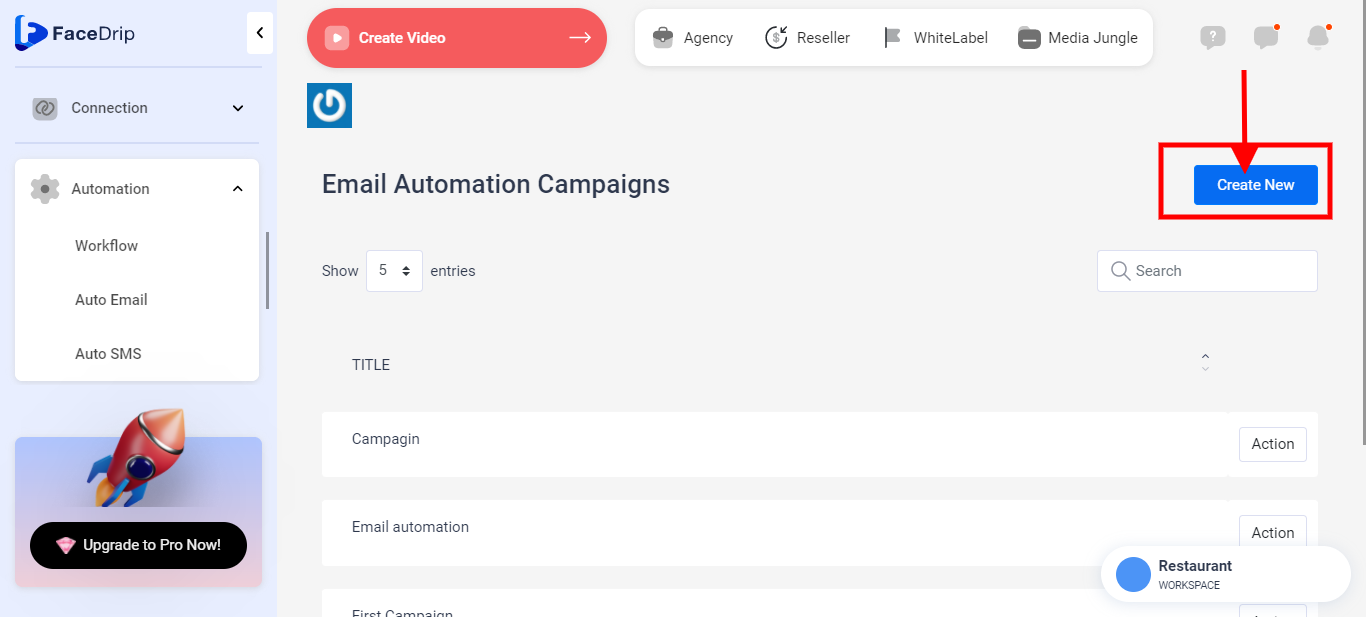
STEP 5: Click on the “blue create new button” on your dashboard.
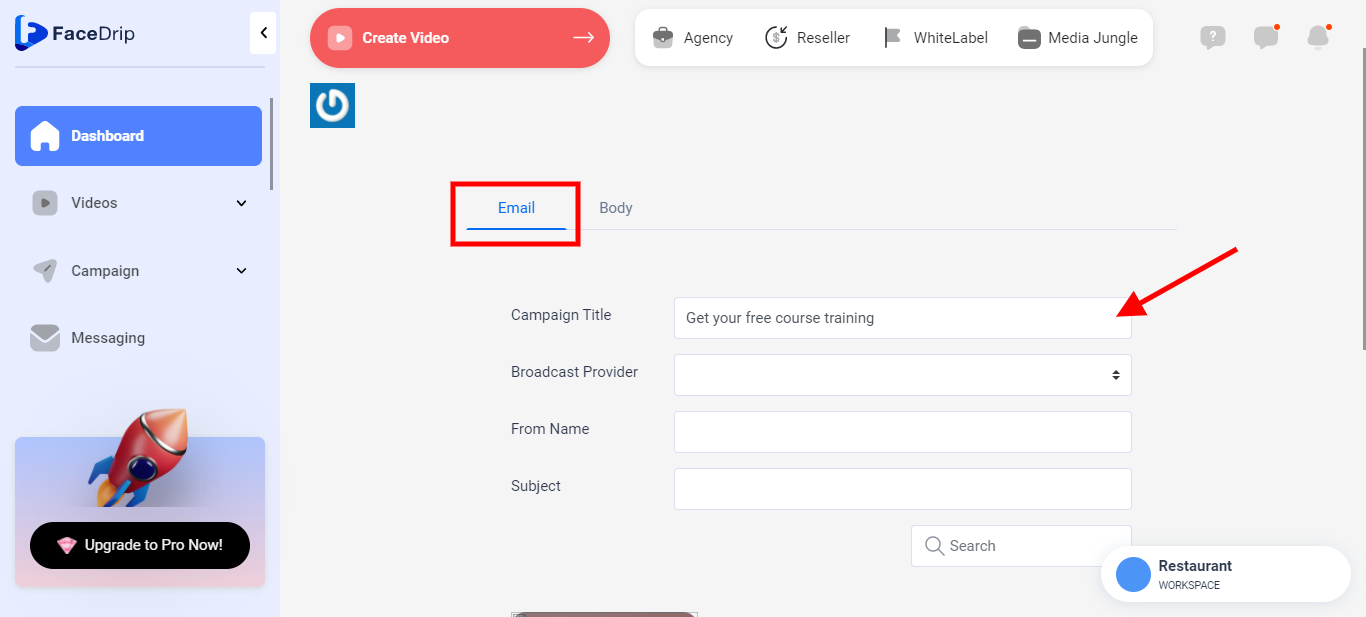
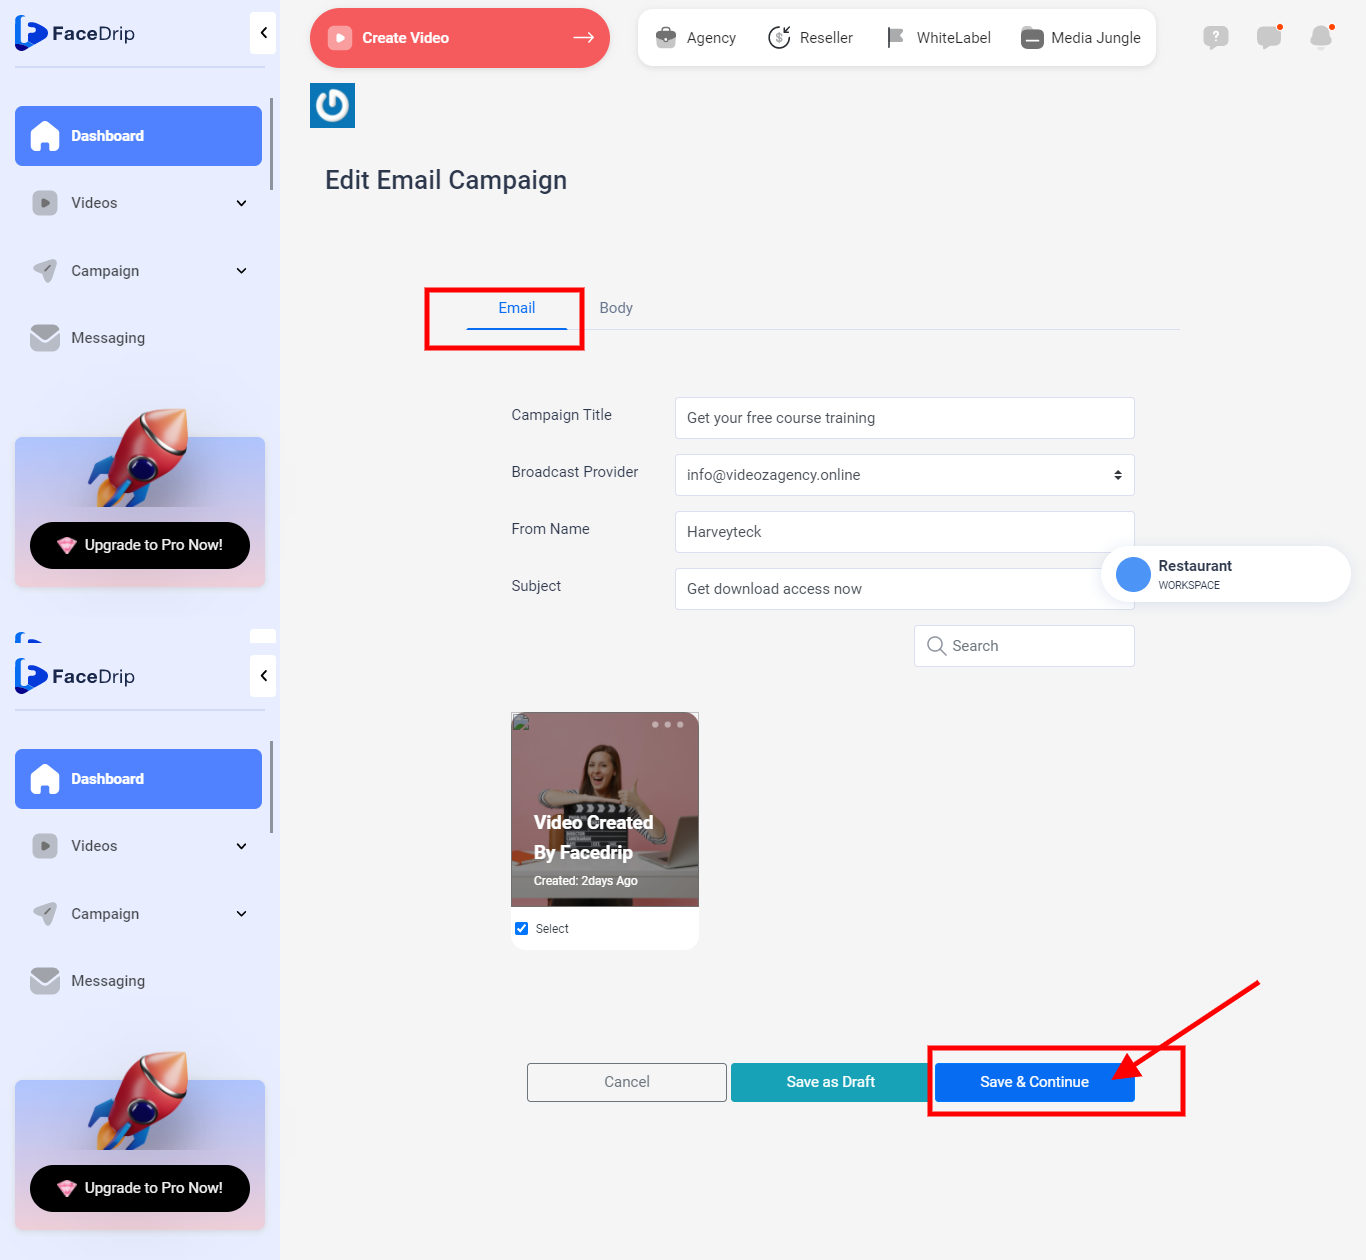
STEP 6: Go to the email tab in the pop up form to make changes as desired to campaign title, broadcast provider, from name, subject and video.

To enter details to the respective fields as shown in the screenshot above please follow this guide;
Click on “campaign title” field to enter your preferred title
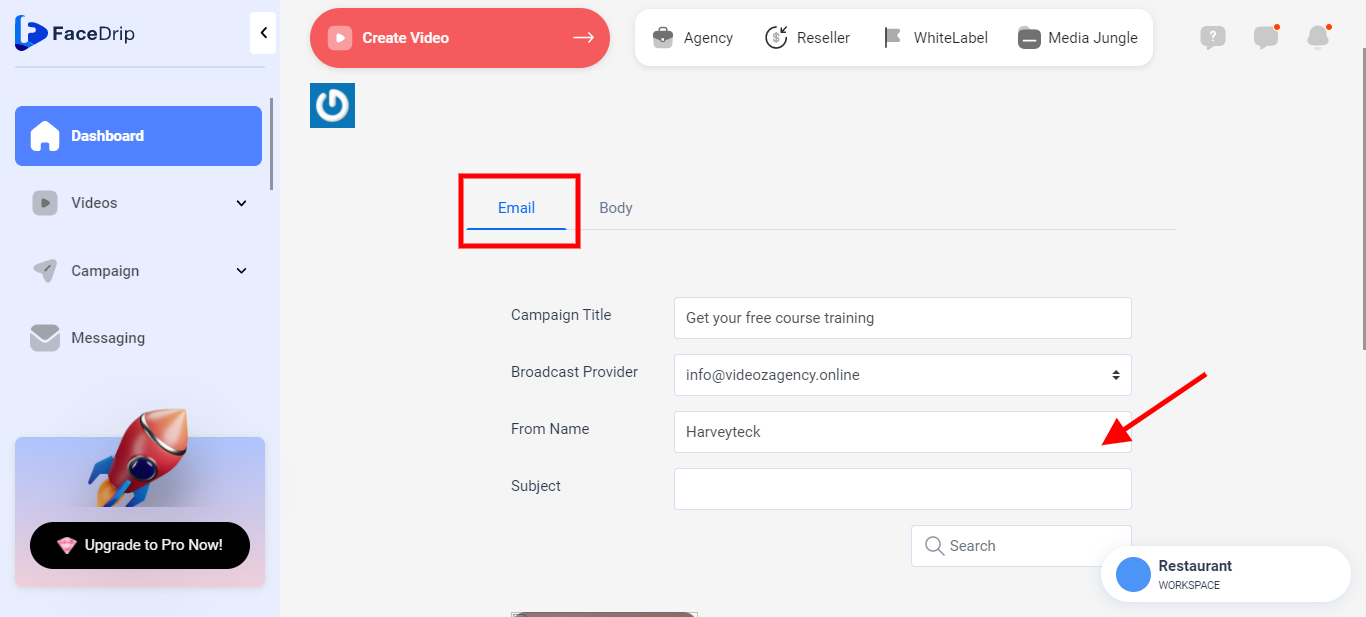
Click on “broadcast provider” field to select your preferred email (please kindly follow this link to see how to create broadcast provider)

Click on “from name” field to enter preferred sender name
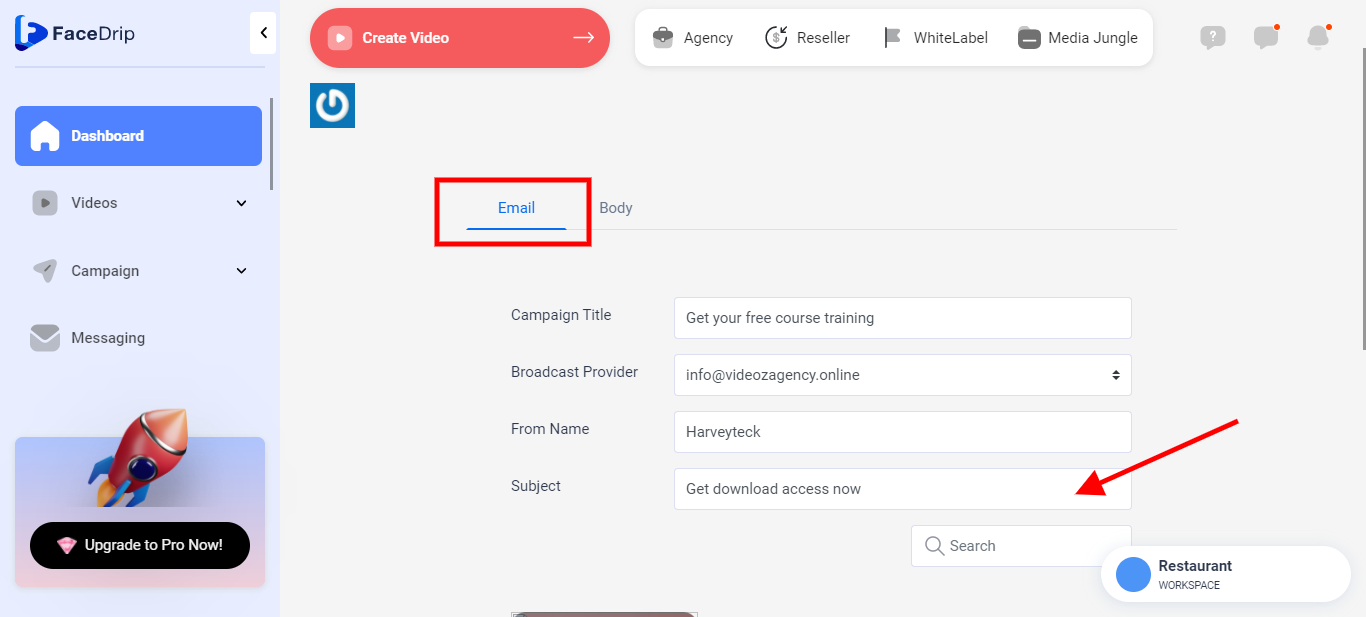
Click on “subject” field to enter preferred details
Choose your preferred video by clicking on the “select check box” (please kindly follow this link to see how to upload video)
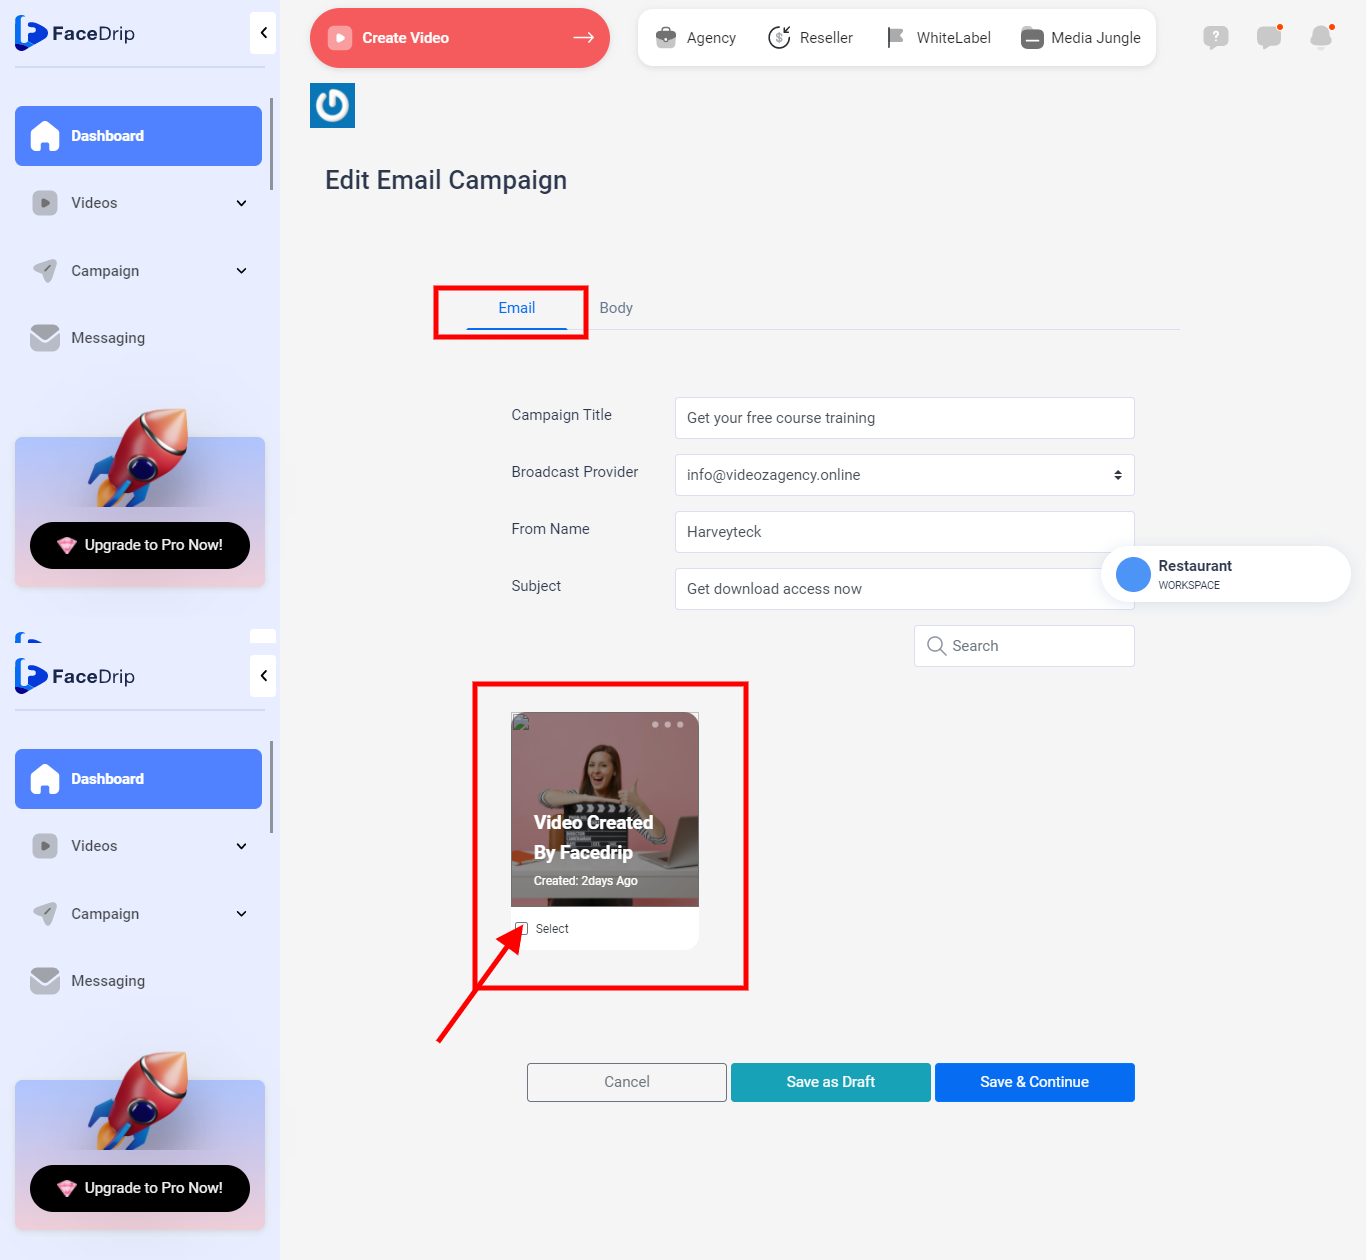
Click on the save and continue button (P.S you would be redirected to the body tab pop up form to continue the email campaign creating process with a success message stating that draft was saved successfully)
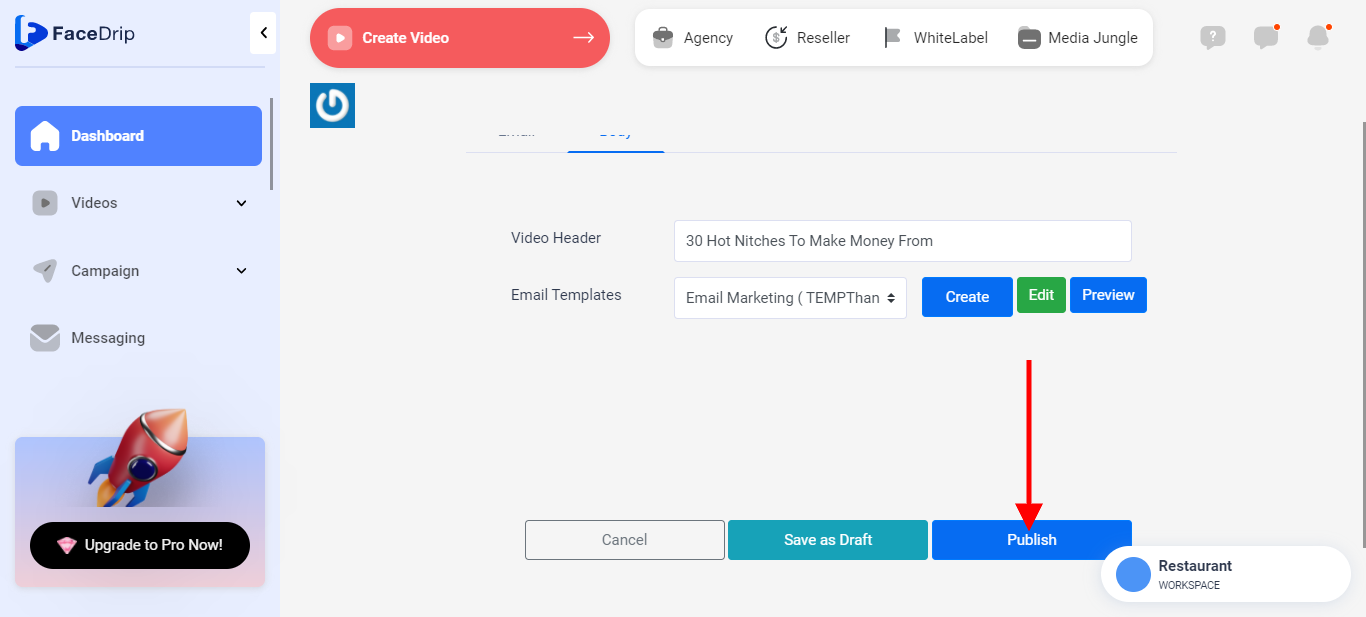
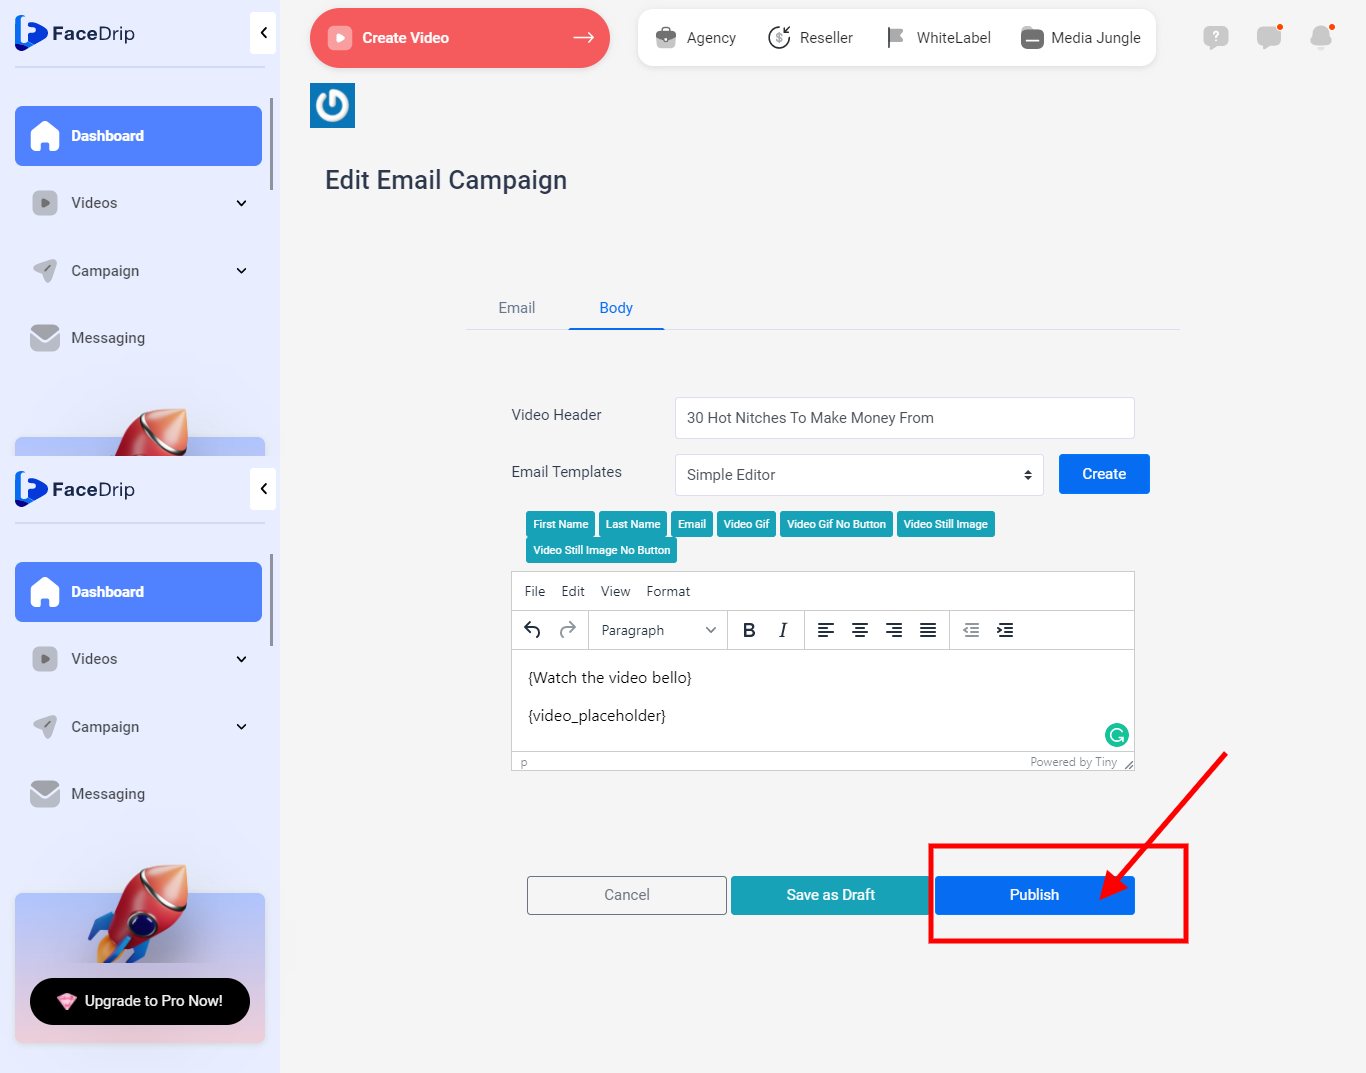
STEP 7: This is the page you will be redirected to see the body tab pop up form and to make changes as desired to “video header” and “email templates”.
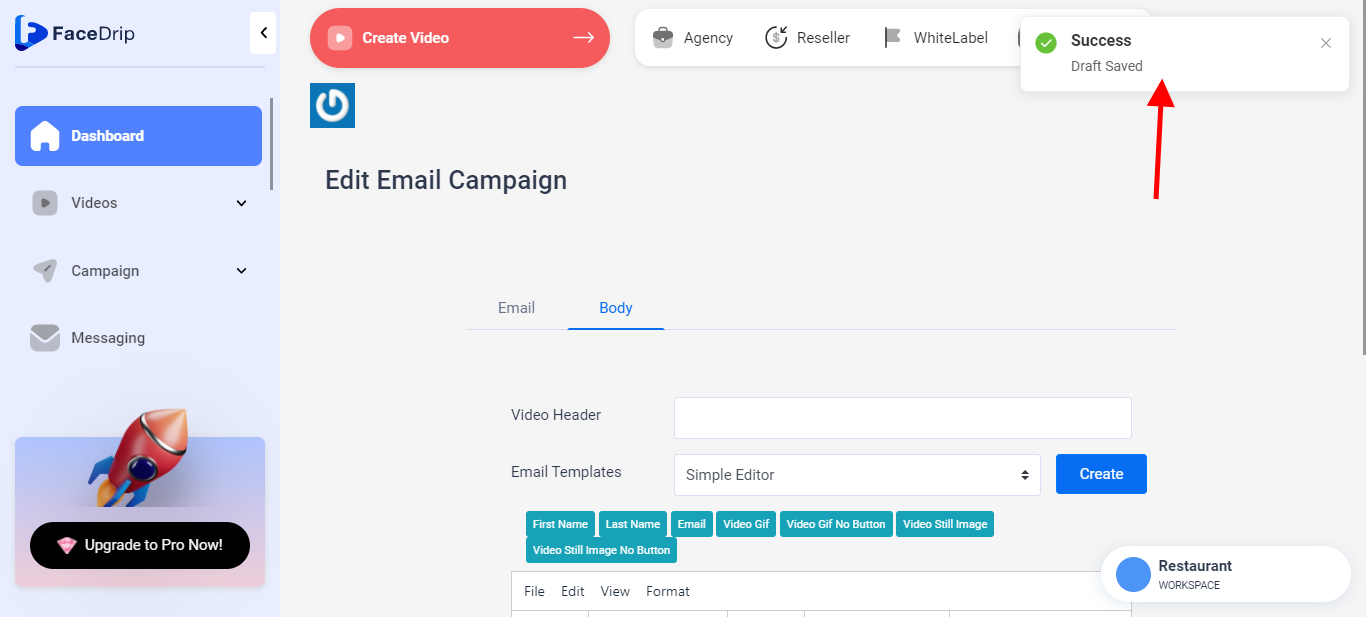
To enter details to the respective fields in the body tab (“video header” and “email templates”) as shown in the screenshot above please follow this guide;
Click on “video header” field to enter your preferred name

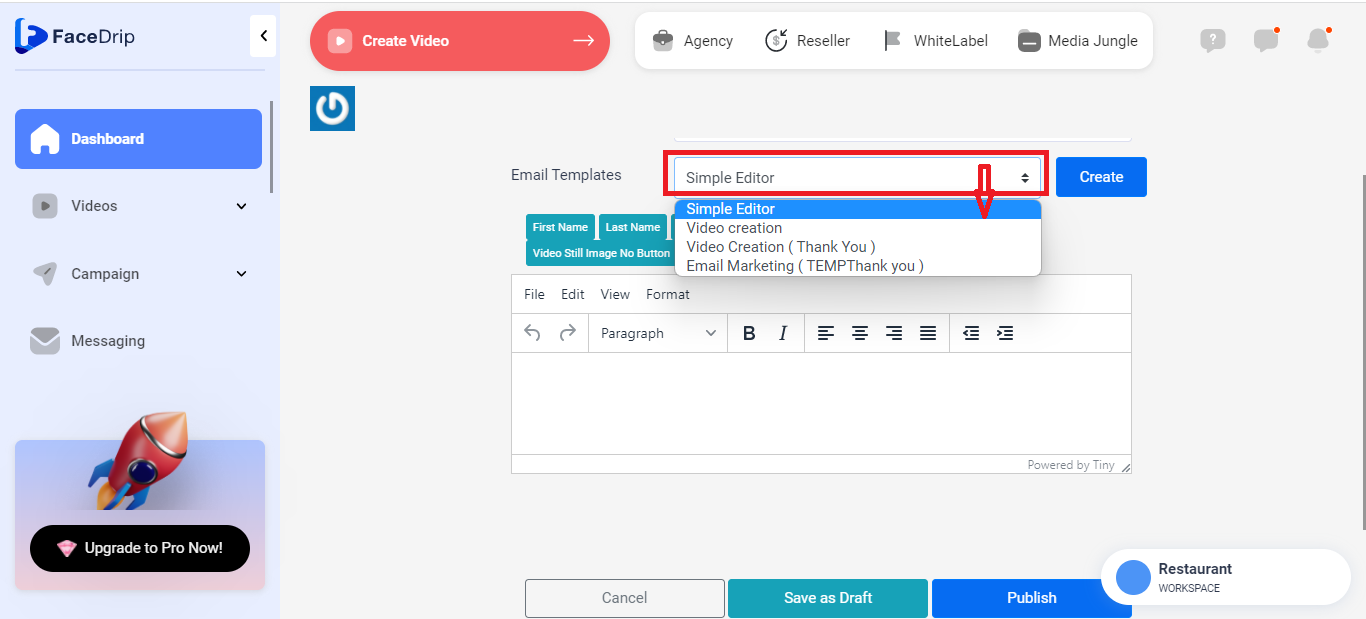
The email templates field has two options to select from;
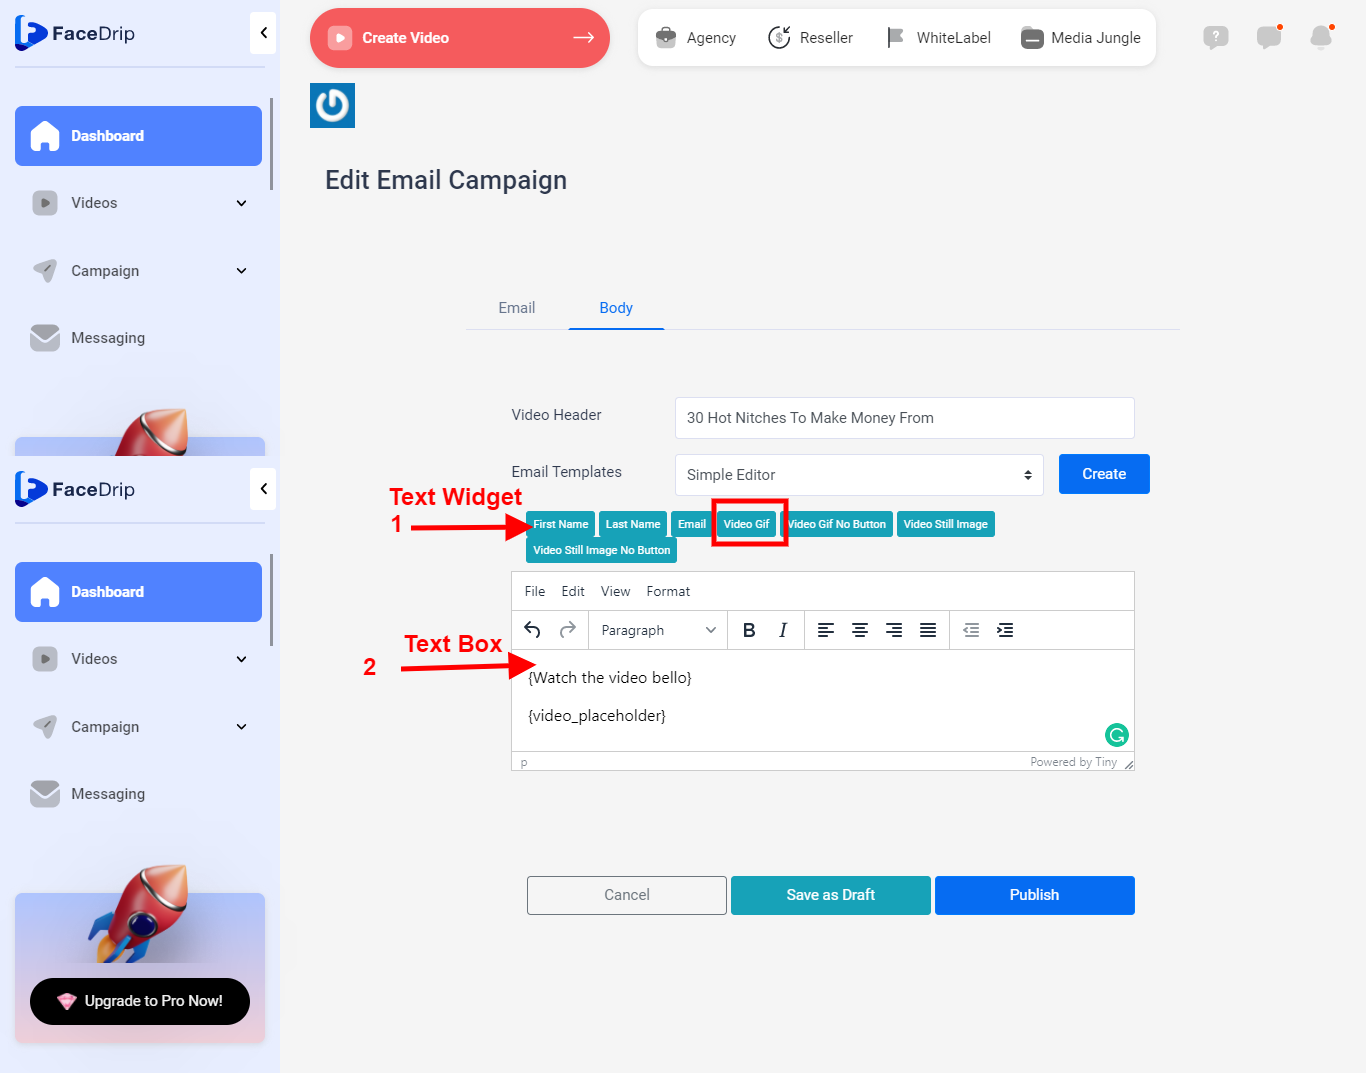
(a) select “simple editor” by clicking on the dropdown from email templates field.
After you select simple editor, enter your preferred description and click on your widget to add it to your email copy. The widget are described below:
{first_name} : adds the recipient’s first name
{last_name} : adds the recipient’s last name
{email} : adds the sender’s email
{video_placeholder} : adds the video gif and cta watch button
{video_placeholder_no_button} : adds the video gif with no cta watch button
{video_placeholder_still_image} : adds the video gif as an image and cta watch button
{video_placeholder_still_image_no_button} : adds the video gif as an image with no watch cta button
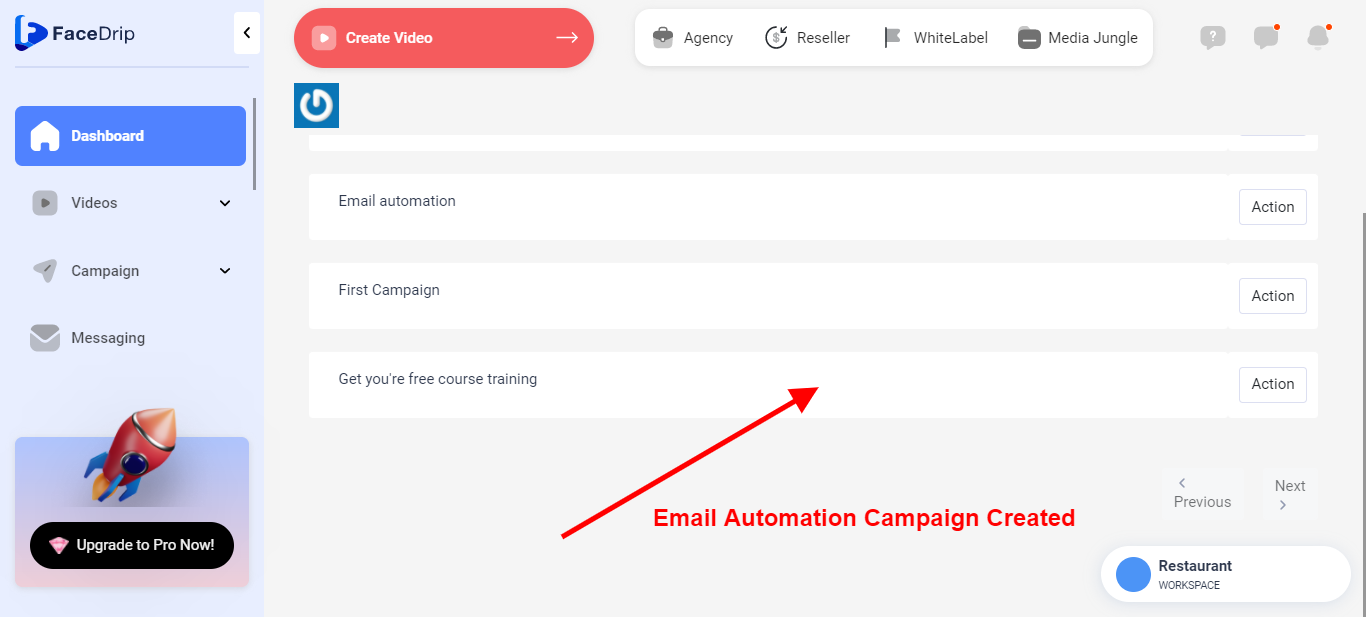
Click on the publish button (P.S you would see a success message stating that draft was saved successfully and you would be redirected to the email campaign automation dashboard.
(b) select “already existing email templates” by clicking on the dropdown from email templates field.
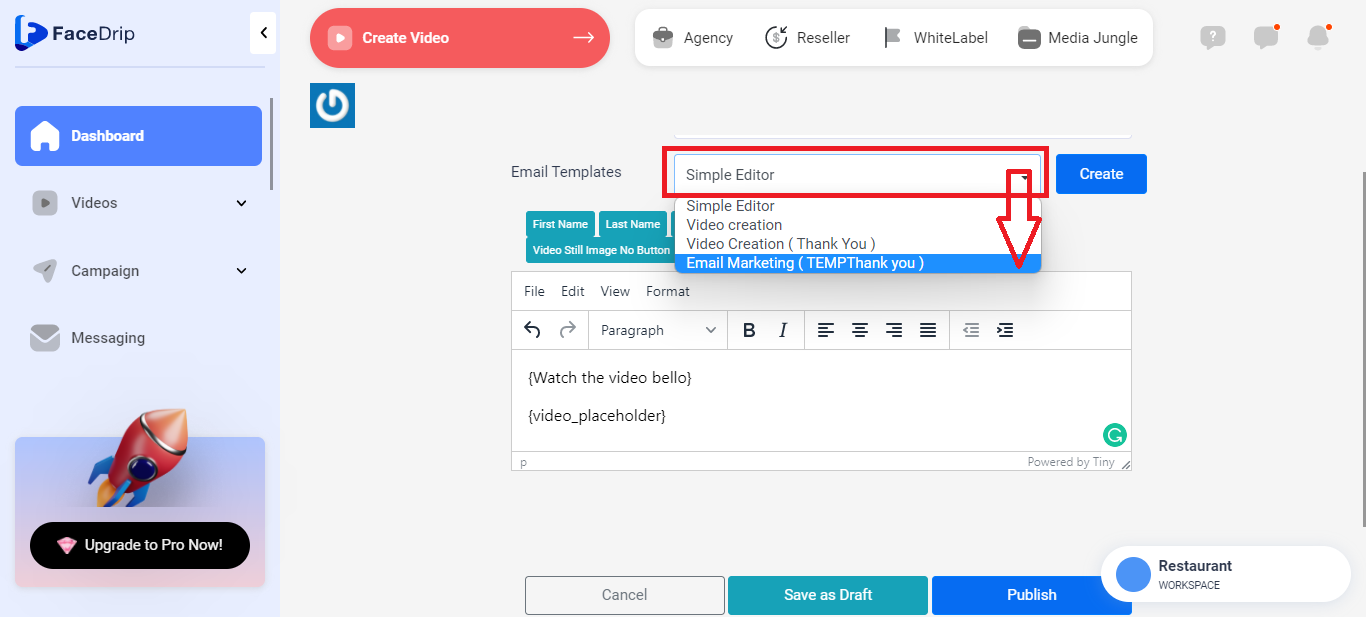
(click on this link to see how to create a new email template)
Green Edit Button: This button would redirect you to a page builder to enable you make changes to your preferred email template. (click on this link to see how to edit an email template)
Blue Preview Button: This button would redirect you to a preview page builder to enable you see your preferred email template.
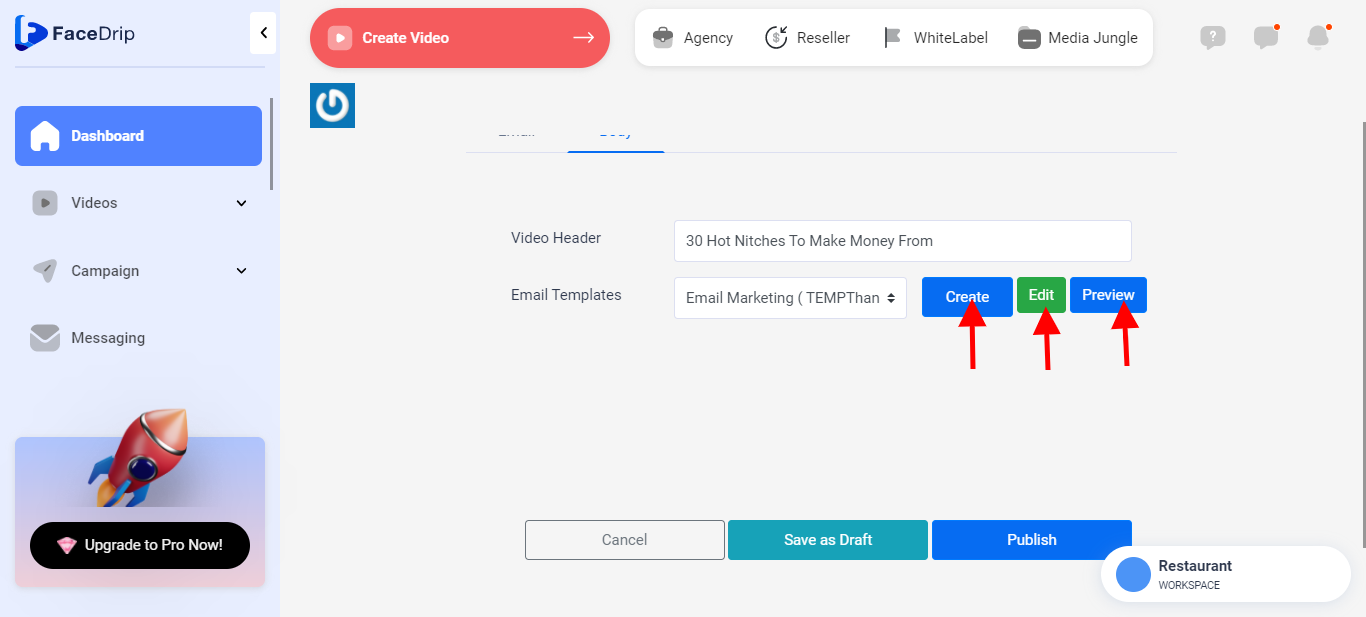
Click on the publish button (P.S you would see a success message stating that draft was saved successfully and you would be redirected to the email campaign automation dashboard.