You can setup automation or workflow in facedrip with these instructions however you need a workspace you would like to setup the automation in.
Getting Started On How To Setup and Use Workflow in Facedrip
Log in to your Facedrip account.
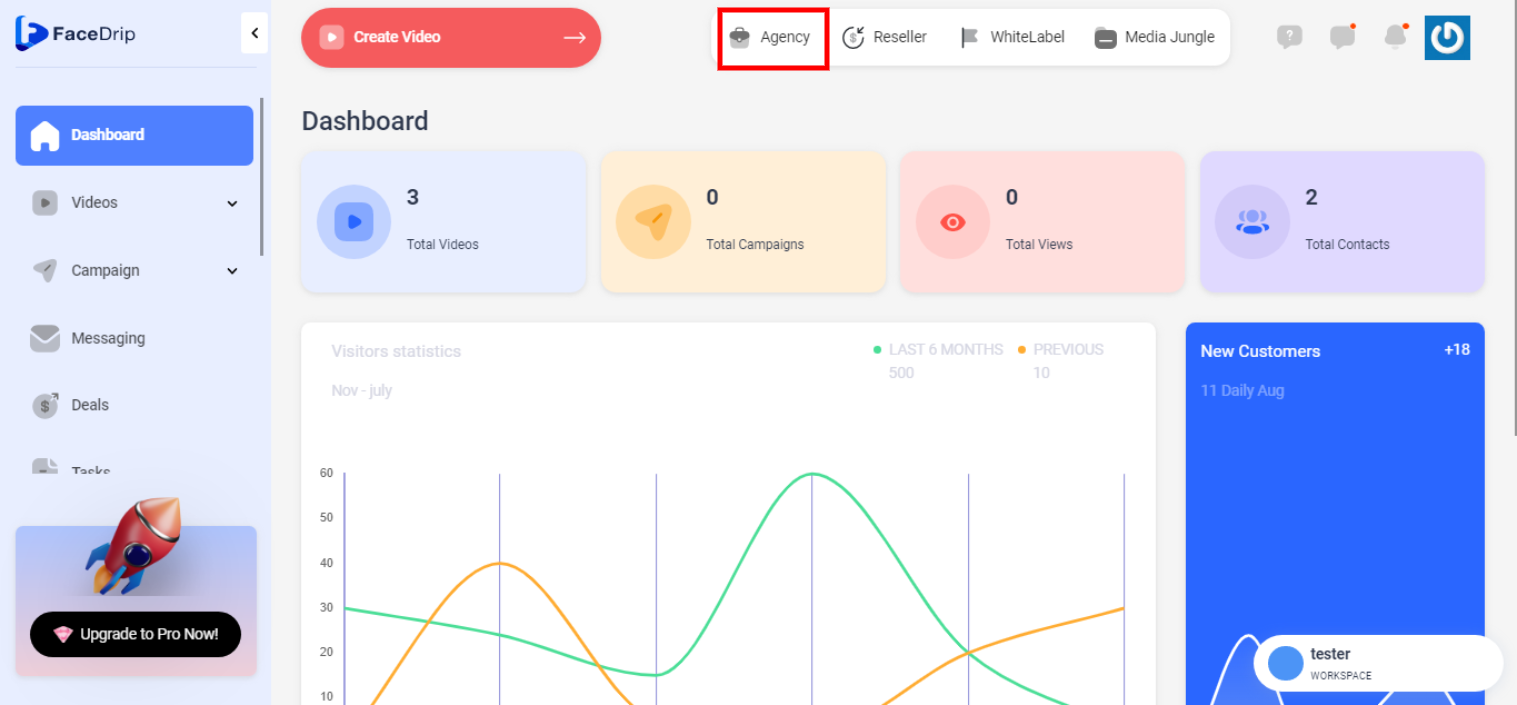
STEP 1:Click on the “Agency” on the top side menu bar of your dashboard
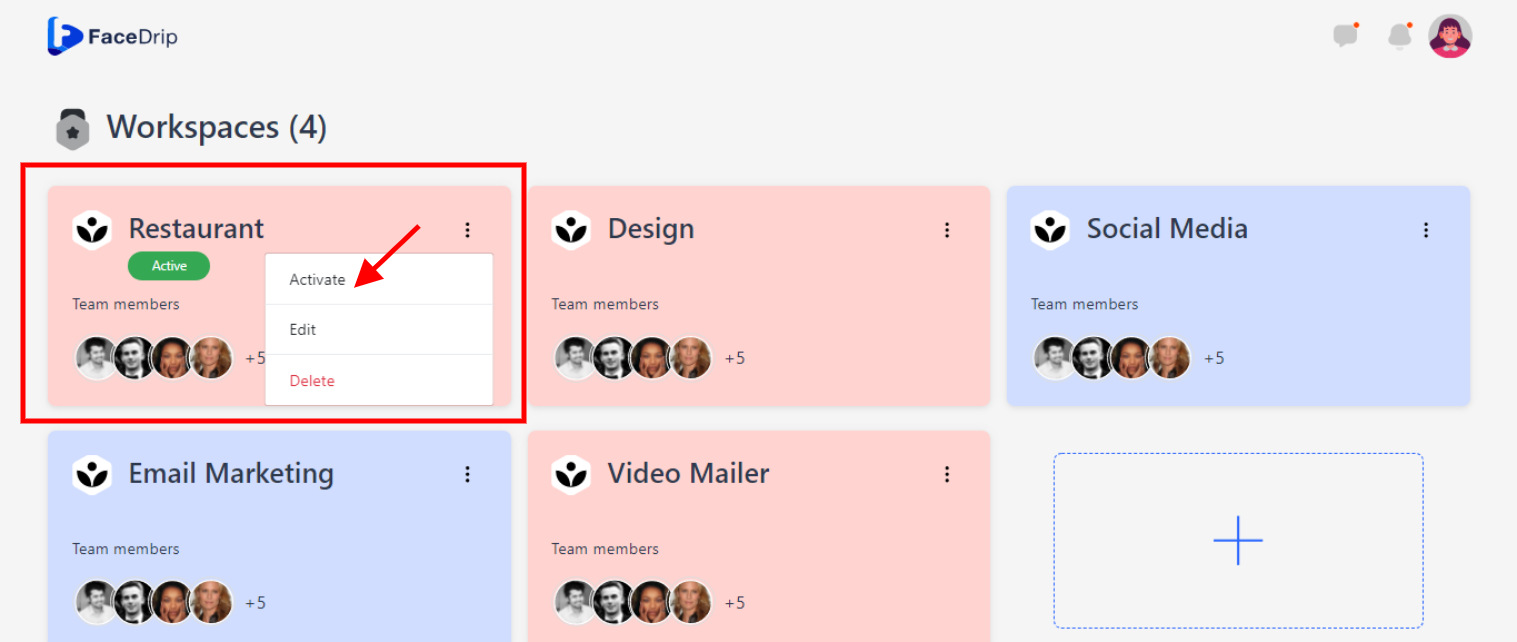
STEP 2: Click on “Workspace”

STEP 3: Choose the workspace you want to setup a workflow in and click the “activate workspace” button. (follow this link on How To Create New Workspace)
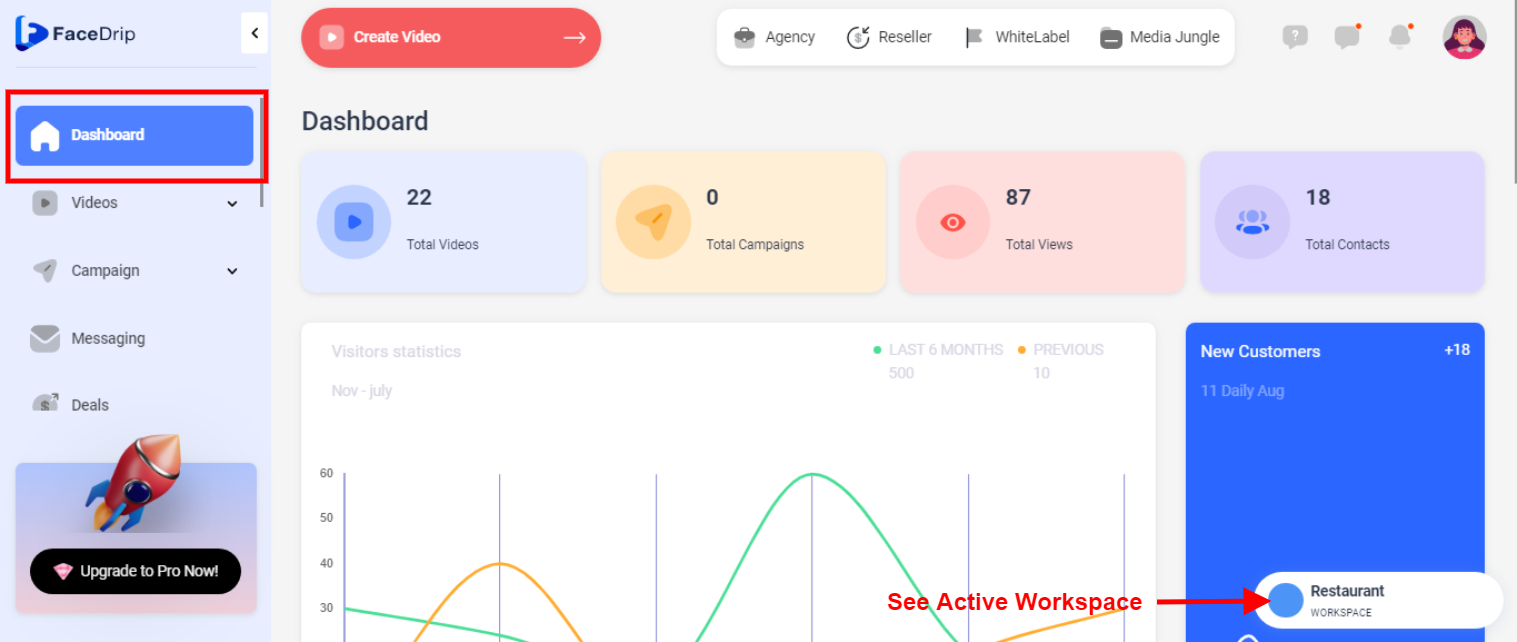
Your workspace will be activated successfully! (PS: Go back to your dashboard module to see the active workspace).
Facedrip Provides the ability to create automated sequences of emails. These sequences can be based on triggers like CTA Clicked, Video Watched and Tag Added followed by actions such as Add Tag, If/then branch, create a task, delay, remove tag and send a campaign.
The steps below describe how to set up and use automation:
STEP 4: Get the following ready before you set up your automation
==> Contacts: Follow this link on how to create a contact
==> Videos: Follow this link on how to create a video
==> Tags: Follow this link on how to create a tag
==> Campaign: Follow this link on how to create an email campaign for automation
==> Task: Follow this link on how to create task
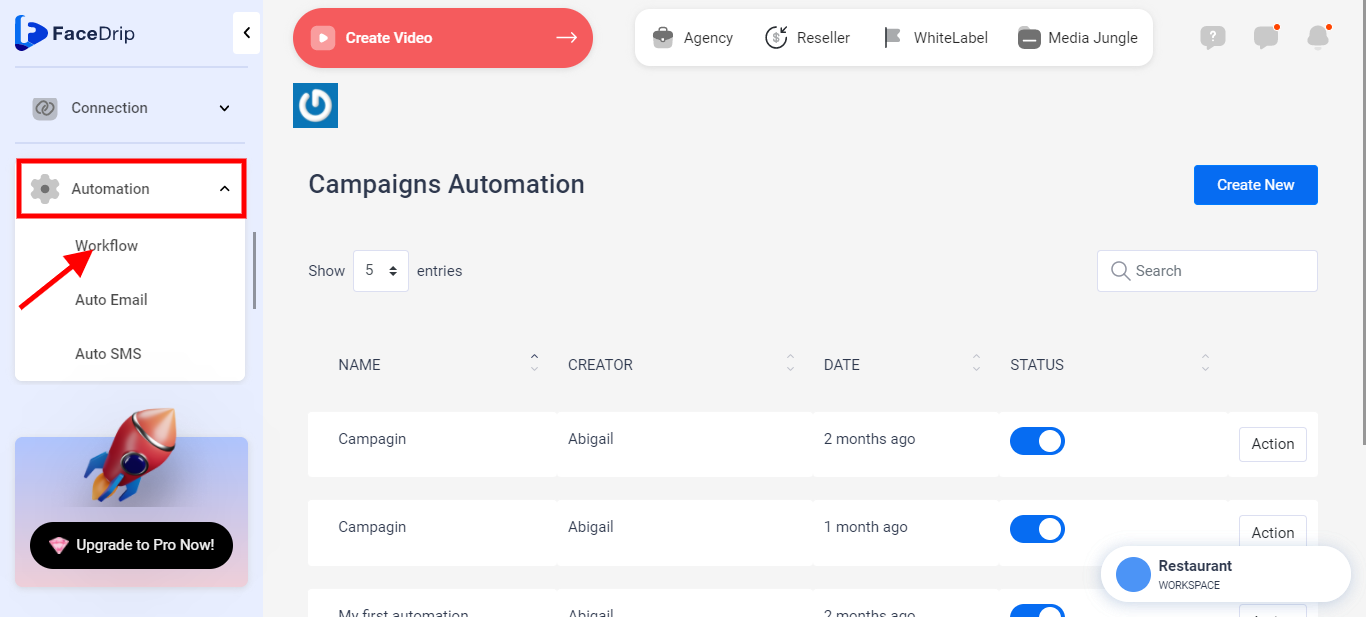
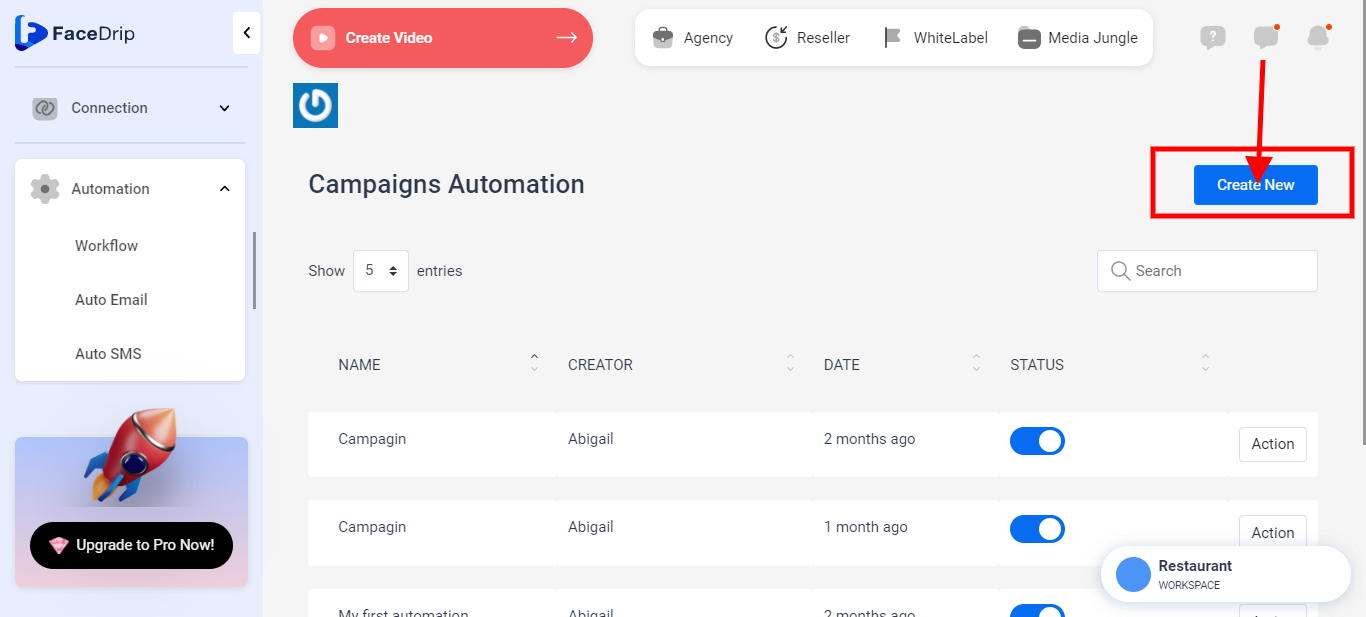
STEP 5: Click on the “automation” menu on the left-hand side menu bar of your dashboard then click on “workflow” in the drop-down option.
STEP 6: Click on the “blue create new button”.
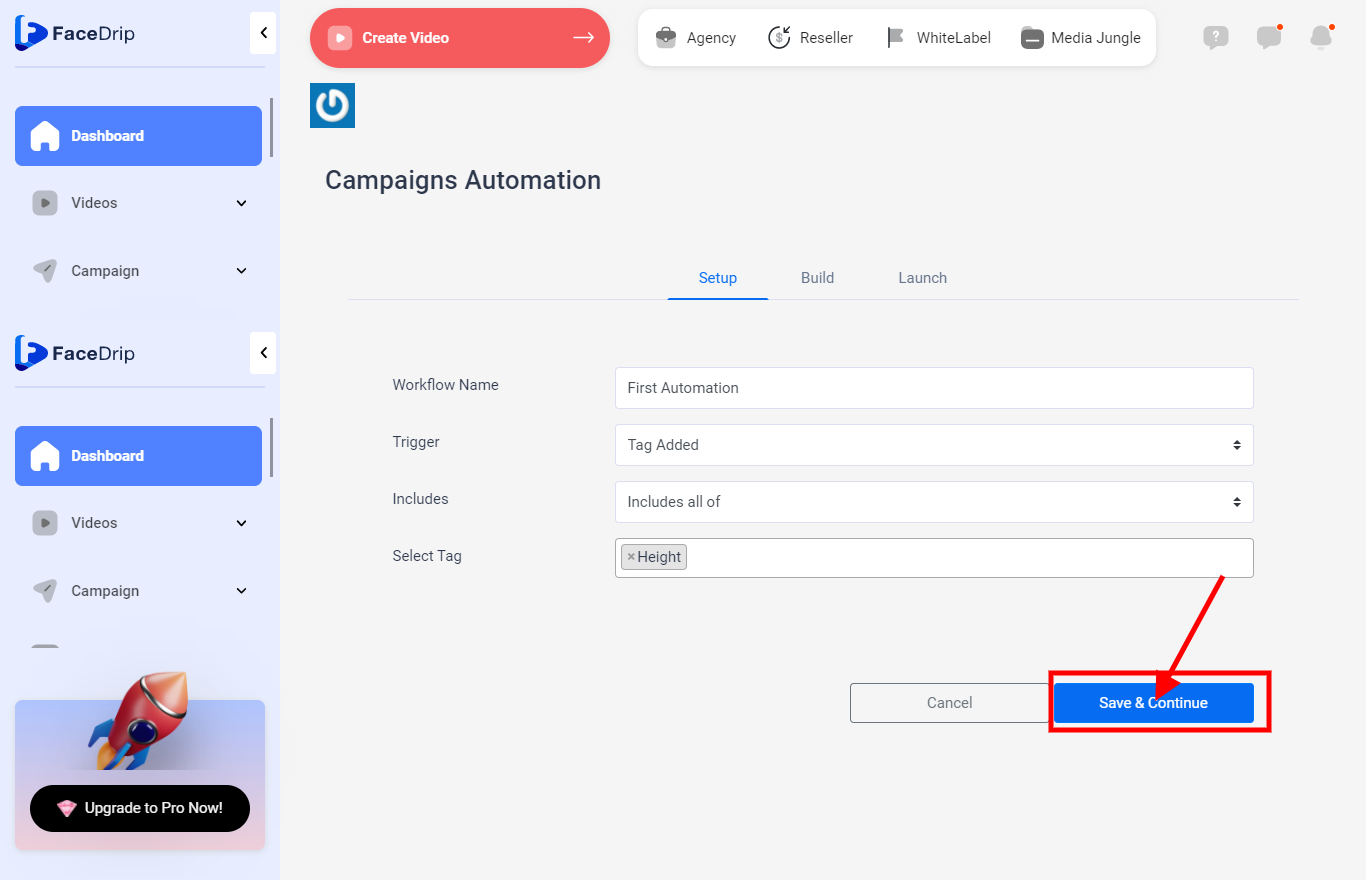
STEP 7: Go to the setup tab in the pop-up form to enter the workflow name and select trigger as desired.
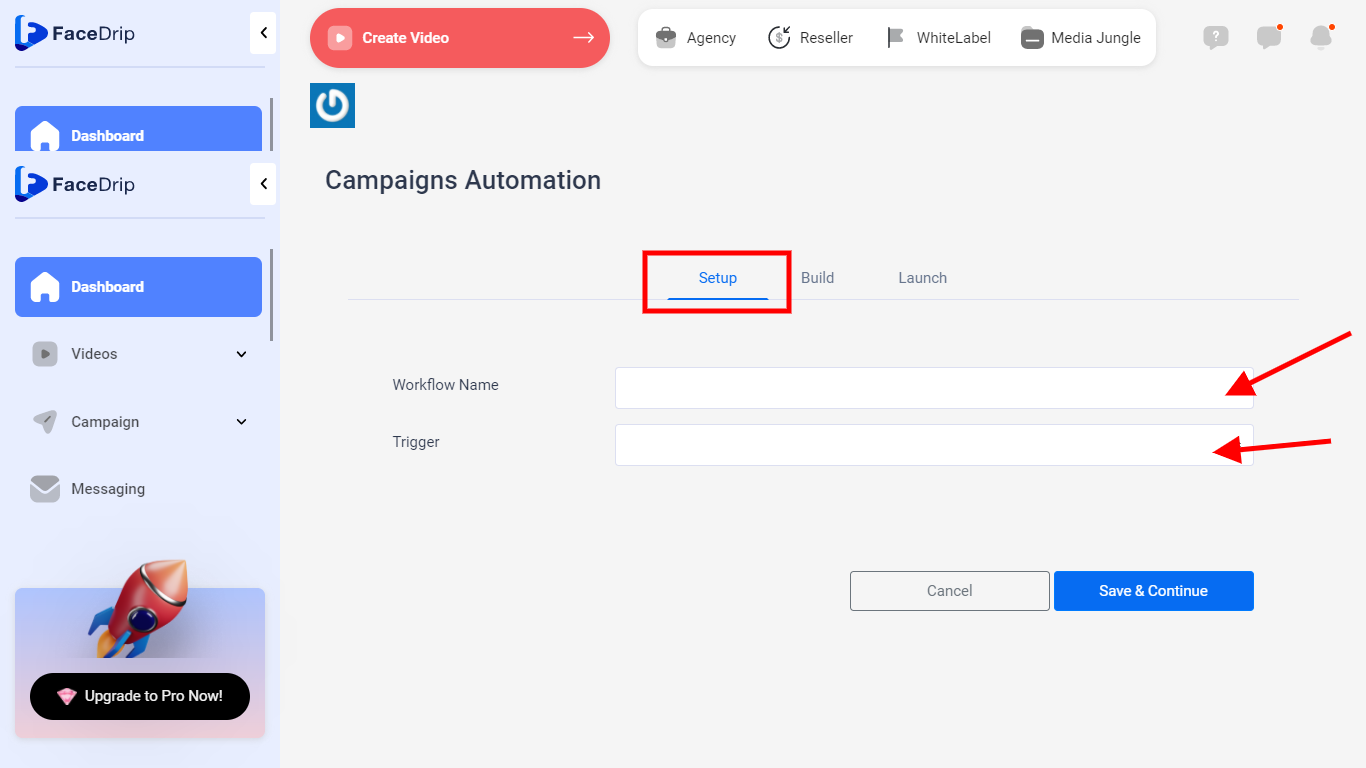
To edit details to the respective fields as shown in the screenshot above please follow this guide;
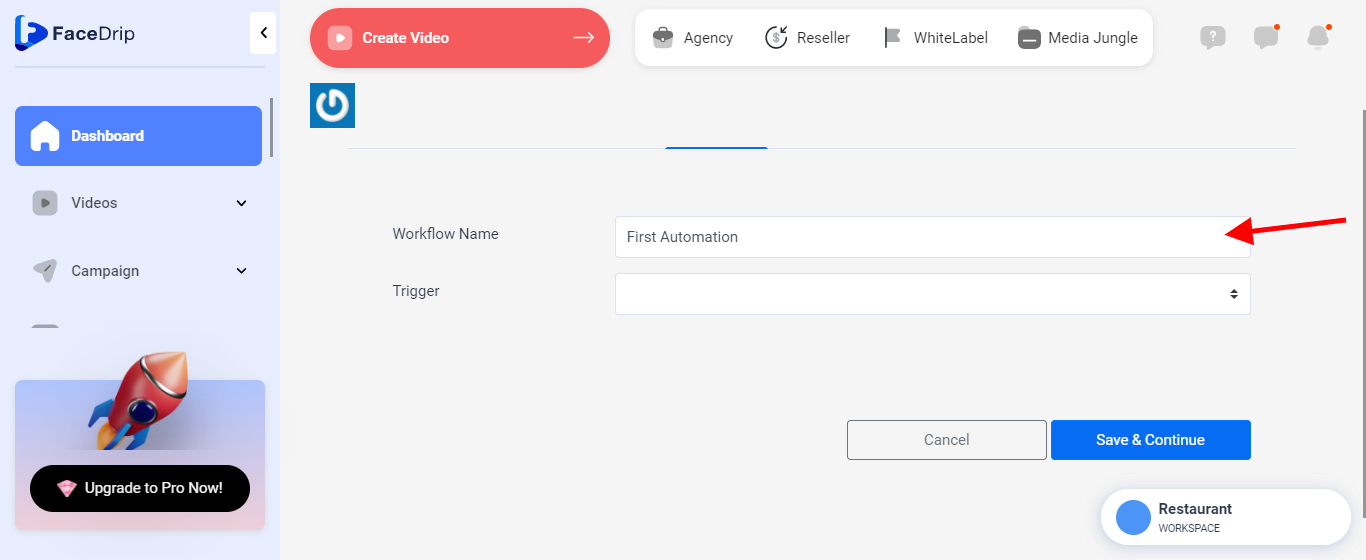
Click on “Workflow” field to enter your workflow name
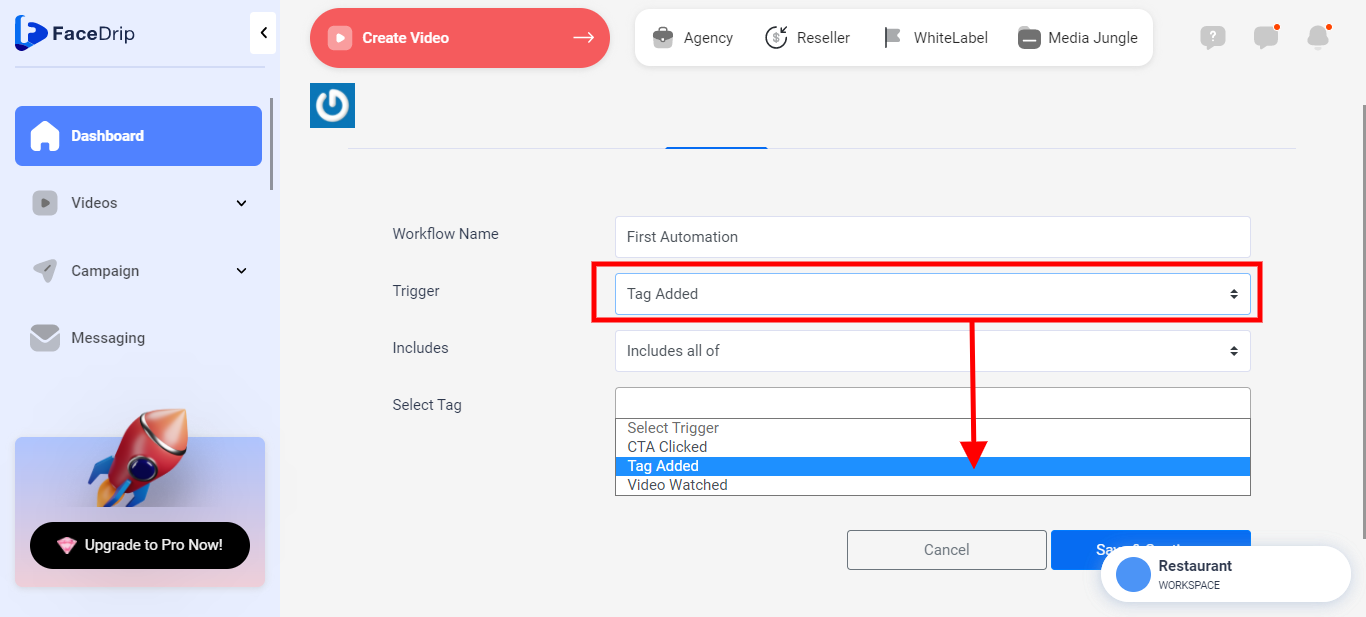
(Create the workflow based on the trigger (CTA, Video watched, and Tag added) and then create the steps of your workflow which includes action to be taken once the automation is triggered (Add tag, if/then branch, create a task, delay, remove the tag and send campaign)
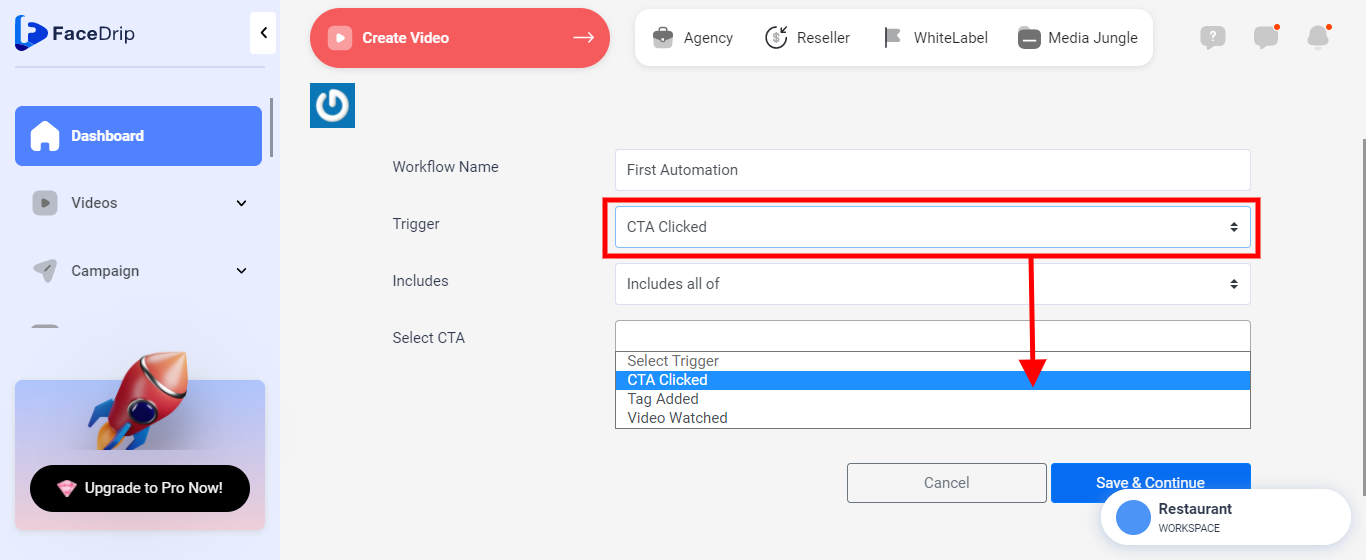
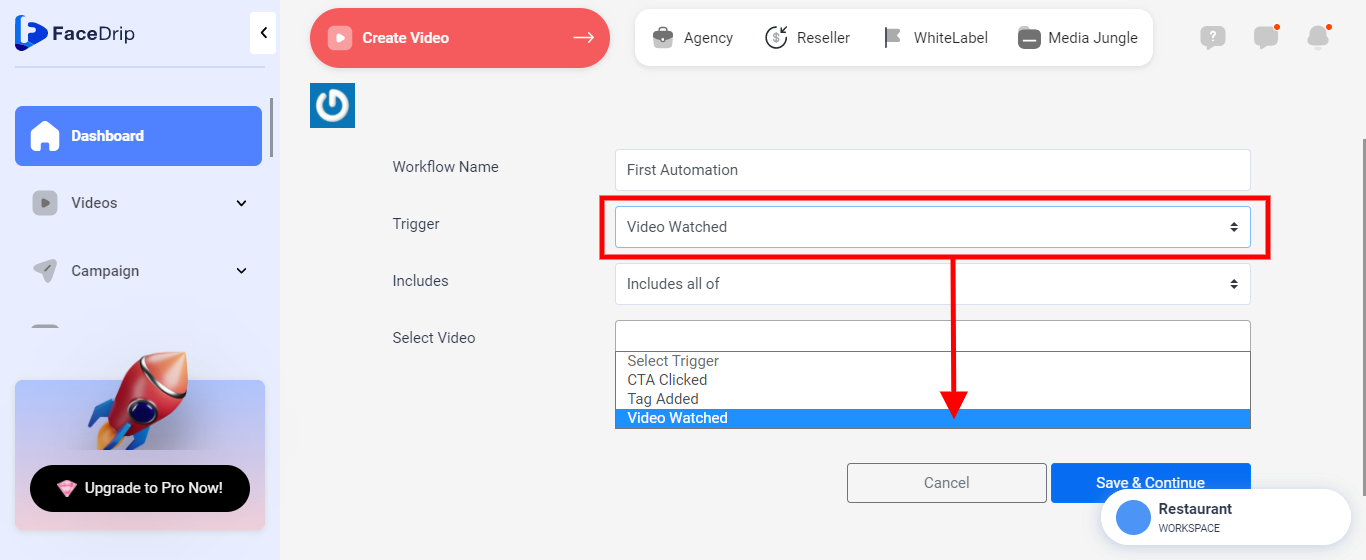
7. A. Name the workflow and select a trigger type.
7. A. “Tag added” trigger
What this means is when a tag is added to a contact the workflow will be executed on that contact.
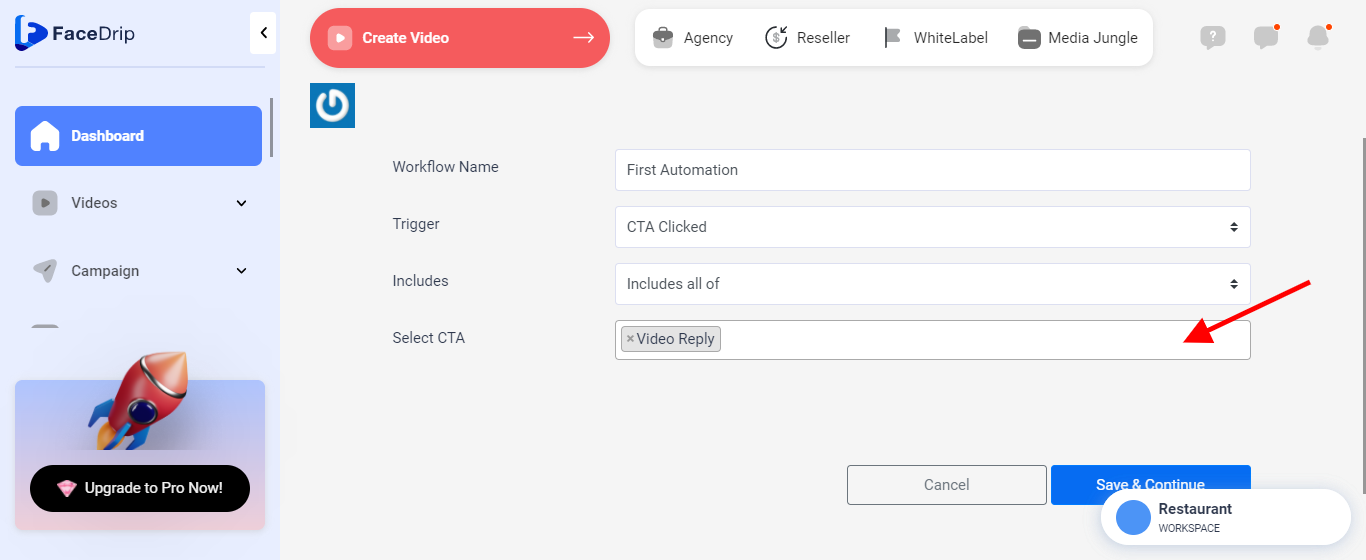
CASE 2: “CTA Clicked” trigger
What this means is when a CTA is being clicked by a contact the workflow will be executed on that contact.
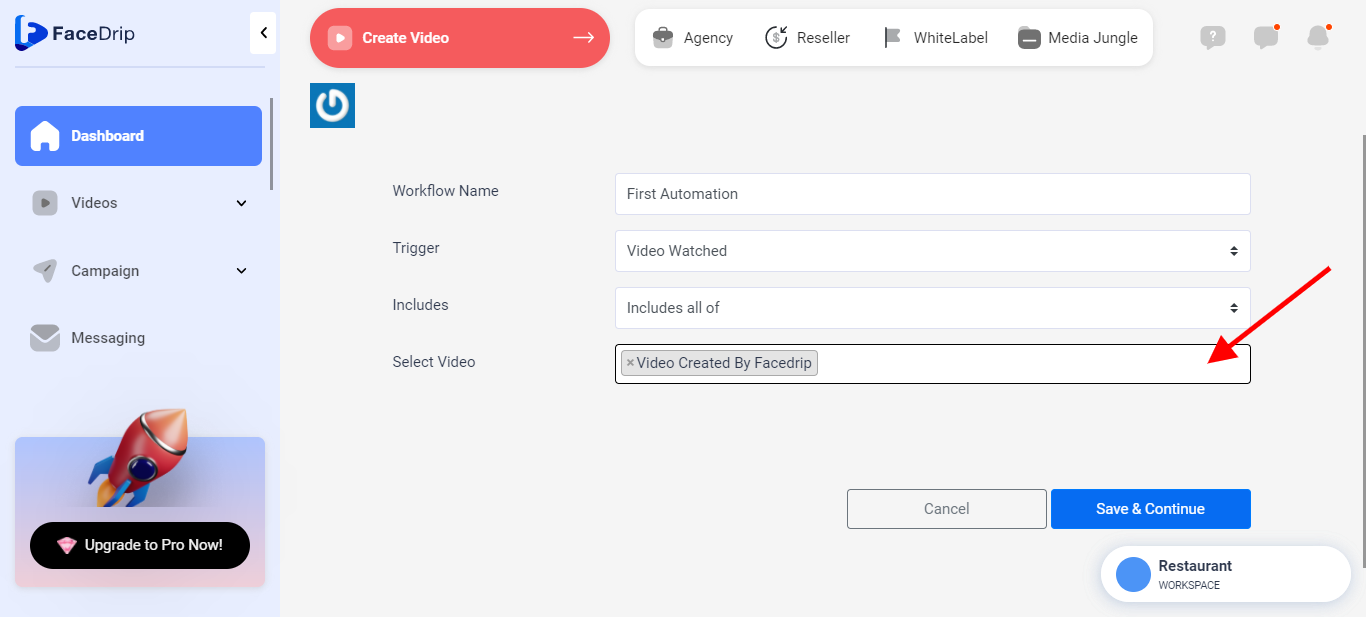
CASE 3: “Video Watched” trigger
What this means is when a video is being watched by a contact the workflow will be executed on that contact.
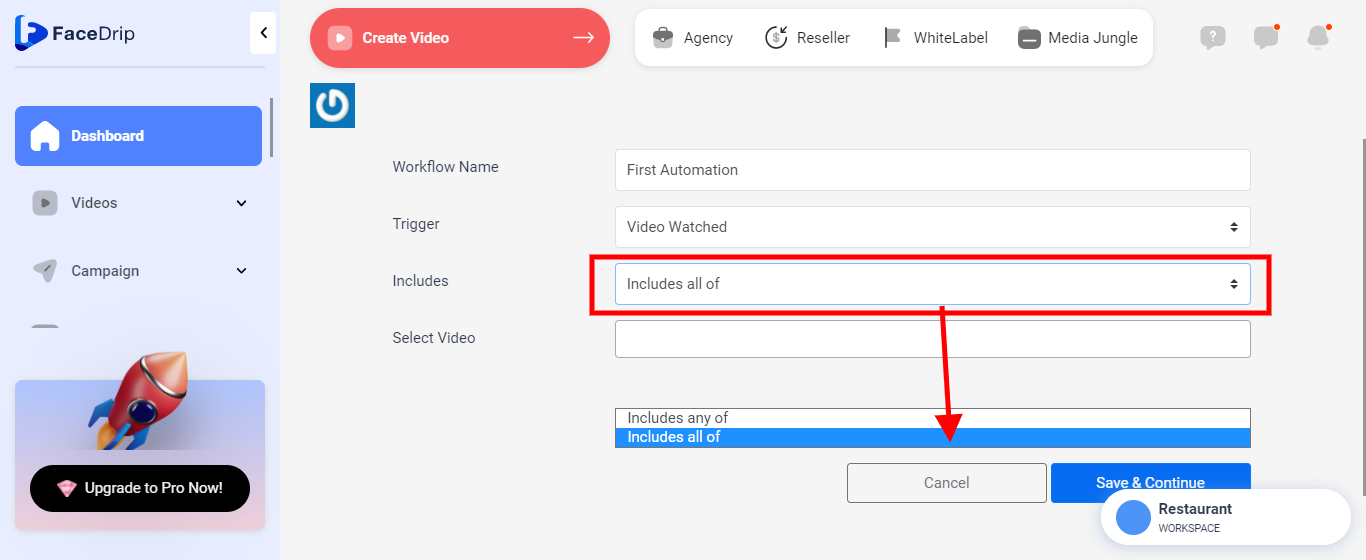
7. B. Choose a condition
*You can choose “includes any of” which means if a contact has any of the tags, cats, or video you enter in the field they will be enrolled in the workflow.
*You can also choose “includes all of” which means only contact that has all of the tags, cats, or video you enter in the field will be enrolled in the workflow.
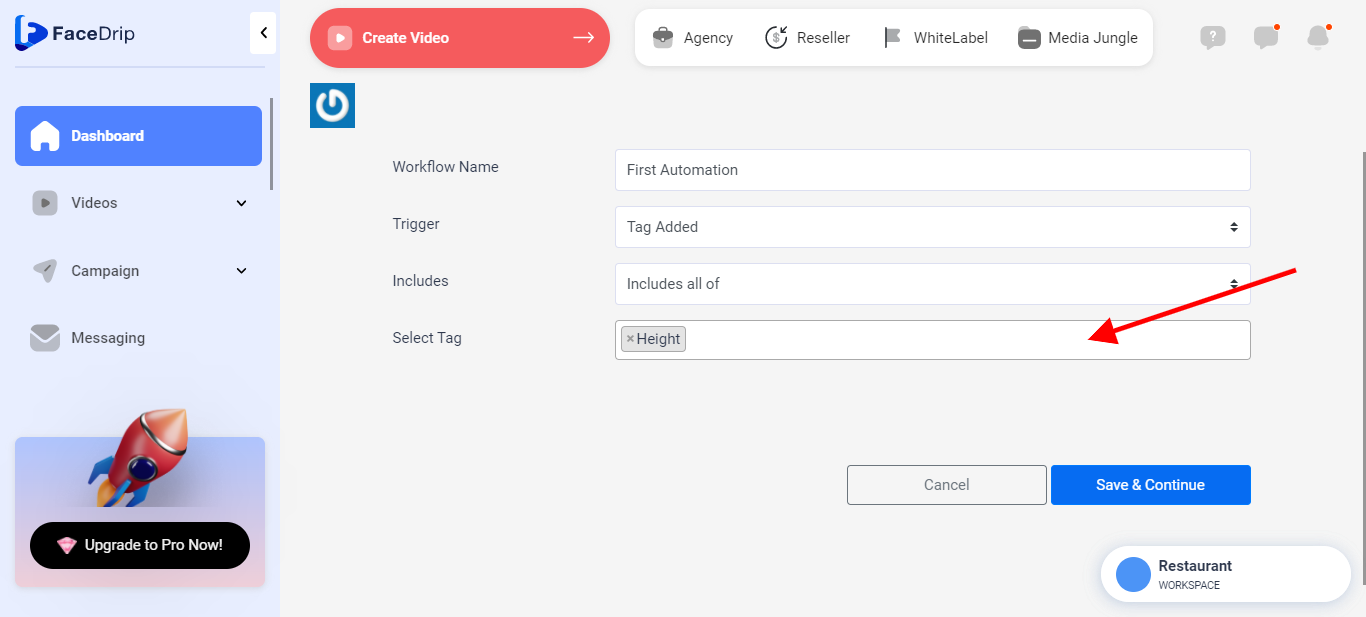
7. C. Select From Dropdown Option
CASE 1: Select Tag(s)
Choose the tag(s) you want to enroll into the automation by clicking on the select tag field
CASE 2: Select CTA(s)
Choose the CTA(s) you want to enroll into the automation by clicking on the select CTA field
CASE 3: Select Video(s)
Choose the video(s) you want to enroll into the automation by clicking on the select video field
Click on the save and continue button (P.S you would be redirected to the build tab pop up form to continue setting up the automation with a success message stating that draft was saved successfully)
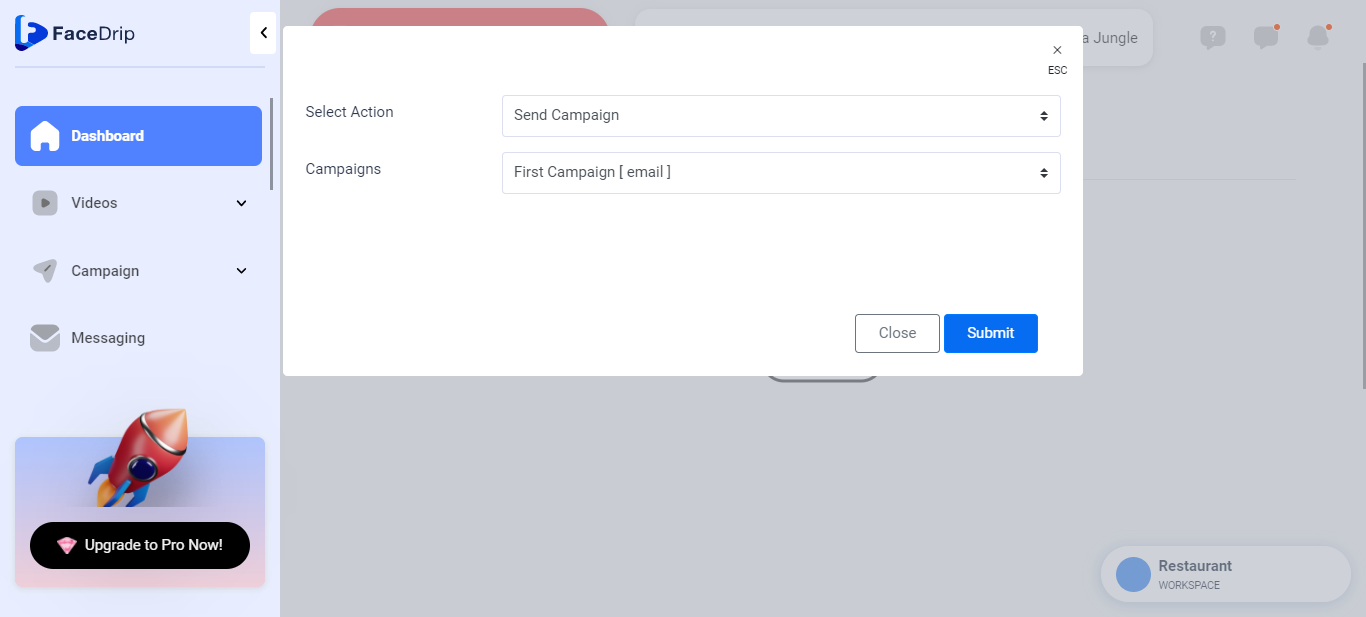
STEP 8: Build Automation
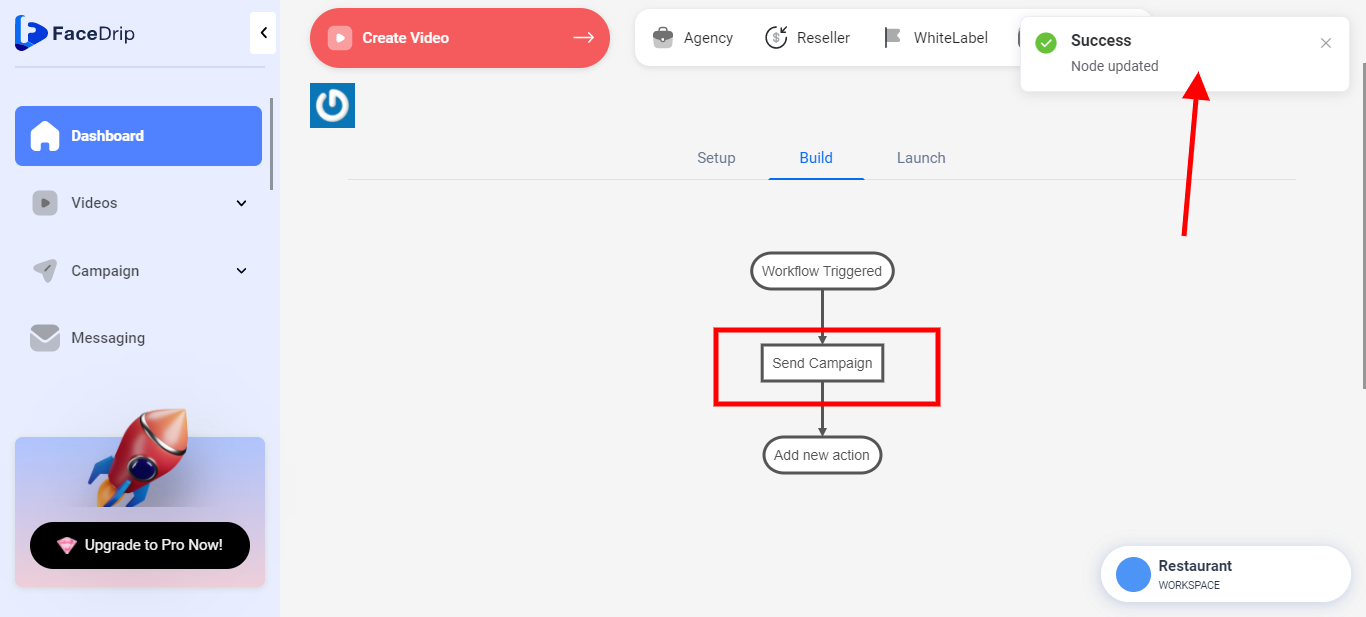
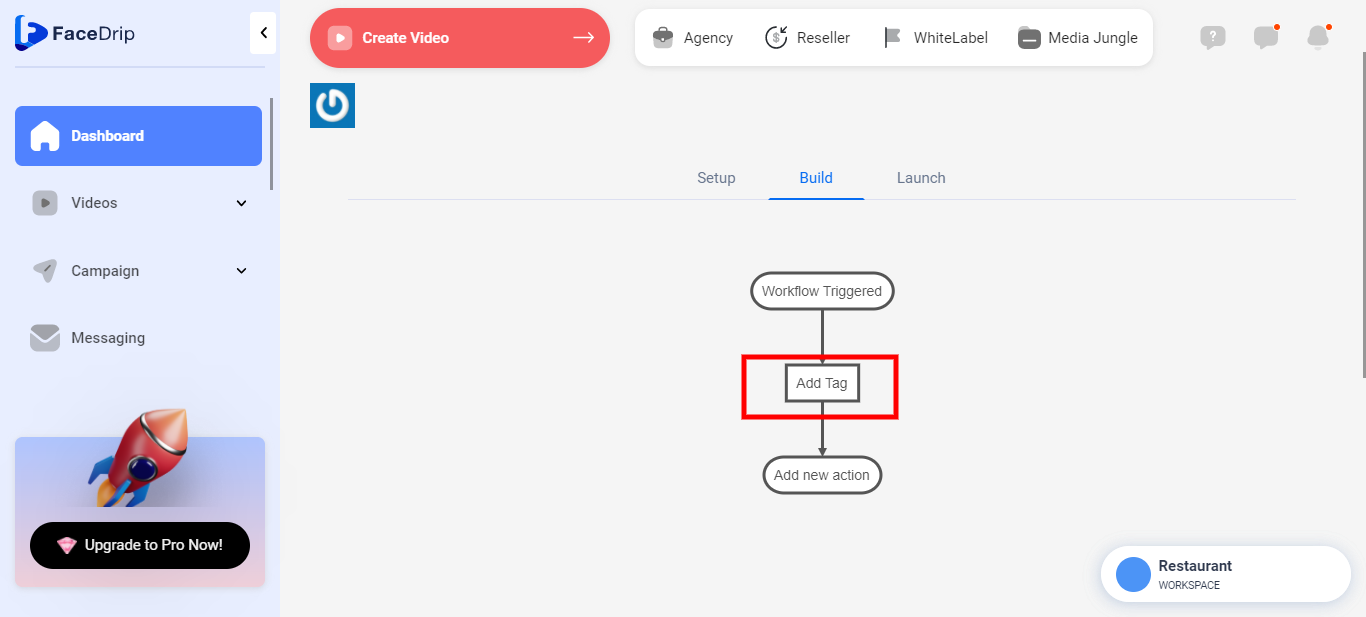
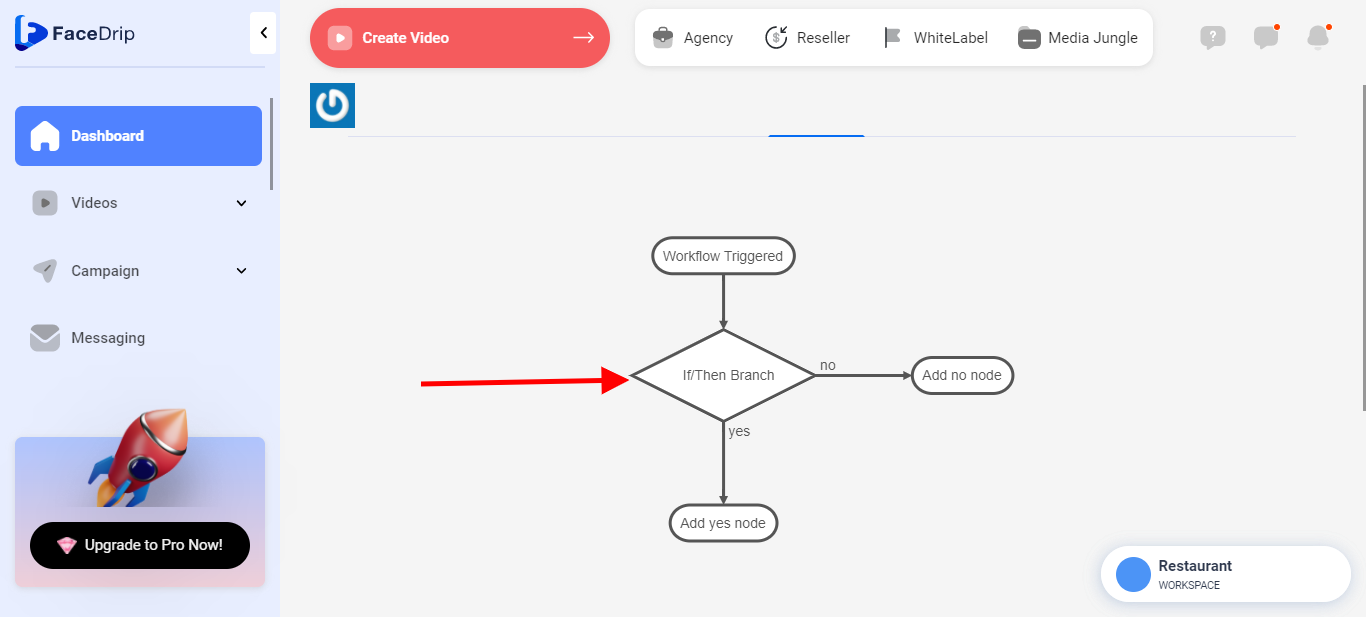
Here you choose what action (Add tag, if/then branch, create a task, delay, remove the tag and send campaign) you want to take place after the trigger by clicking on the add new action node.

*You can choose to “Send Campaign” which is sending the email we crafted in Step 4 after your trigger is executed.
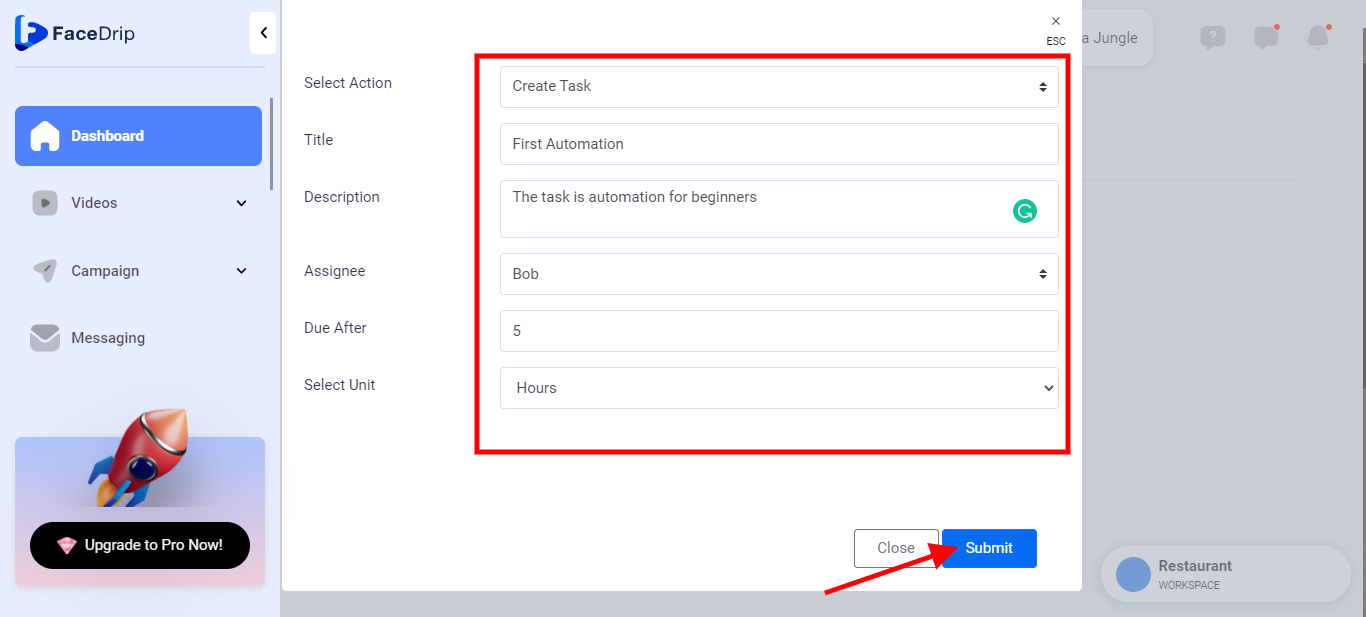
*You can choose to “Create Task” which is creating a task after your trigger has been executed and click on “Submit”

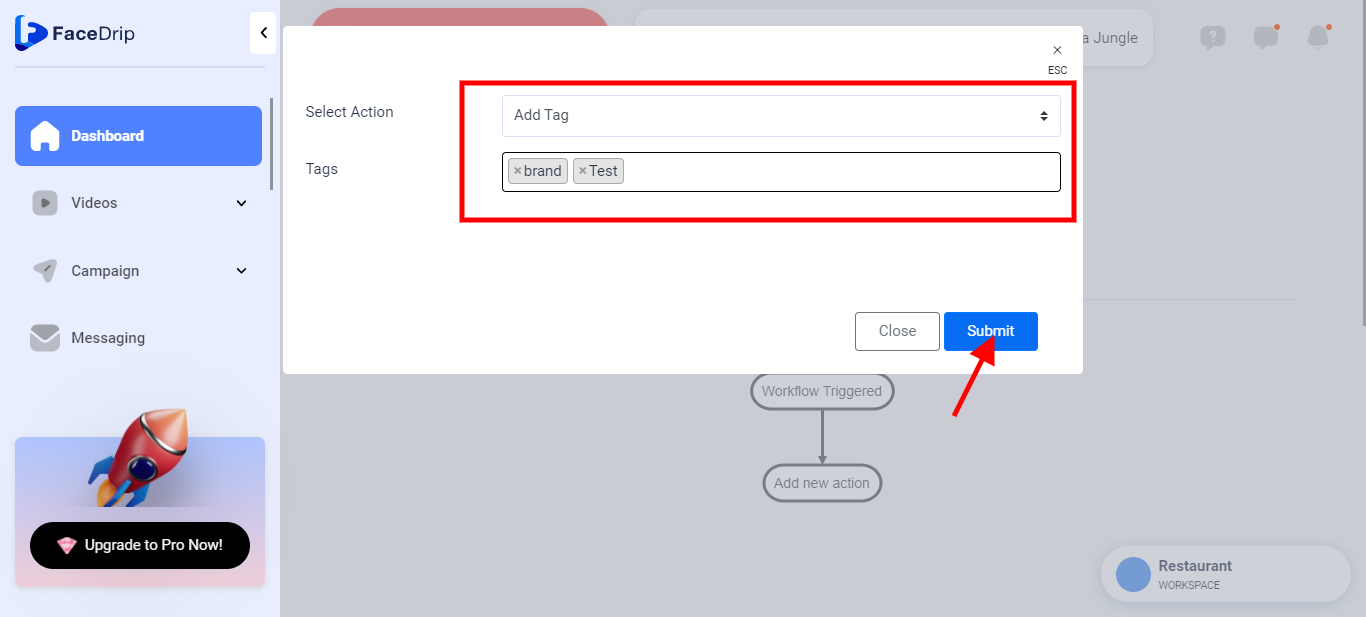
*You can choose “Add Tag” which will add a tag to all recipients enrolled in the workflow after your trigger has been executed then click on “Submit”
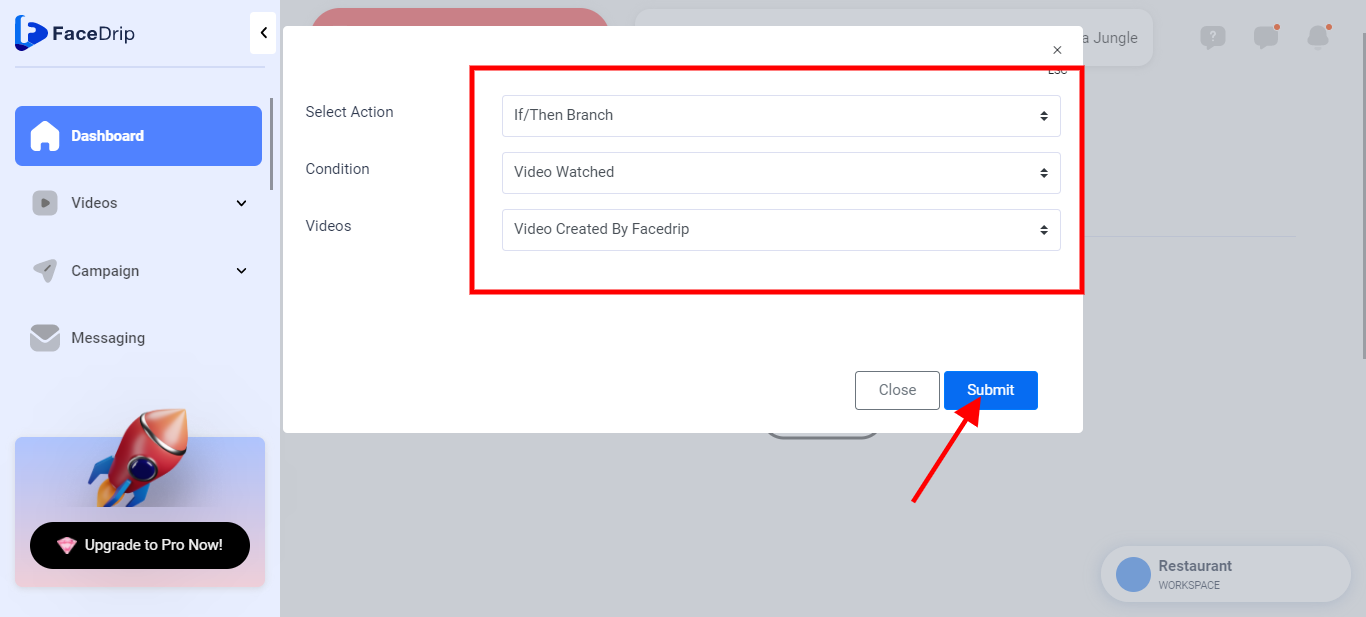
*You can choose the “if/then branch” when an action is taken or not. The if/then branch only allows two actions i.e video watched and CTA clicked. When the if/then a branch is set for video watch (and a video is selected for that action), the YES declare that the selected action (Add tag, if/then branch, create a task, delay, remove the tag and send campaign) is to be taken if the video is watched and the NO also declare that the selected action ( Add tag, if/then branch, create a task, delay, remove the tag and send campaign) to be taken if the video is watched not watched. Both YES or NO allows you to decide what action should be taken if a video is watched or not.
P.S This is also the same If the if/then branch is set for CTA clicks.
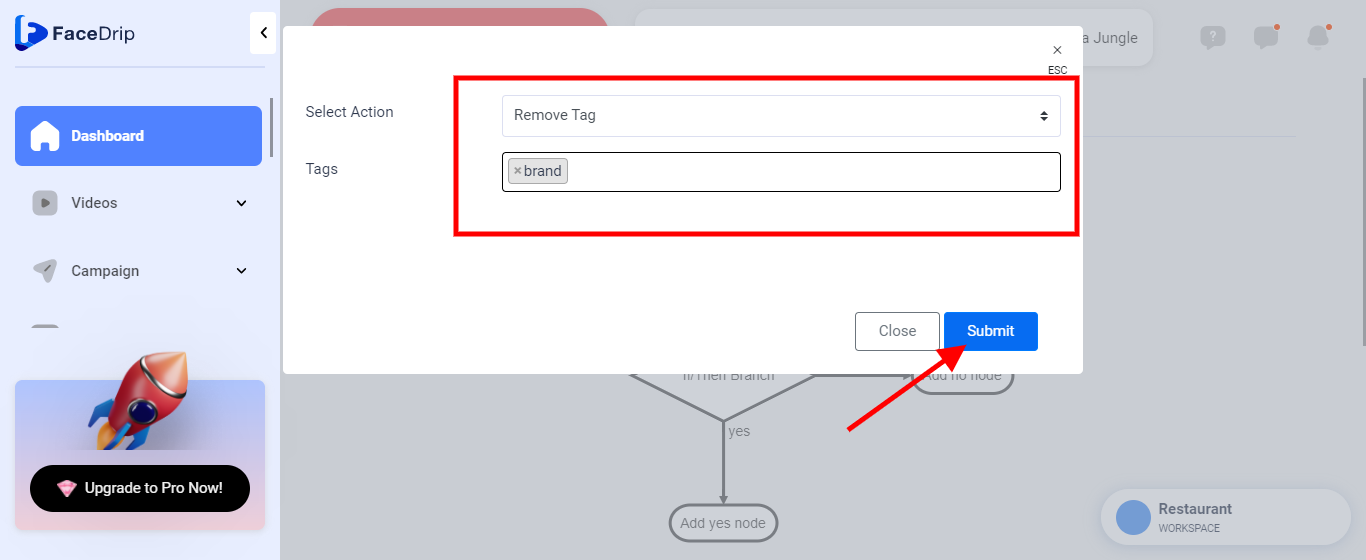
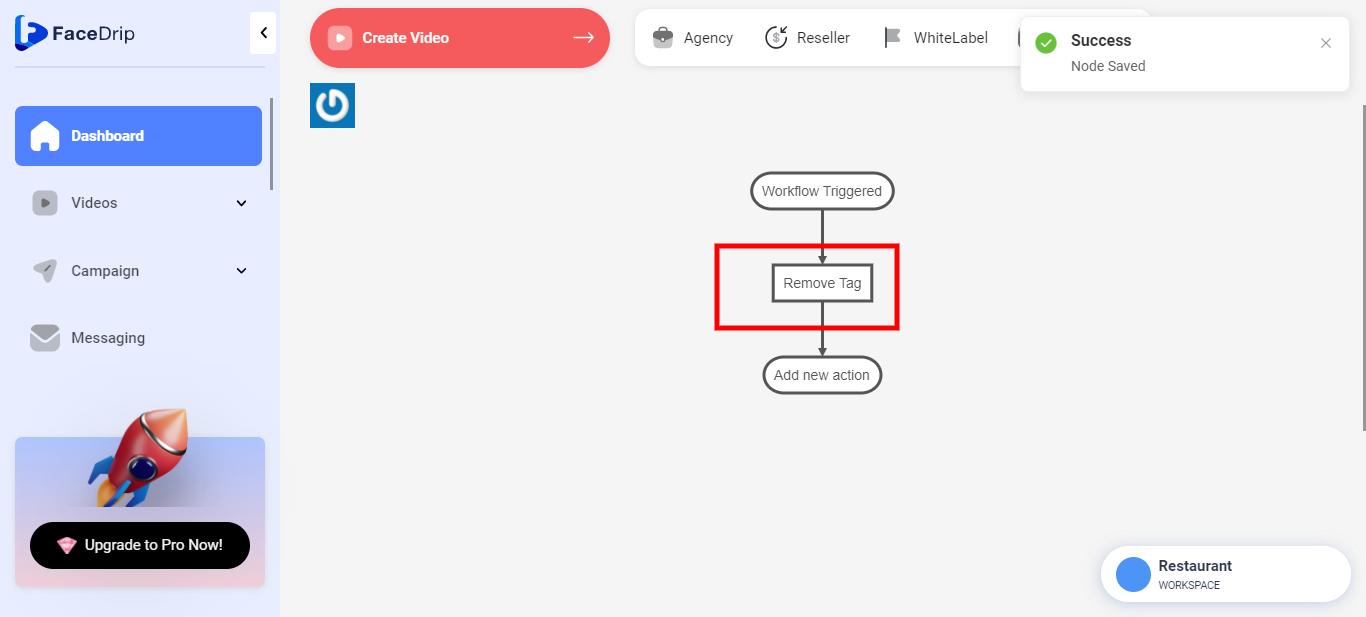
*You can choose “Remove Tag” which will remove a tag to all recipients enrolled in the workflow after your trigger has been executed Then click on “Submit”
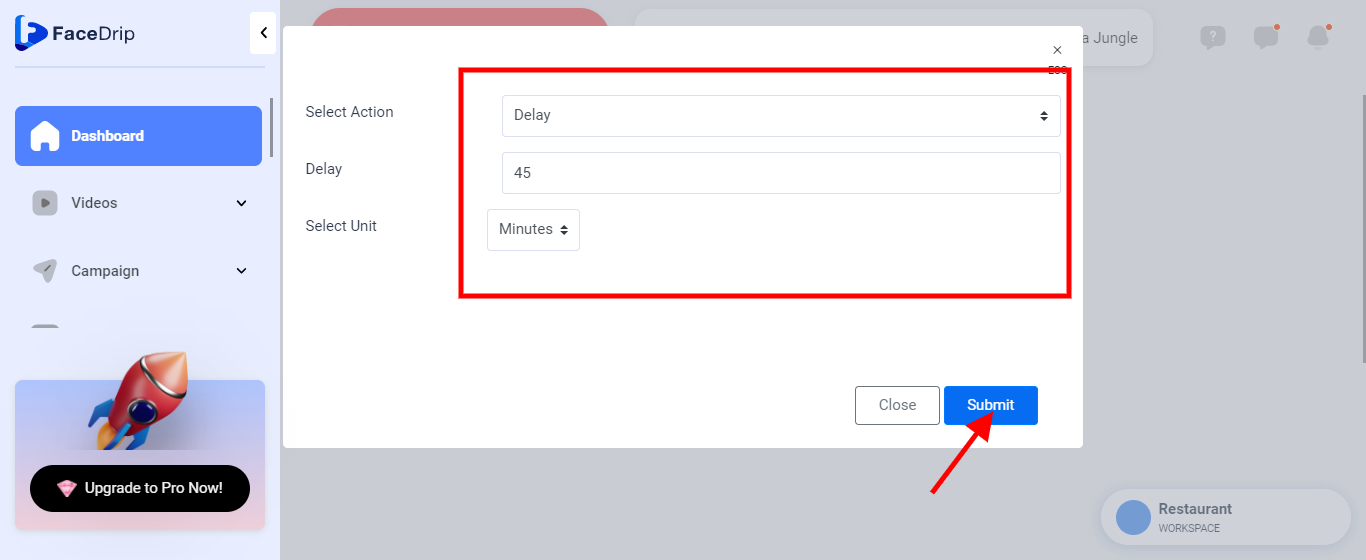
*You can choose to “Add Delay” which is adding a time delay between actions in your workflow Then click on “Submit”.

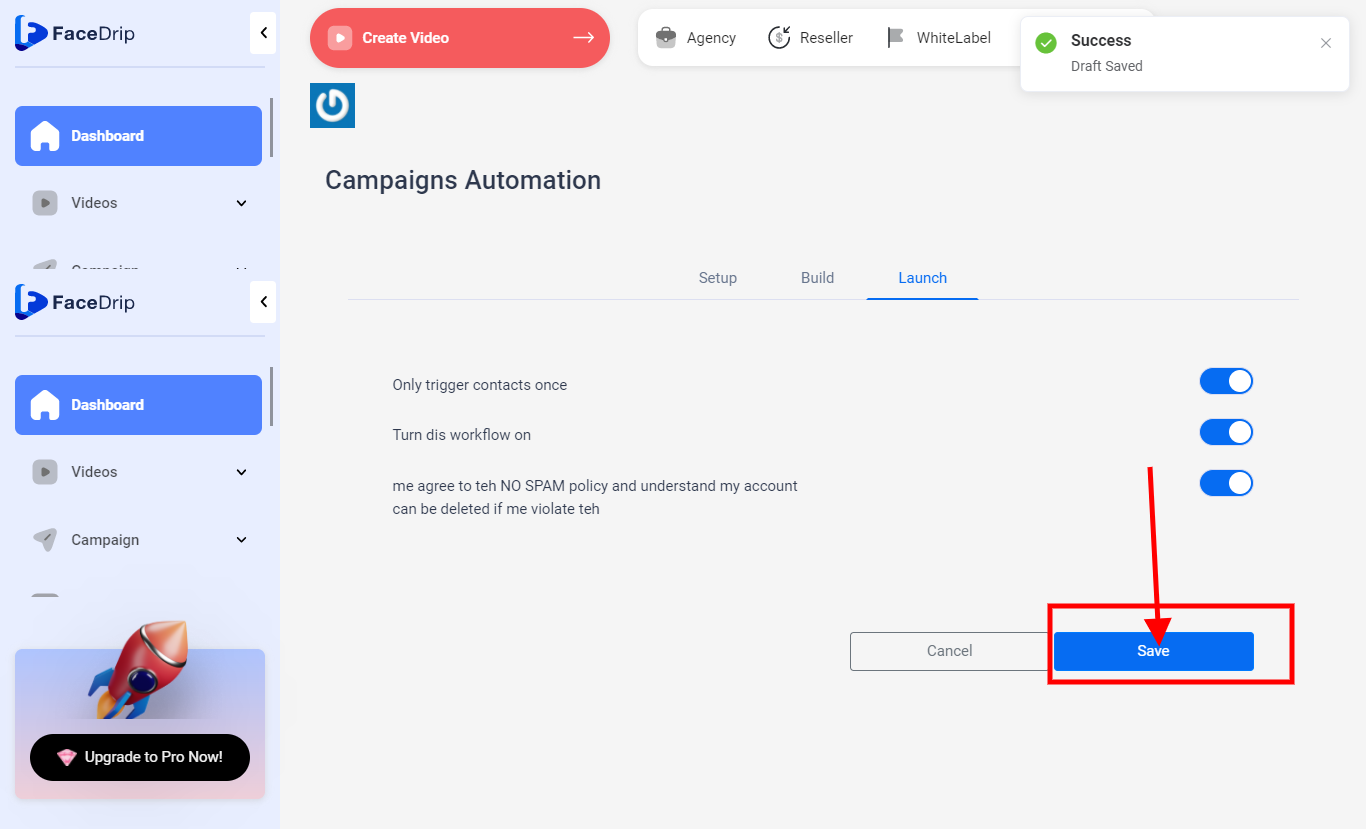
Step 9: Launch Workflow
*The first toggle button that says “Only trigger contacts once” is to ensure that the same contact is not enrolled in the same workflow more than once.
*The second toggle button is to turn the workflow on. This does not execute the workflow.
*The third toggle button is your agreement to the NO SPAM policy. If you are found in violation of this agreement your account is subject to deletion.
Finally, click the blue save button.
Step 10: Test Workflow.
CASE 1: “Tag added” trigger
You can select a single contact or multiple contacts to add a tag to. If you add a tag to a contact that you entered in the Tag field when you created the workflow, that contact will be enrolled into the workflow.
Once the Tag is added the workflow will be executed.
CASE 2: “CTA Clicked” trigger
You can choose to add either a single cta or multiple cta. If you have a Video that has a particular CTA that you entered in the CTA field when you created the workflow, that CTA will be enrolled into the workflow.
Once the CTA is clicked the workflow will be executed.
CASE 3: “Video Watched” trigger
You can select a single video or multiple videos to add. If you add a video that you entered in the Video field when you created the workflow, that Video will be enrolled into the workflow.
Once the Video is watched the workflow will be executed.