Log in to your Facedrip account.
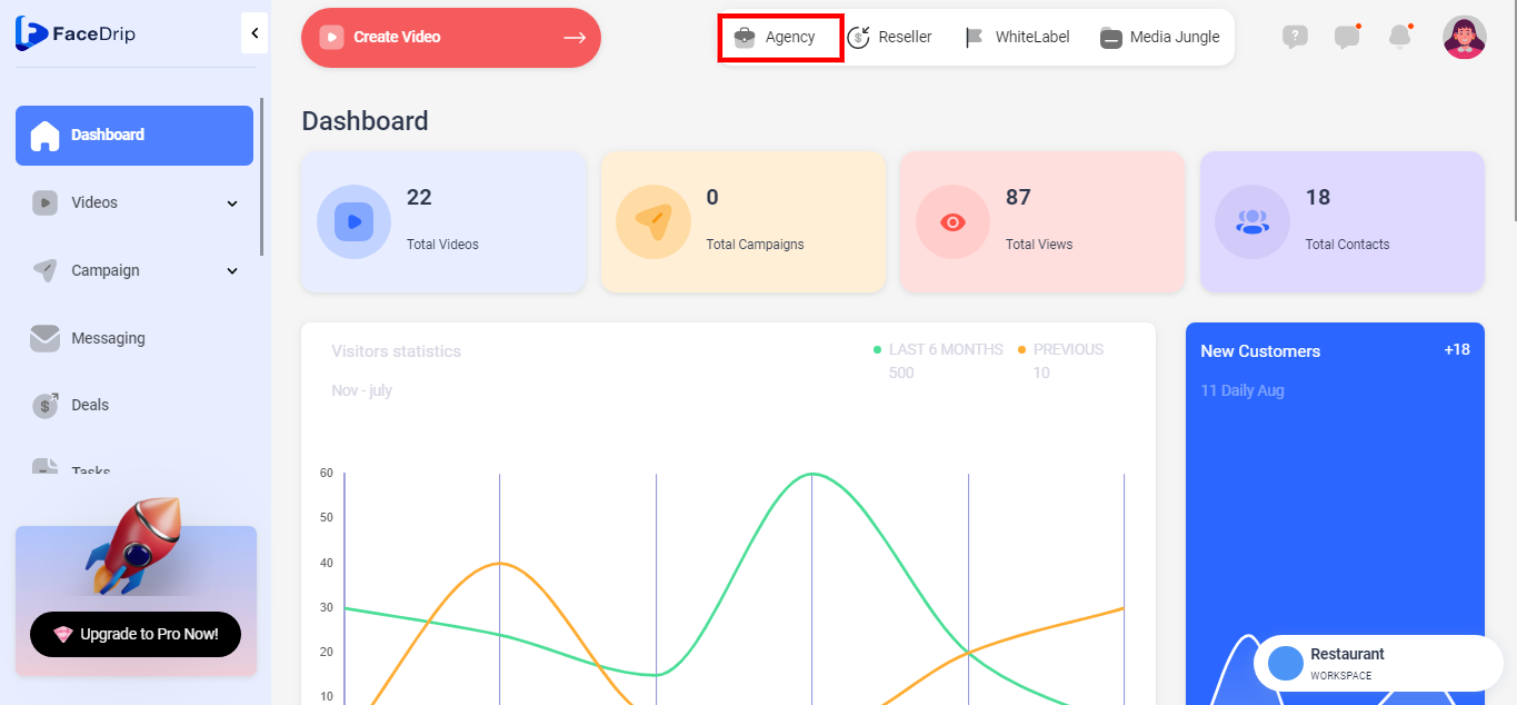
STEP 1: Click on the “agency”on the top side menu bar of your dashboard.
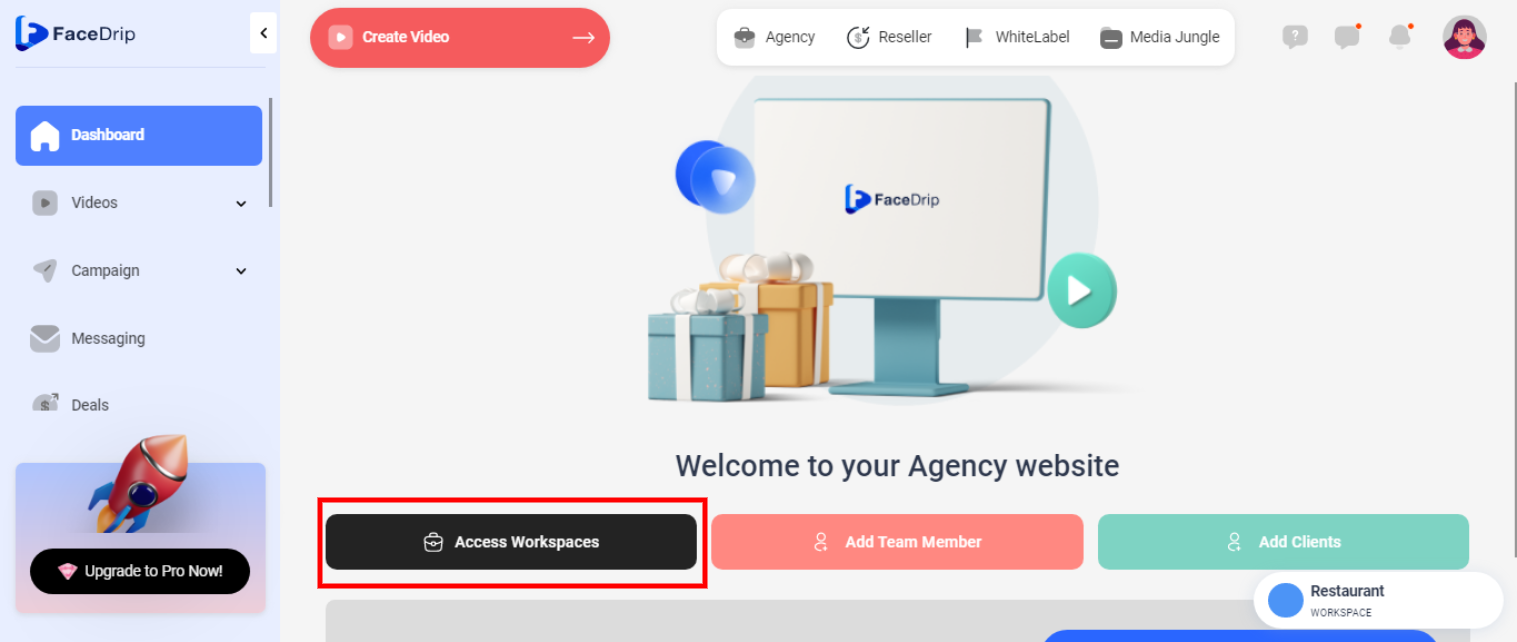
STEP 2: Click on “workspace” in the options below.
STEP 3: Choose the workspace you want to add a new connection tag and click the “activate workspace” button. (follow this link on How To Create New Workspace)
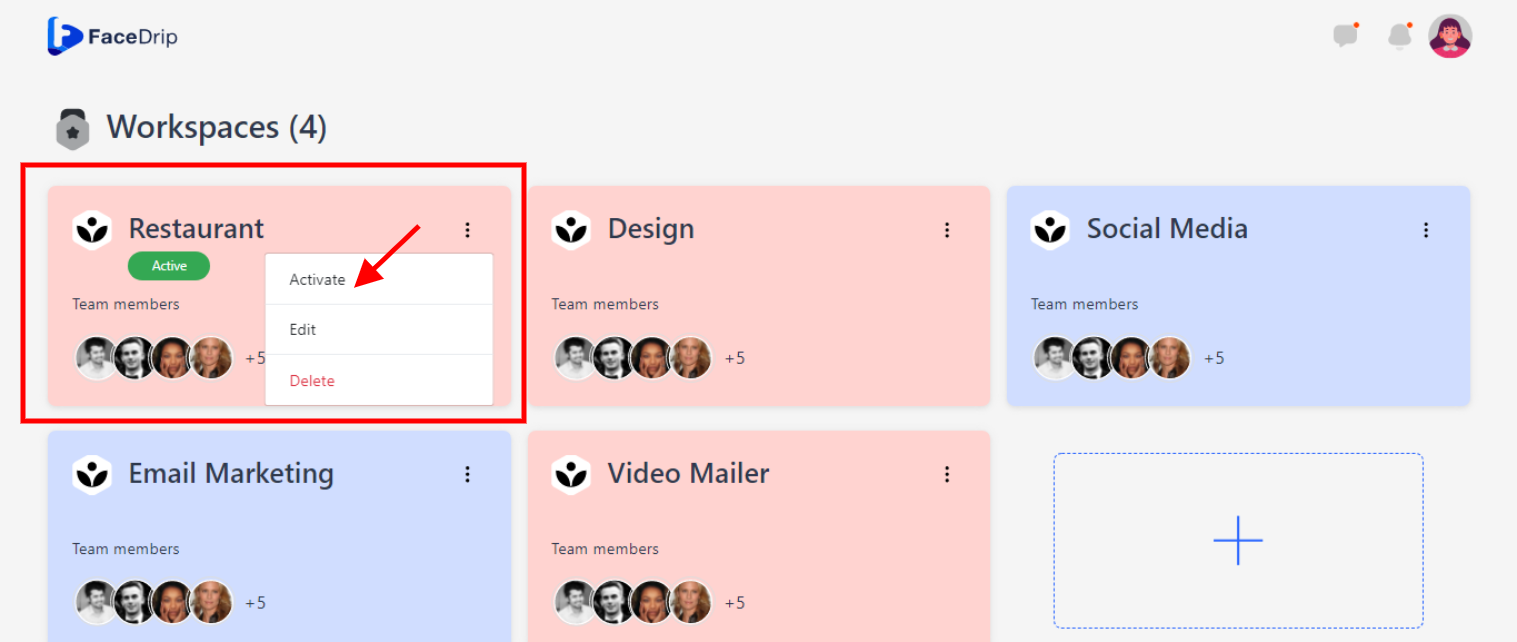
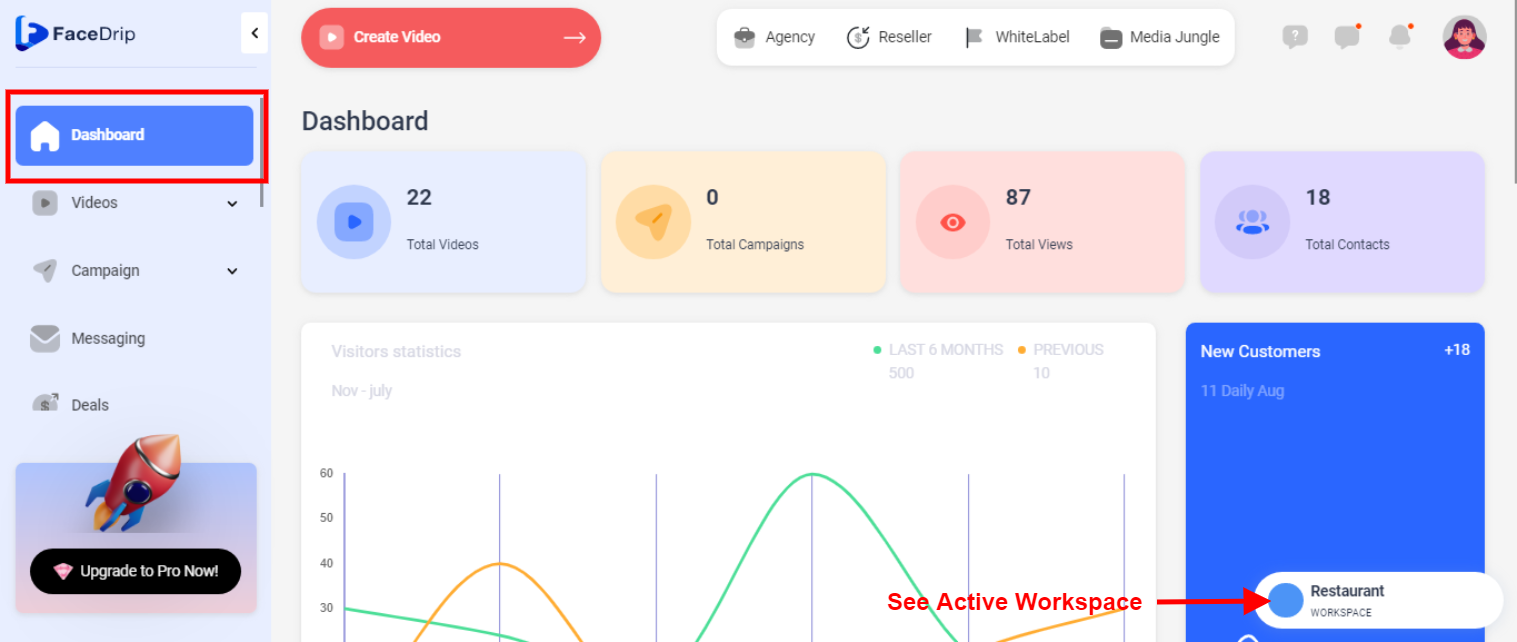
Your workspace will be activated successfully! (PS: Go back to you’re dashboard module to see the active workspace).
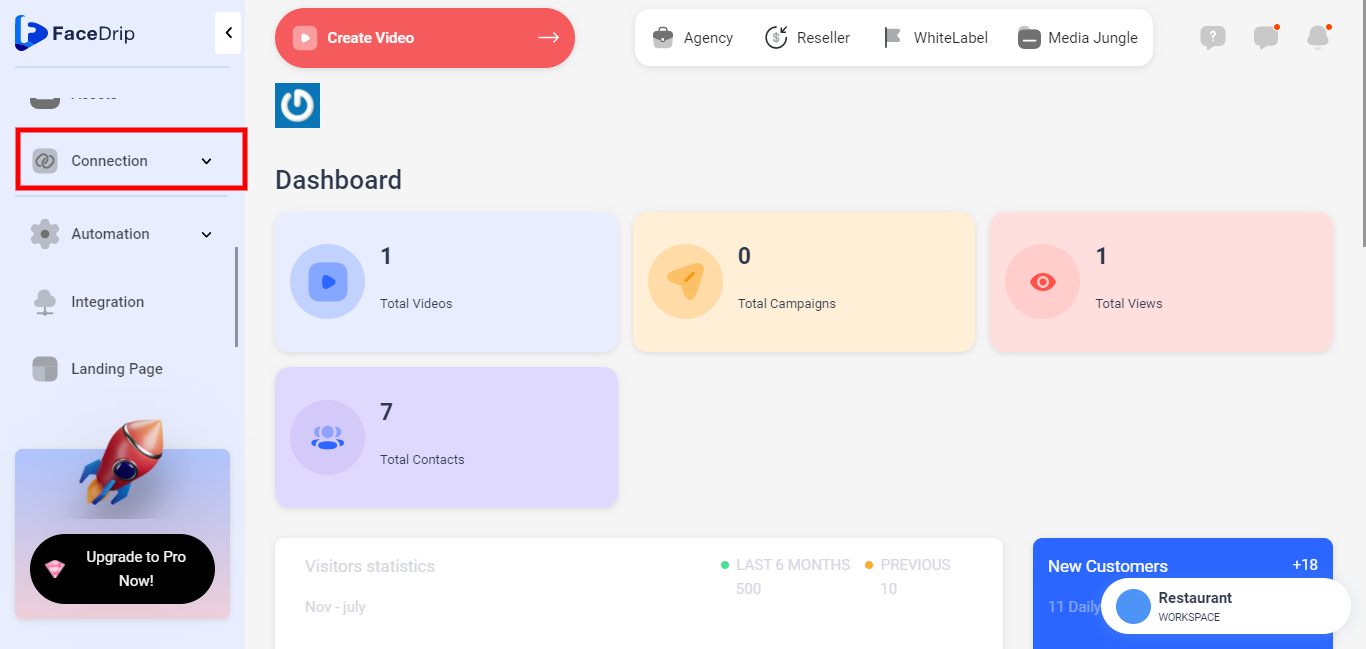
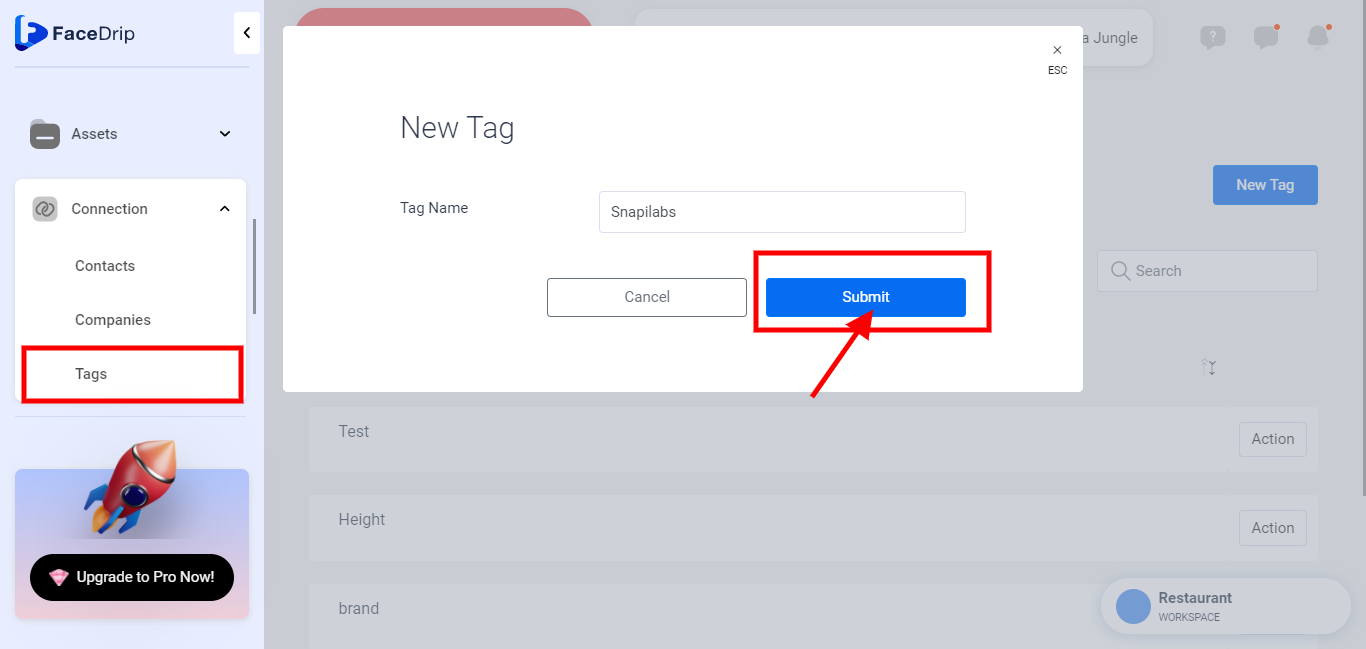
Step 4: On the side menu bar, click on “Connection” click on the drop-down menu
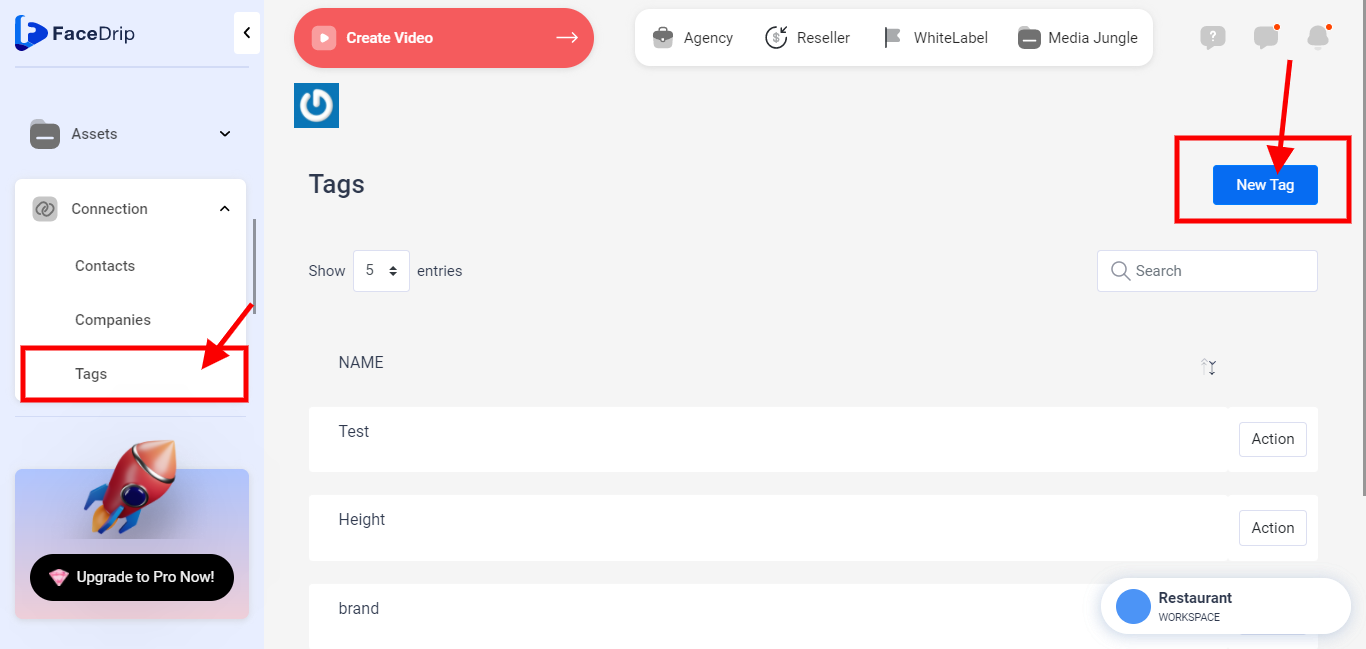
Step 5: Click on “Connection Tag” click on “New Tag”
You can input the “TAG” name as required
A “TAG” is a label attached to someone or something for the purpose of identification or to give other information.
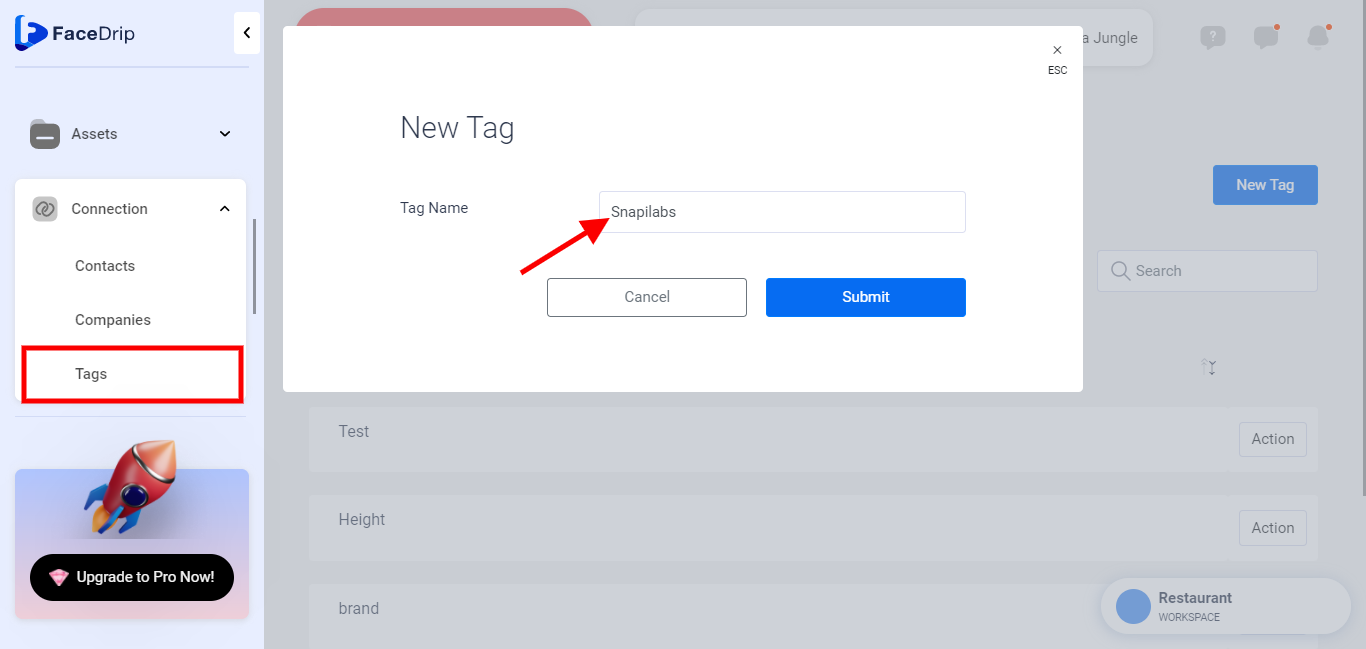
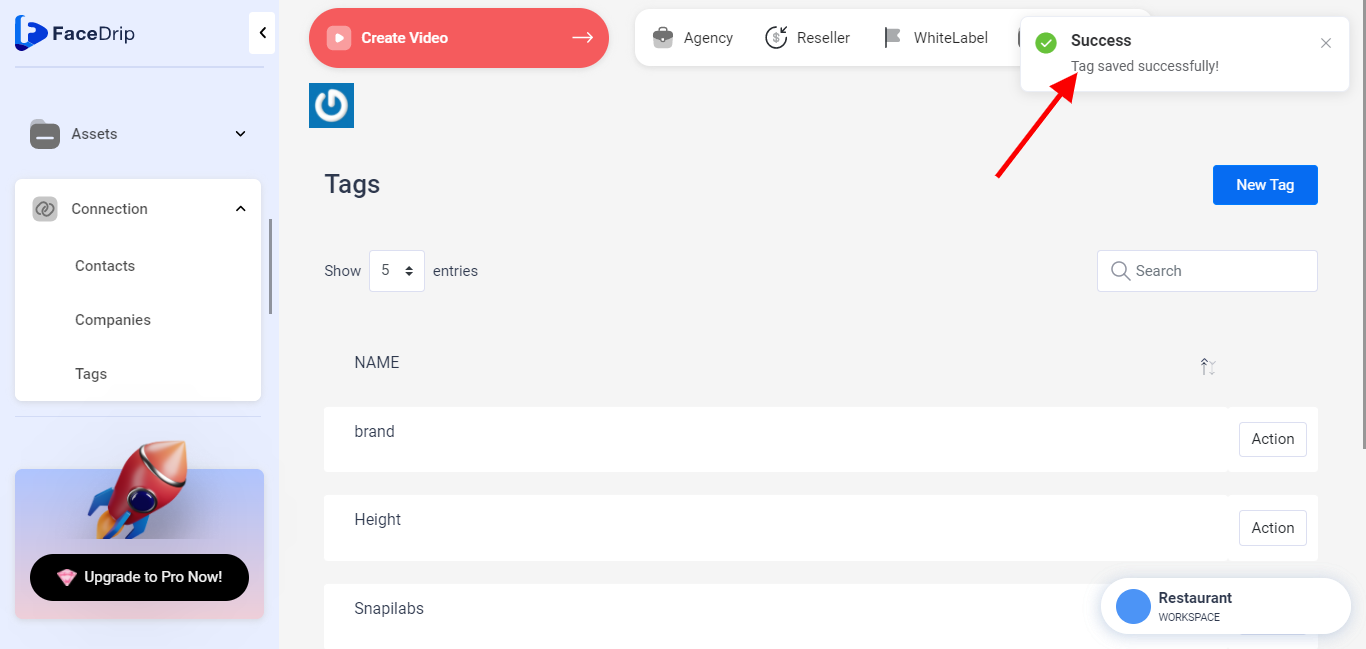
Step 6: click on the “Submit button”
Note: A success message alert will pop up saying “Tag was saved successfully”