Log in to your Facedrip account.
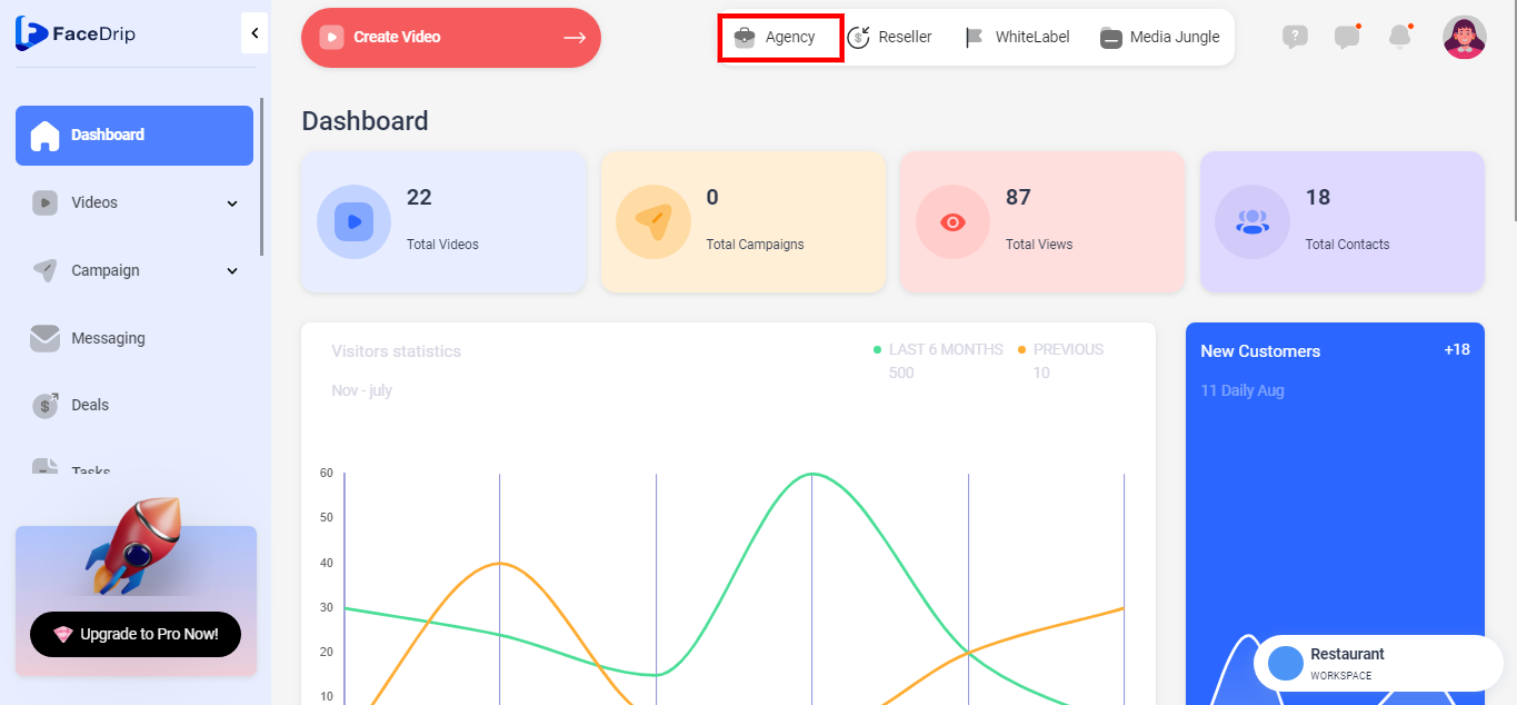
STEP 1: Click on the “agency” on the top side menu bar of your dashboard.
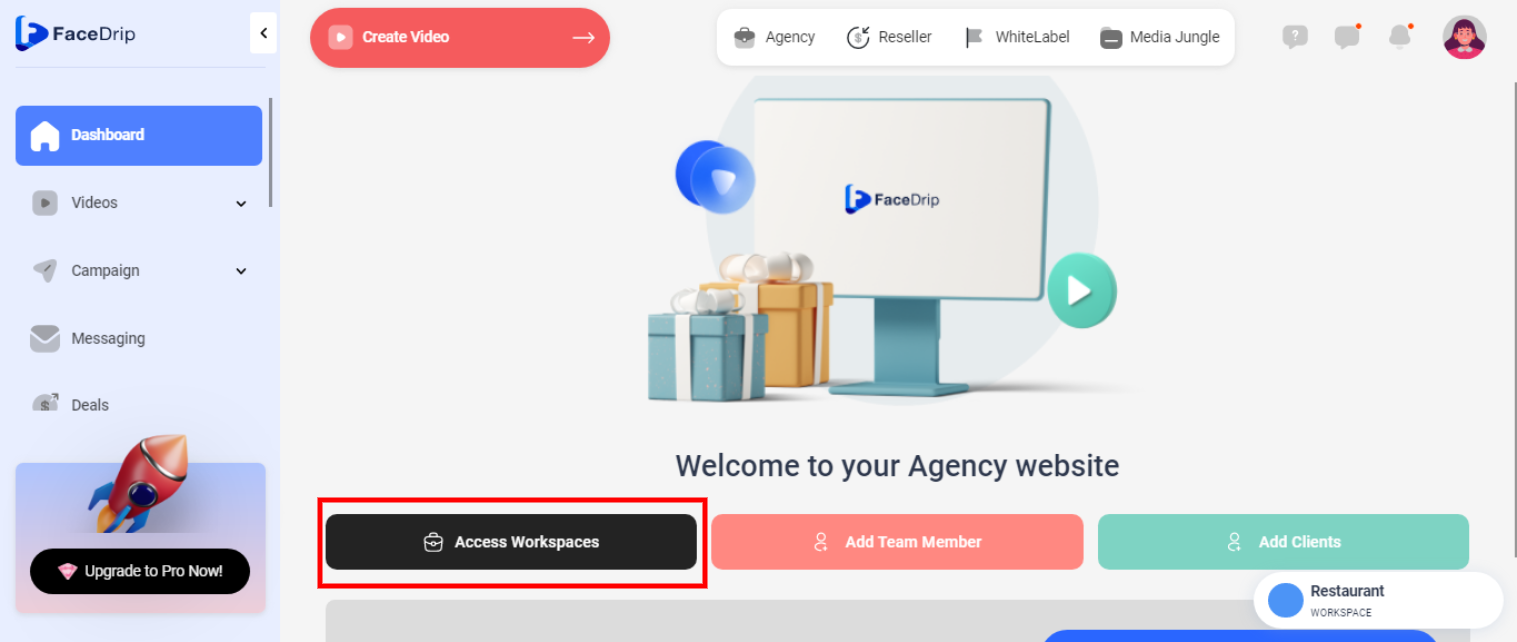
STEP 2: Click on “workspace” in the options below.
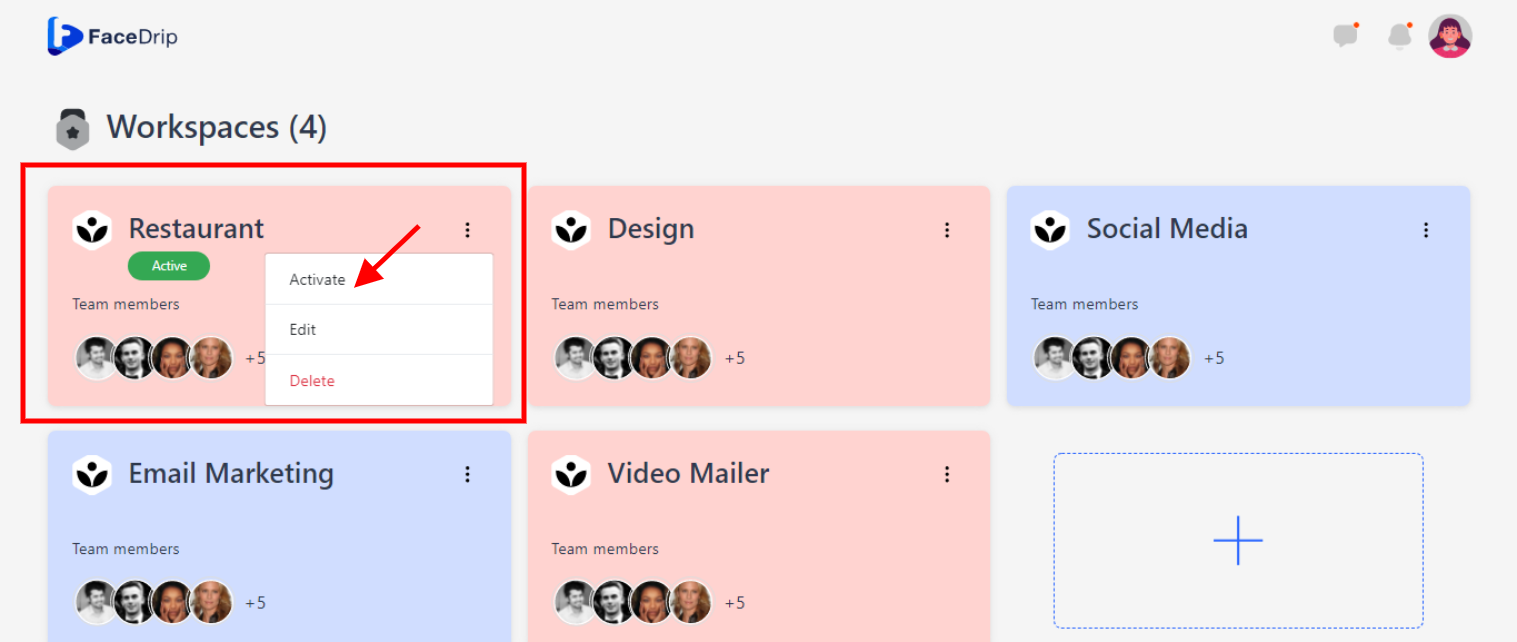
STEP 3: Choose the workspace you want to edit the connection tag and click the “activate workspace” button. (follow dis link on How To Create New Workspace)
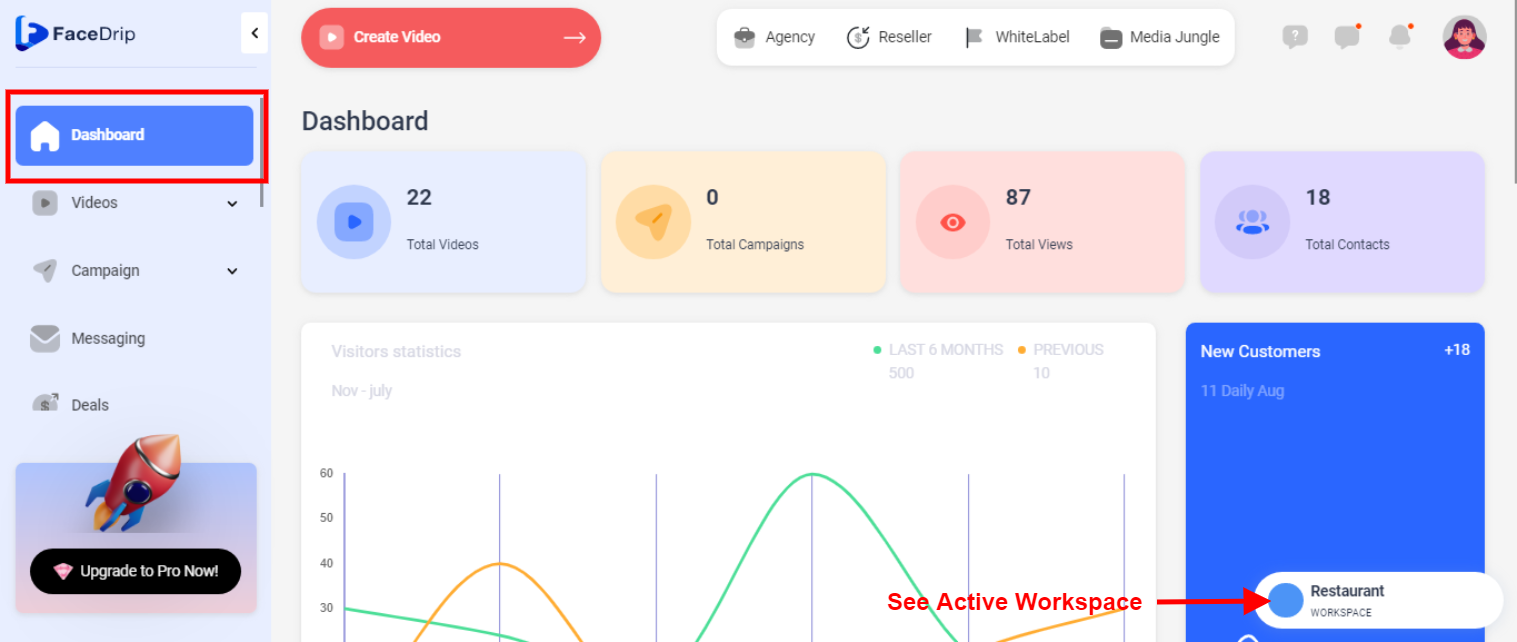
your workspace will be activated successfully! (PS: Go back to you’re dashboard module to see the active workspace).
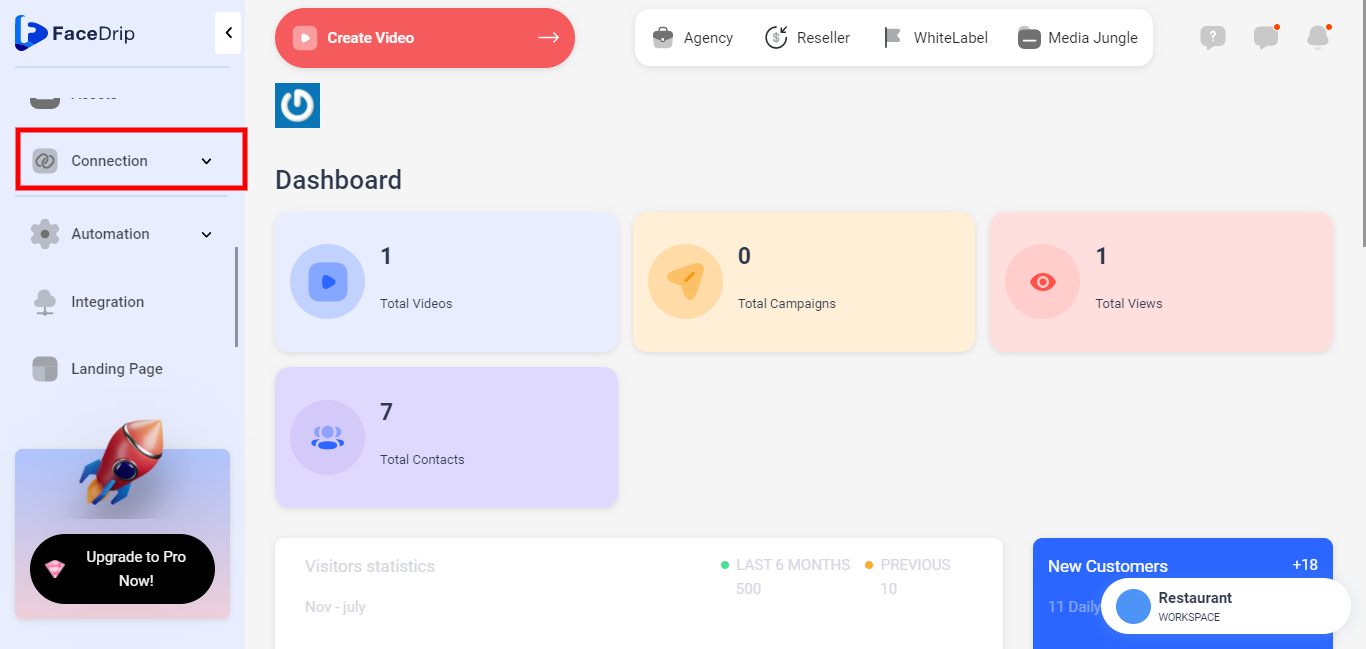
Step 4: On the side menu bar, click on “Connection” (follow this link on How To Add New Connection Tag)
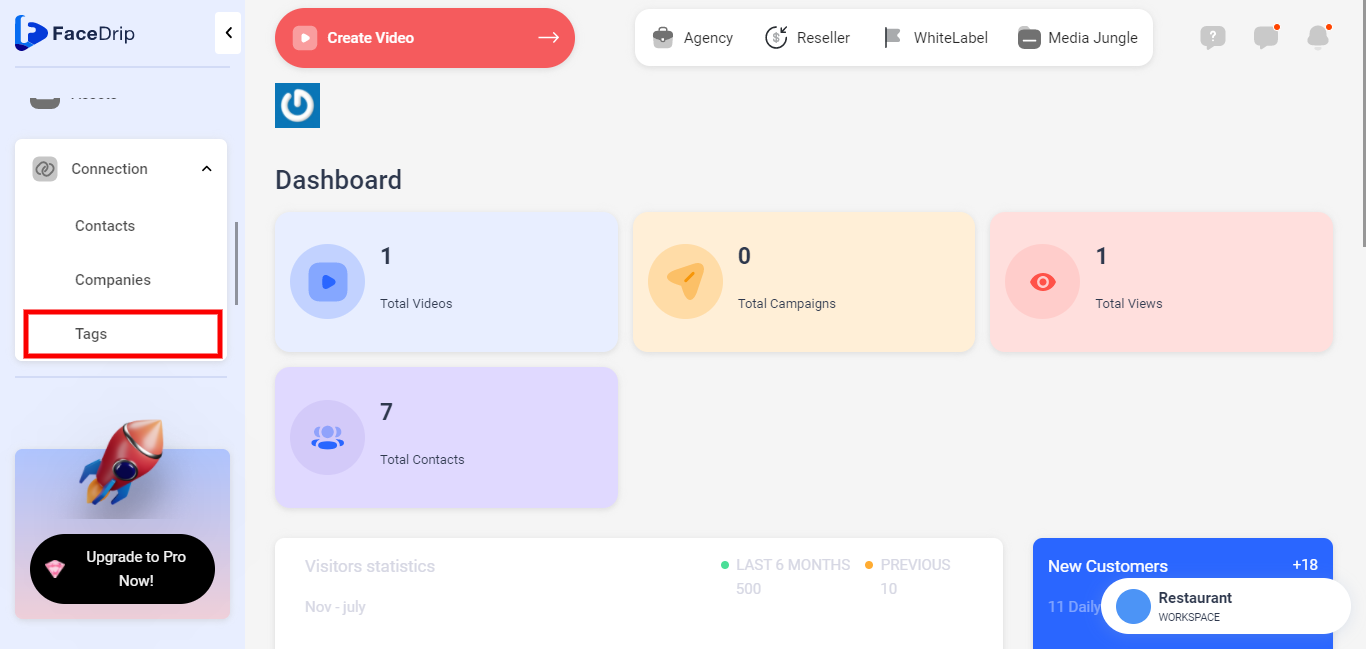
Step 5: Click on ” Connection Tag ” on the drop-down menu
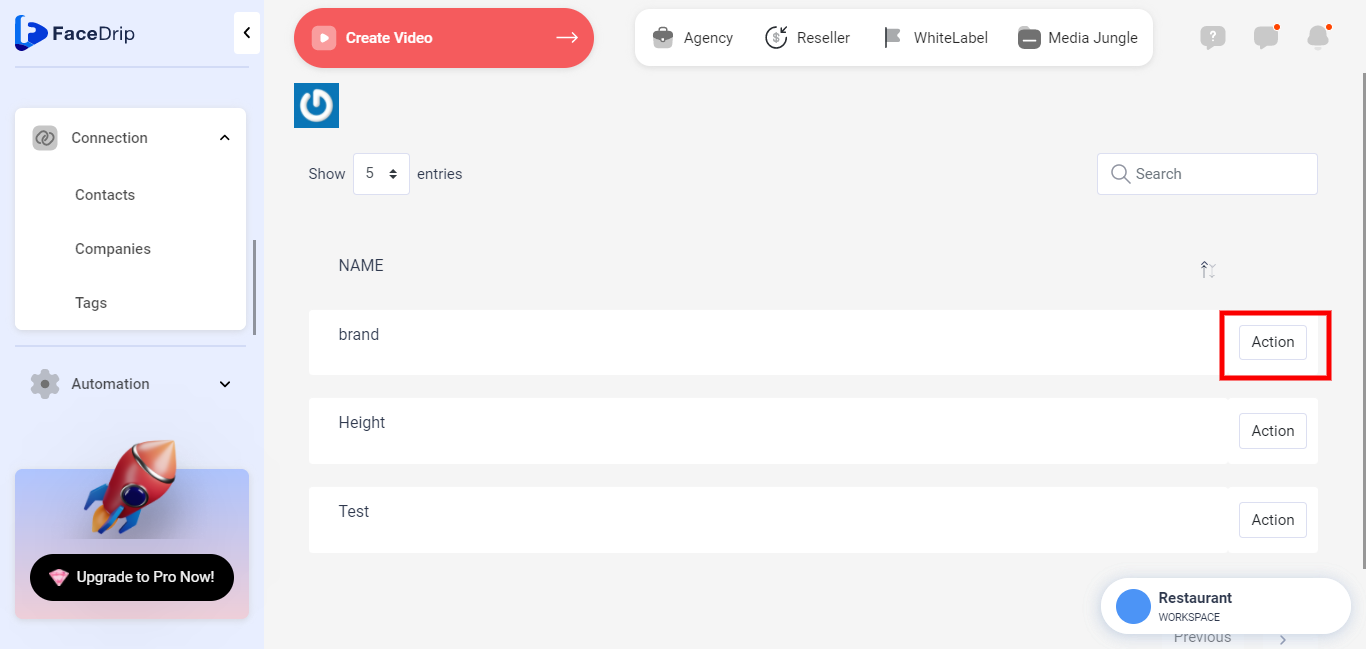
Step 6: On the “Connection Tag” click on the “Action Button”
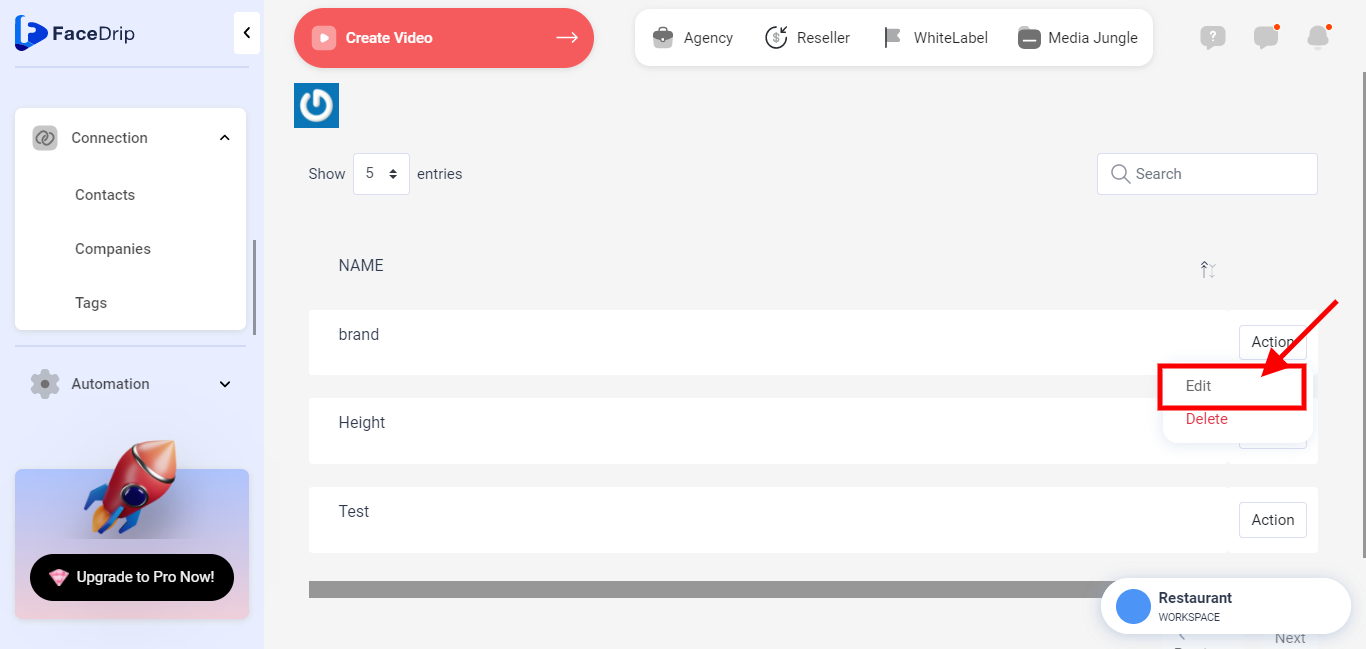
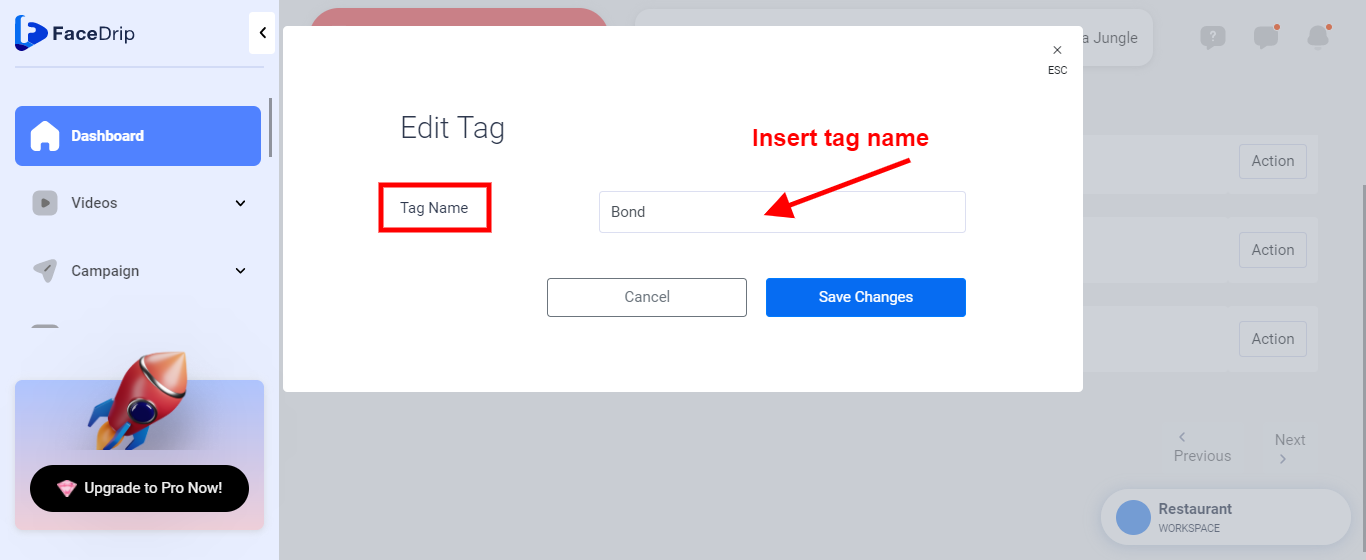
Step 7: Click on the “Edit icon “
Step 8: Create a “TAG NAME”
Tag name is a sticker that displays others name to be noticed
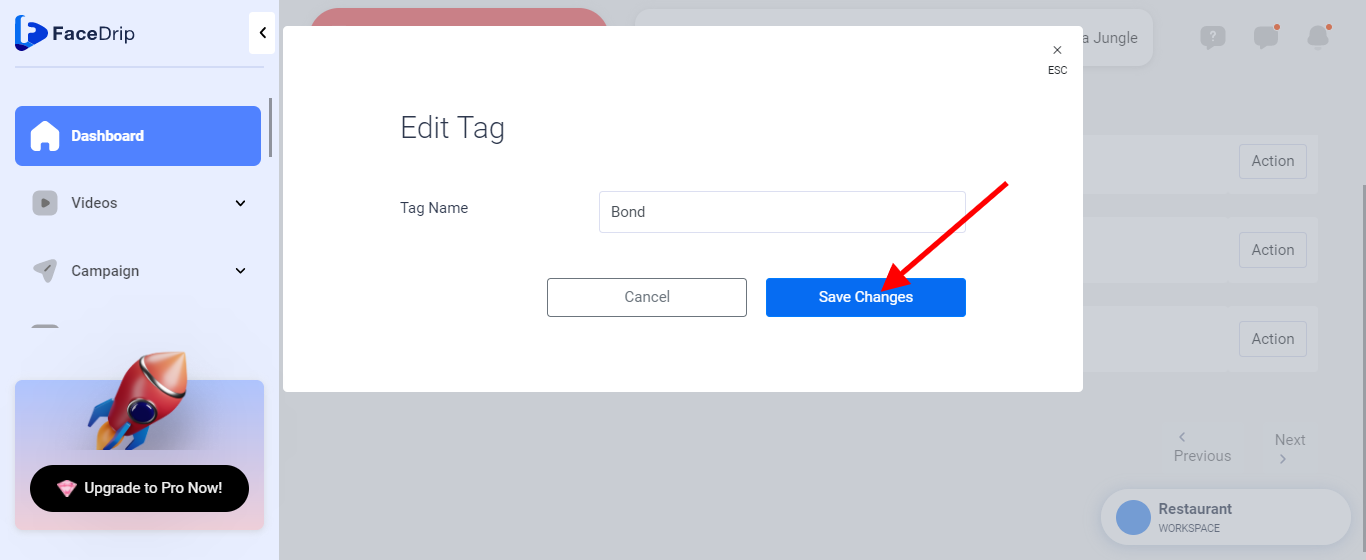
Step 9: After clicking on the “Edit icon” and you must have edited the connection tag click on “Save Changes”
A success message
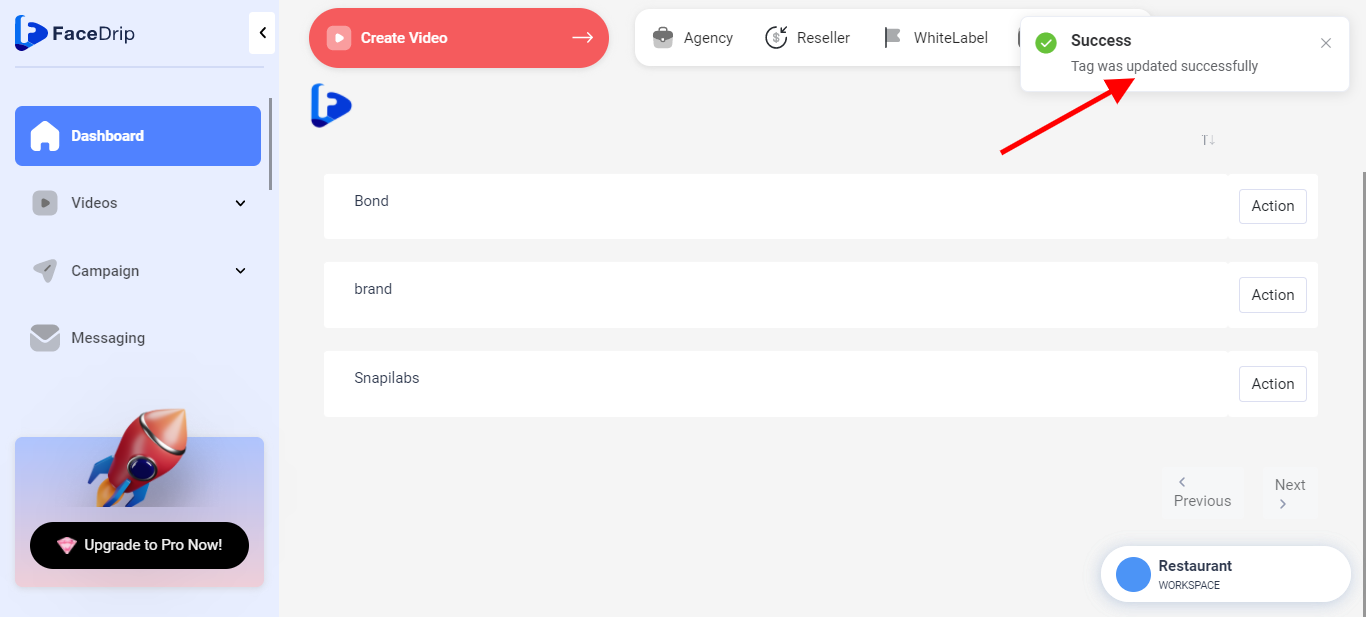
Refresh your page and updated changes will be effective
