Getting Started On How To Add Video Reply
Log in to your Facedrip account.
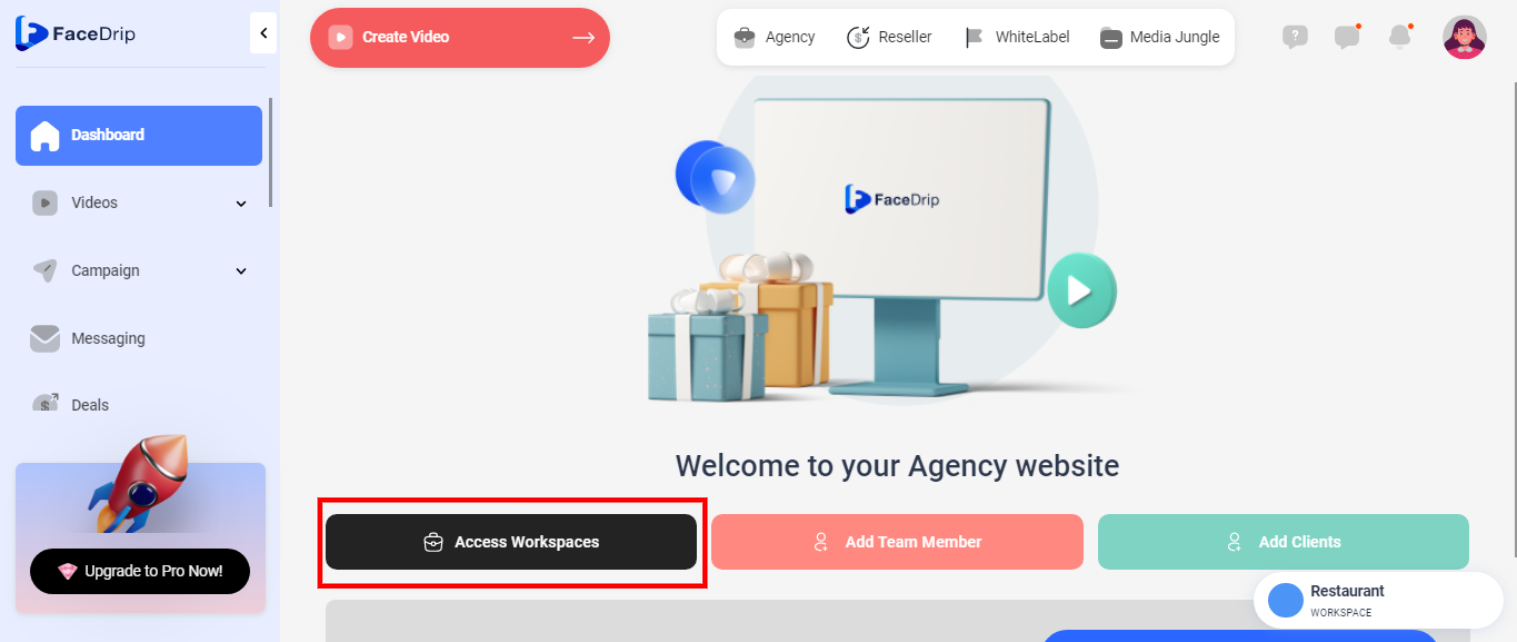
STEP 1: Click on the “agency” on the top side menu bar of your dashboard.

STEP 2: Click on “workspace” in the options below.
STEP 3: Choose the workspace you want to delete video Reply and click the “activate workspace” button. (follow this link on How To Create New Workspace)
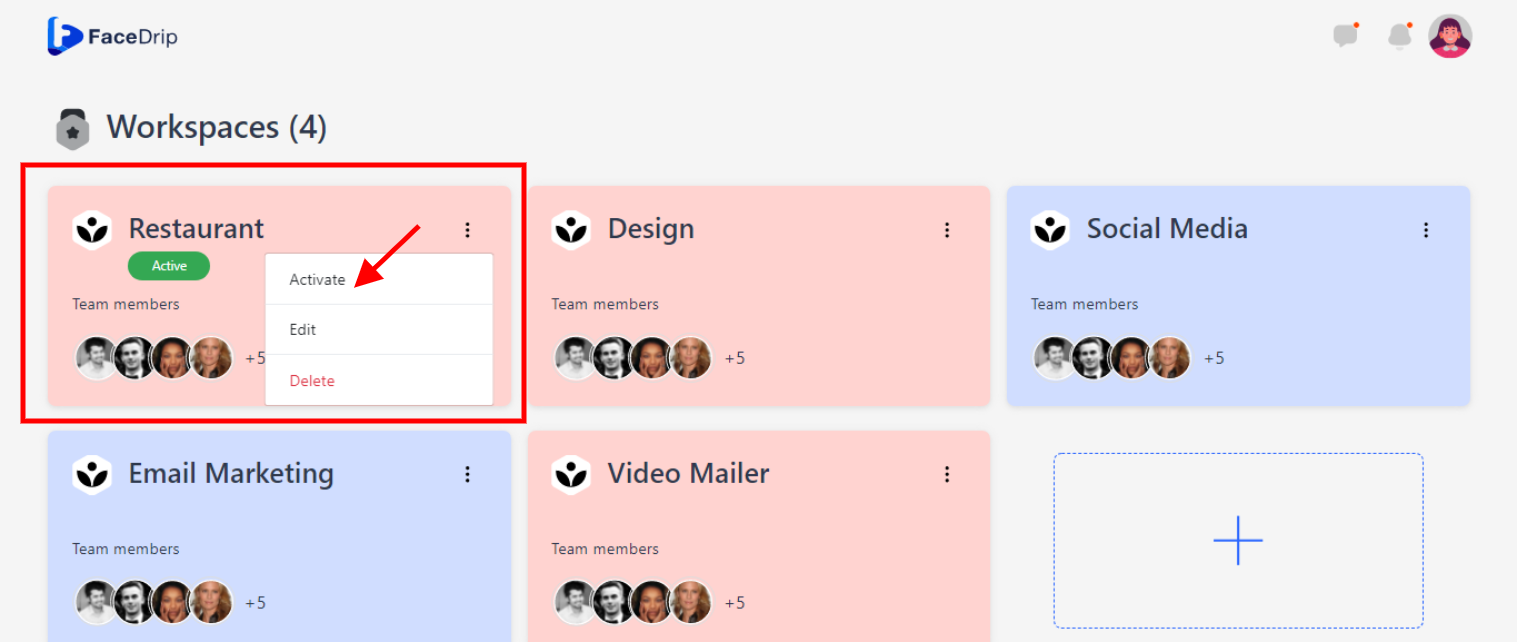
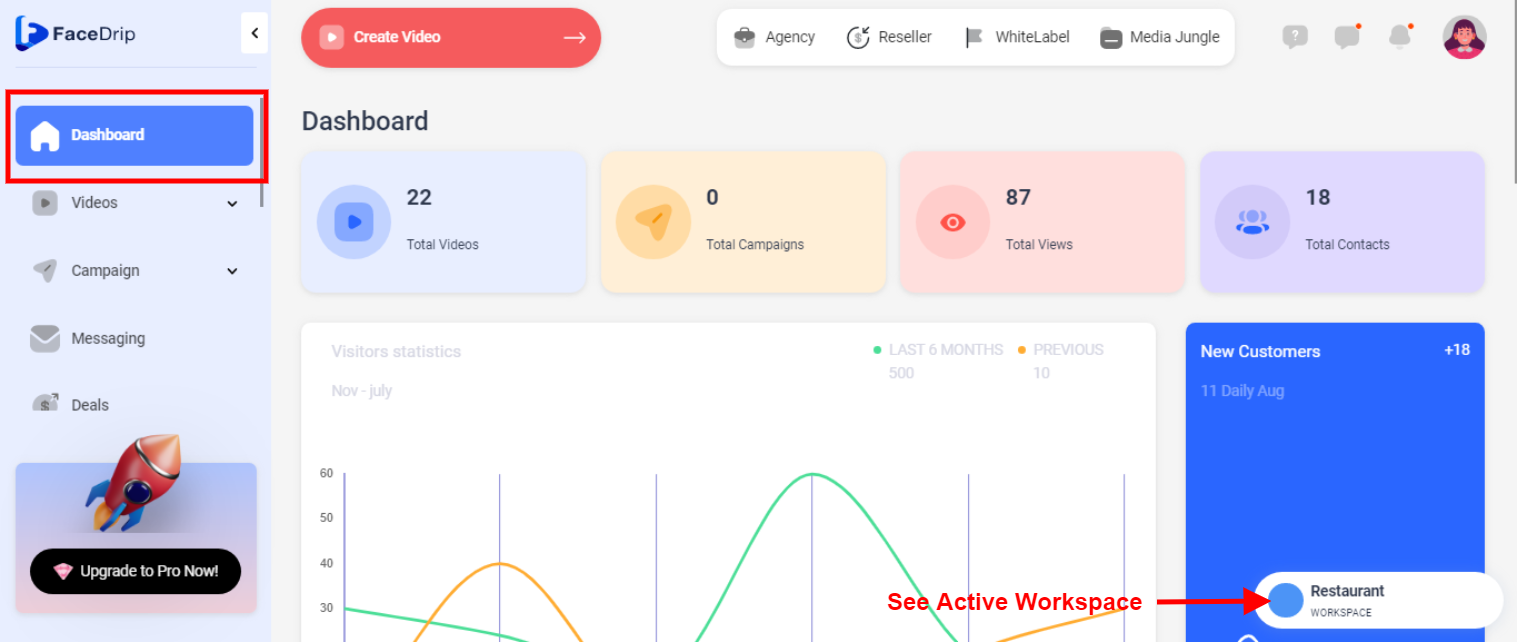
Your workspace will be activated successfully! (PS: Go back to your dashboard module to see the active workspace).
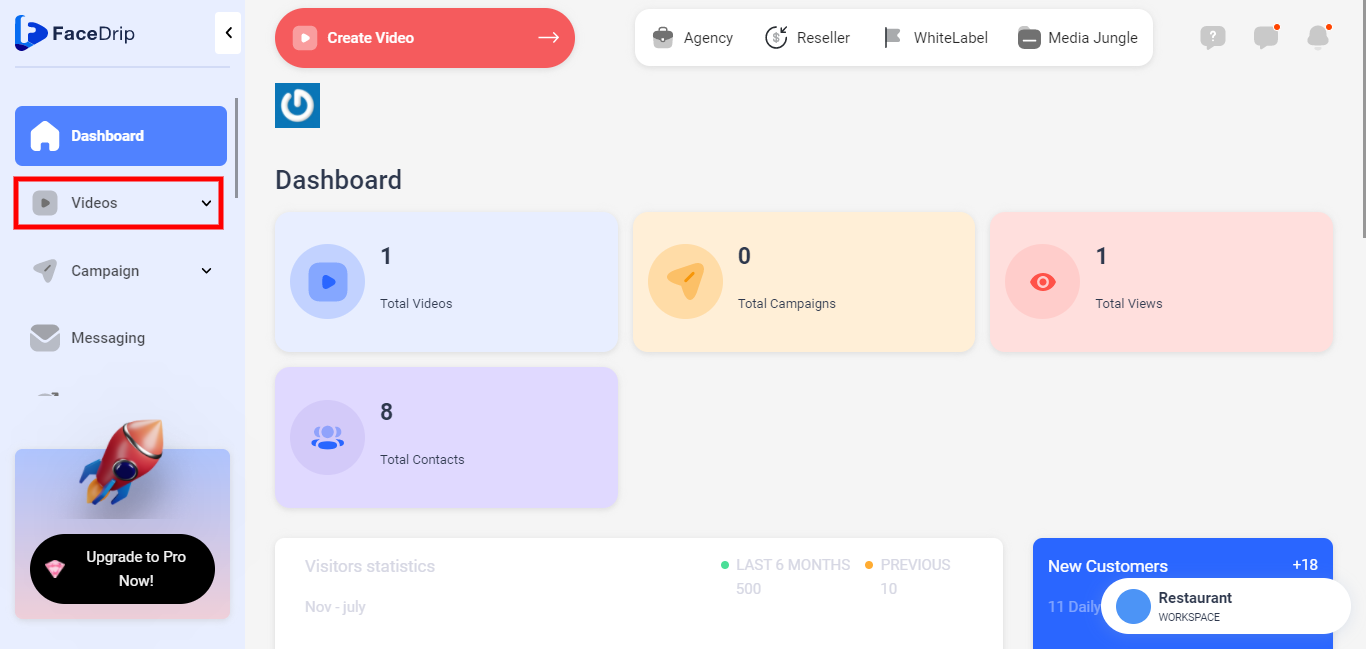
STEP 4: Click on the “video” menu on the left-hand side menu bar of your dashboard.
STEP 5: Click on the “video” from the drop-down menu on the left-hand side menu bar of your dashboard.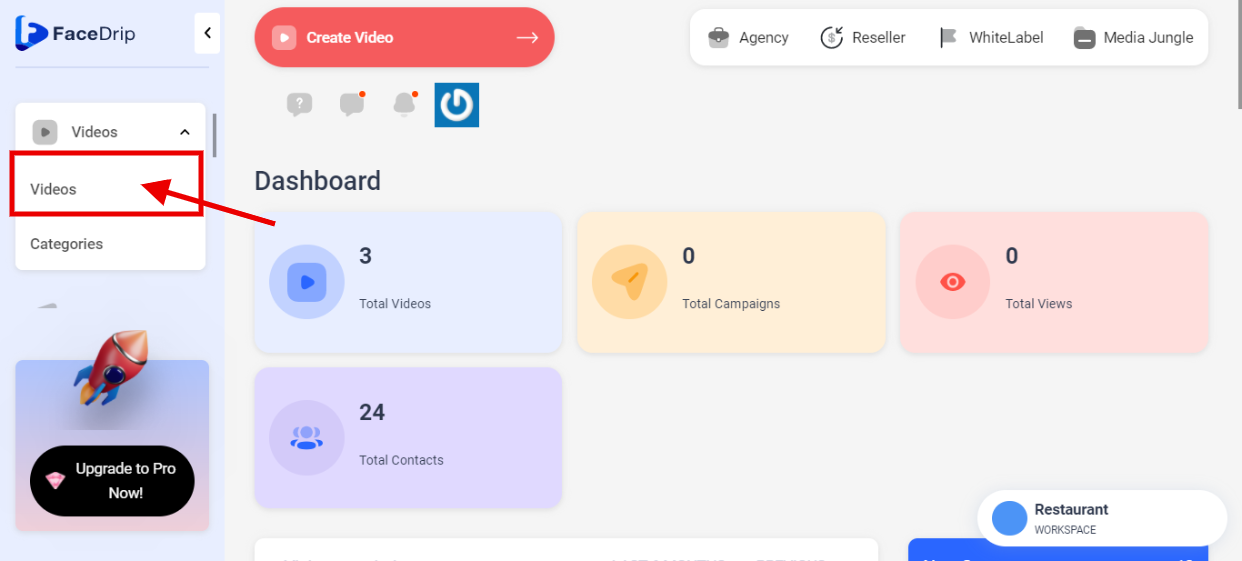
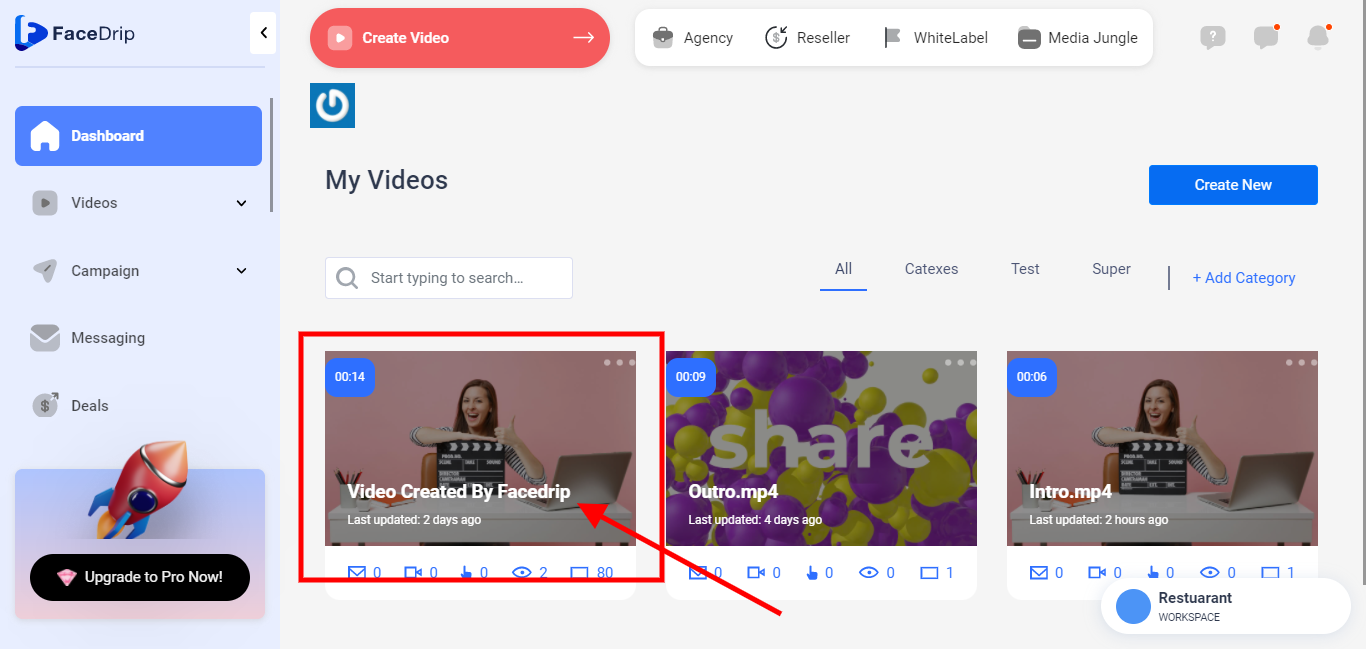
STEP 6: Select a “video” from the list of videos seen on the dashboard.
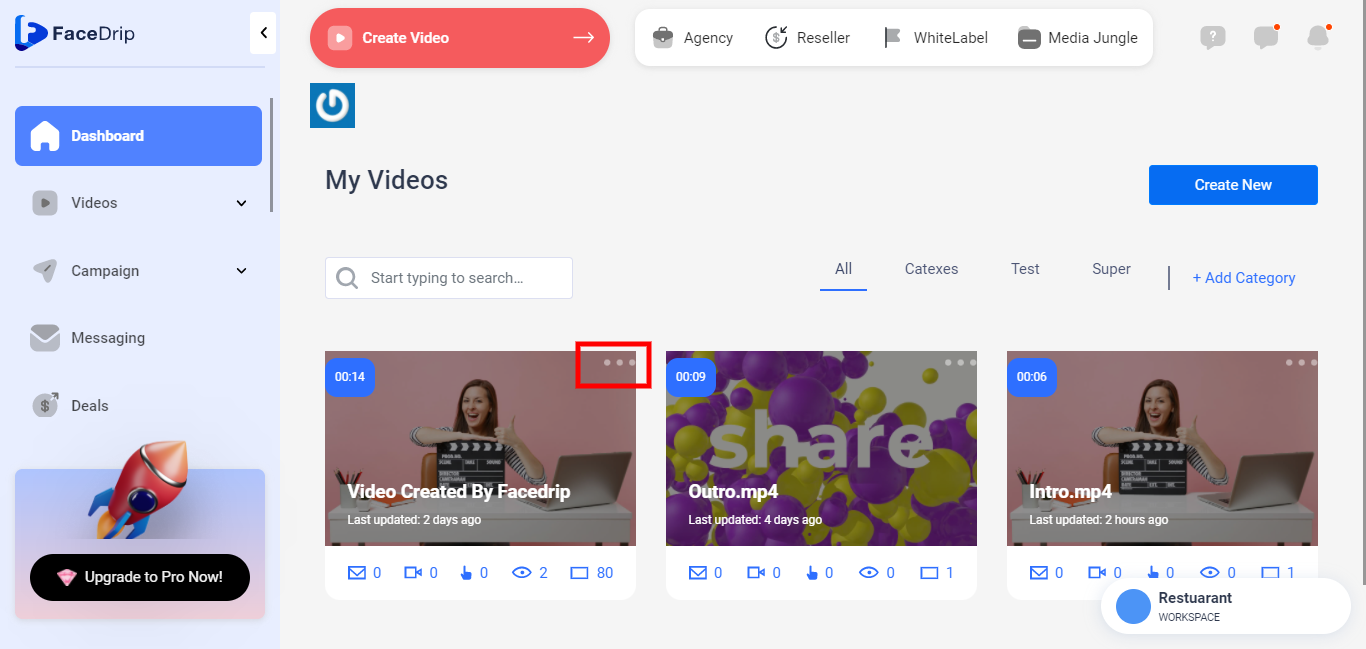
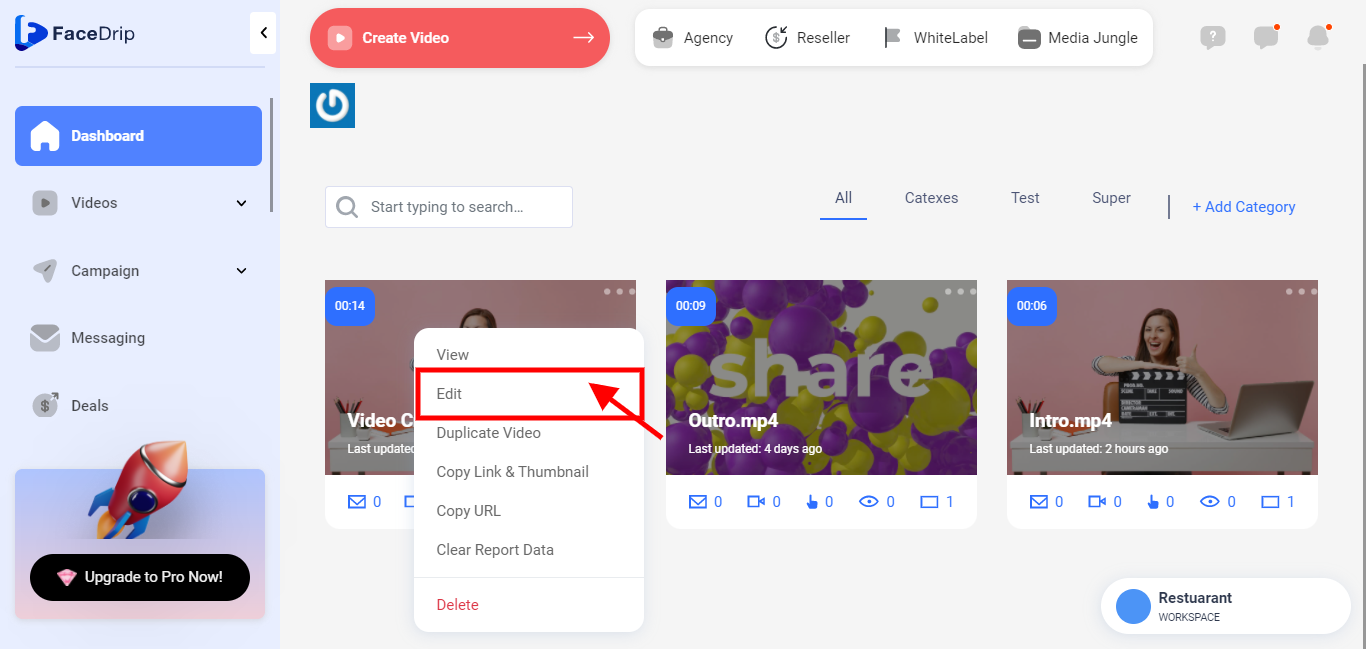
STEP 7: Left–Click on the “Triple Dot” icon on the video selected.
STEP 8: you will see the pop-up list.
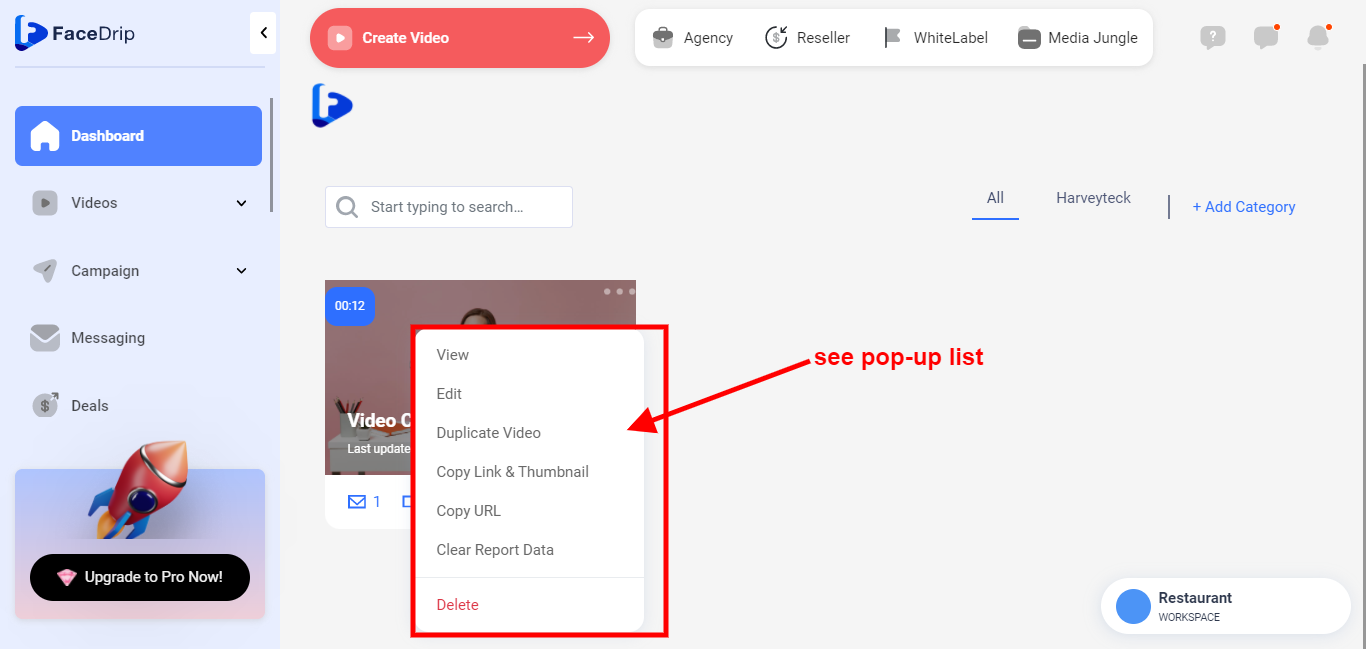
STEP 9: Click on “Edit” on the pop-up list.
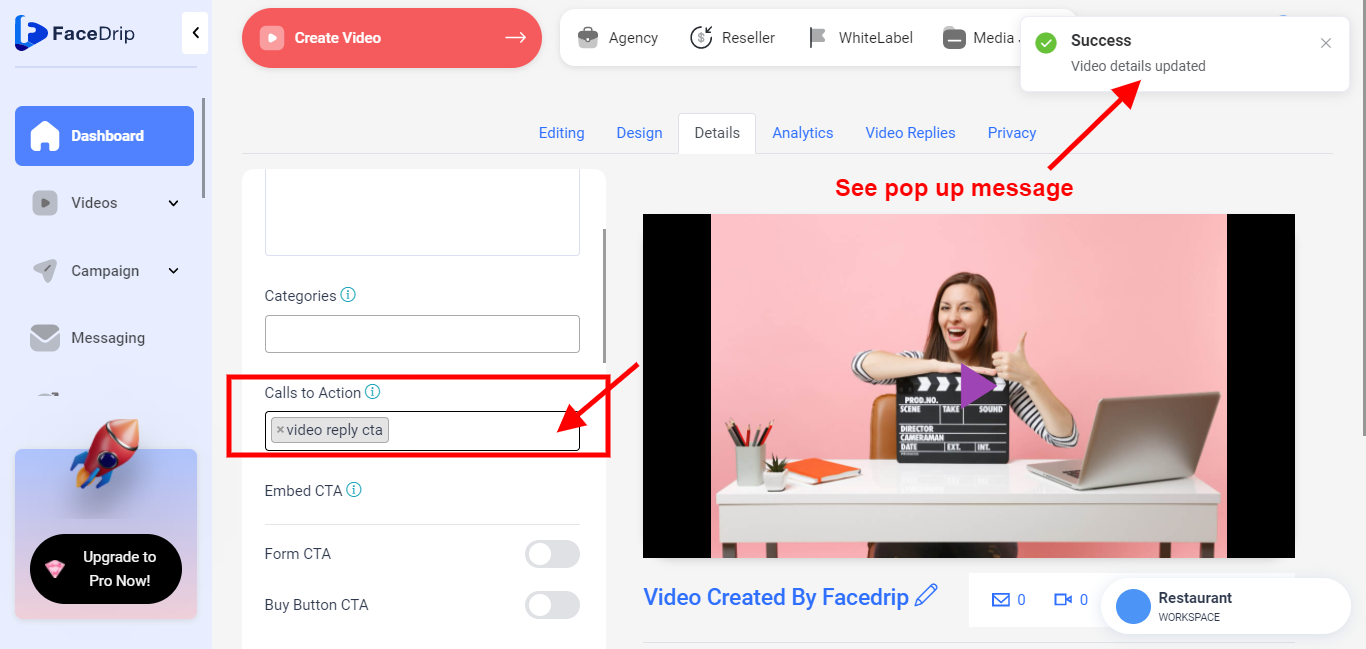
STEP 10: Provide a call to action by selecting from the drop-down list of call to action you already created (e.g Video Reply CTA Type). you will also see a pop-up success message Find a knowledgebase article on how to create CTA type
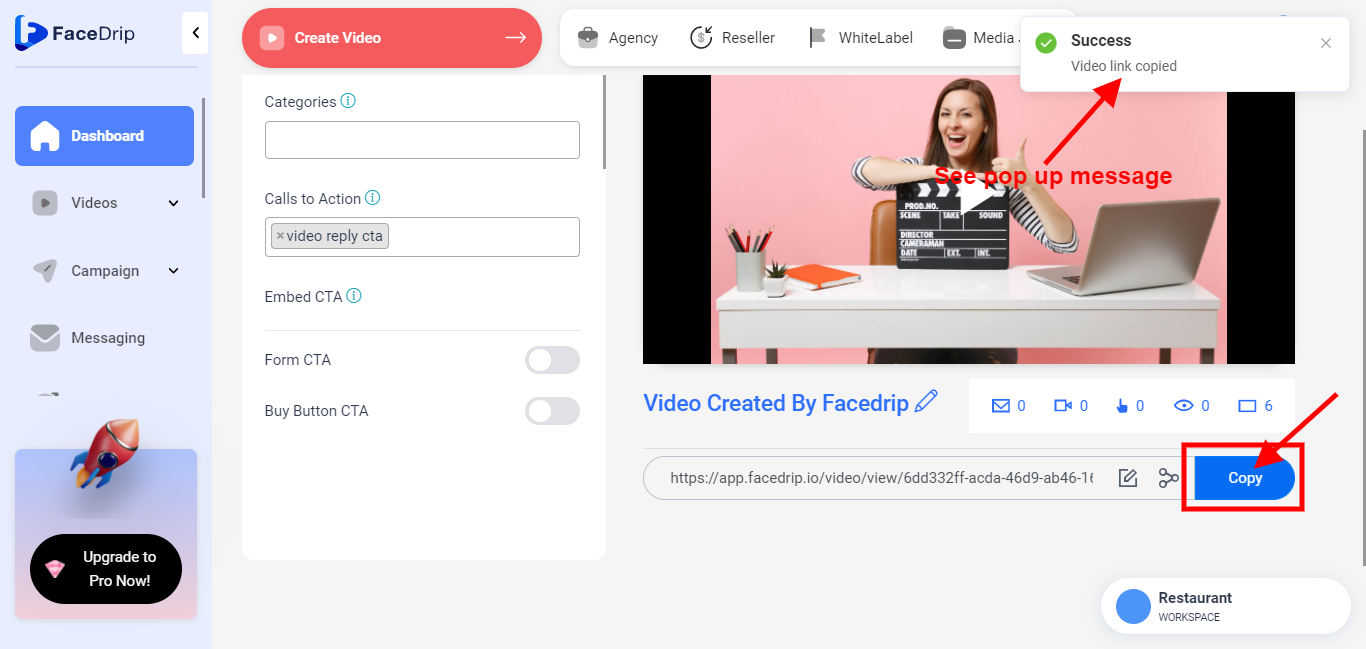
STEP 11: Click on the blue “copy” button to copy the link. you will see a pop-up success message stating “video link copied”.
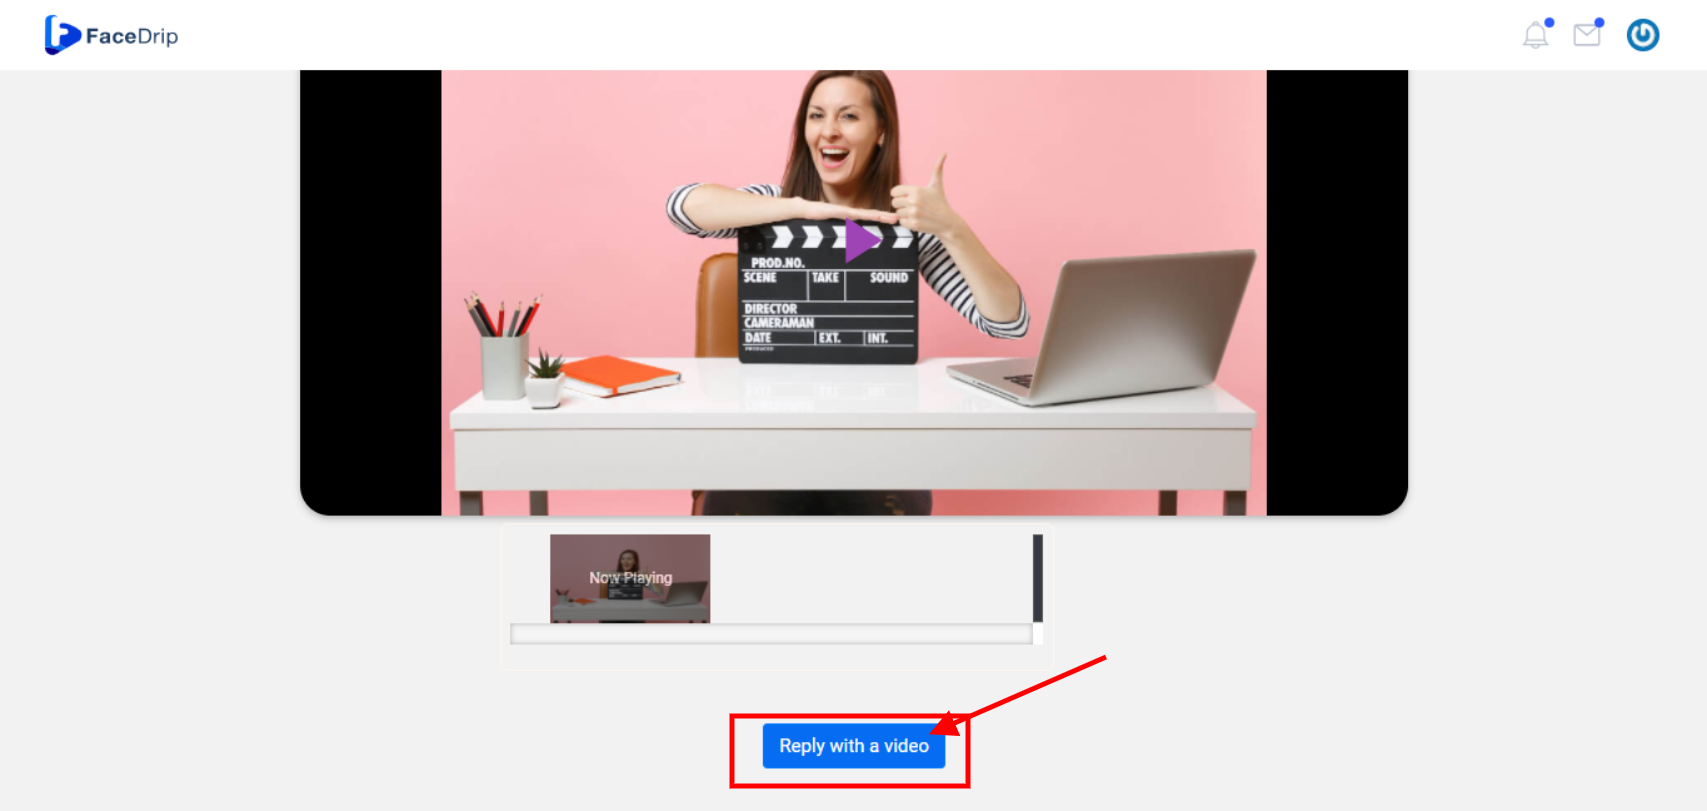
STEP 12: Open a new tab and paste the link you copied to open. Upon Opening, you will see a video, Scroll down to see a “Reply Video” button click the button.
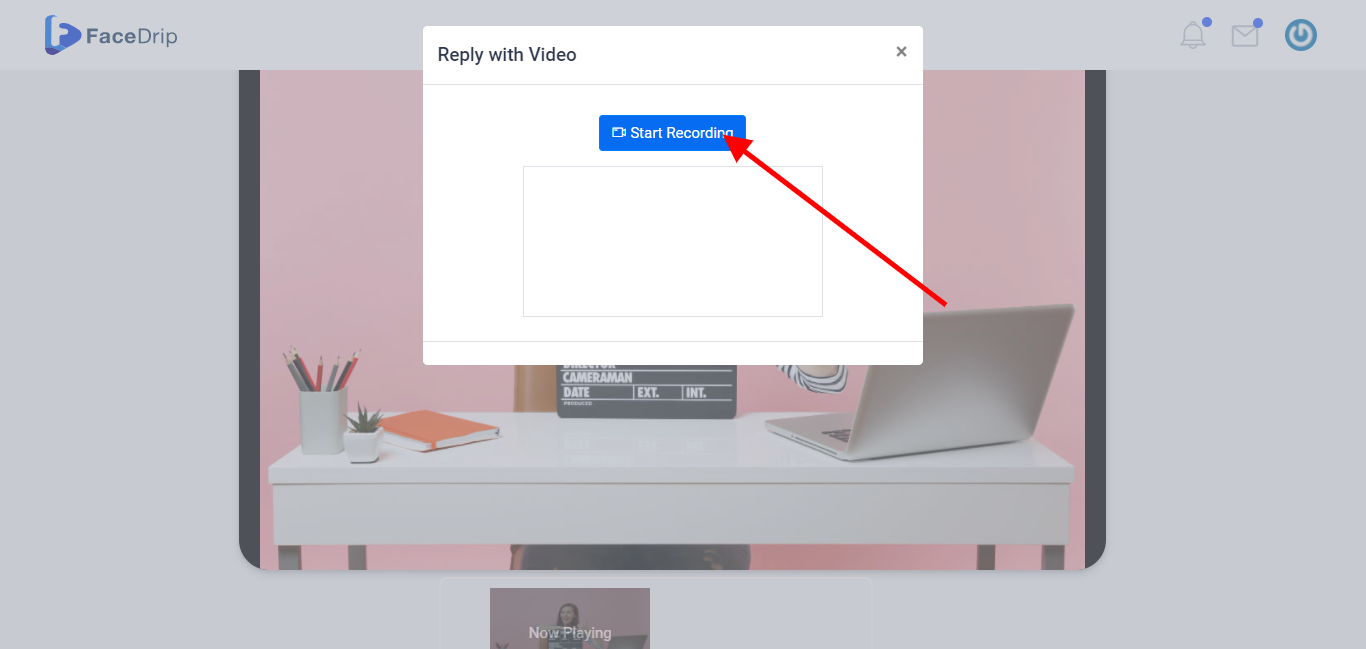
STEP 13: You will see a pop-up “Modal”

STEP 14: Click on the blue “Start Recording” button on the pop-up modal to start recording your video reply.
STEP 15: After recording, click on the red “Stop Recording” button on the pop-up modal to stop recording
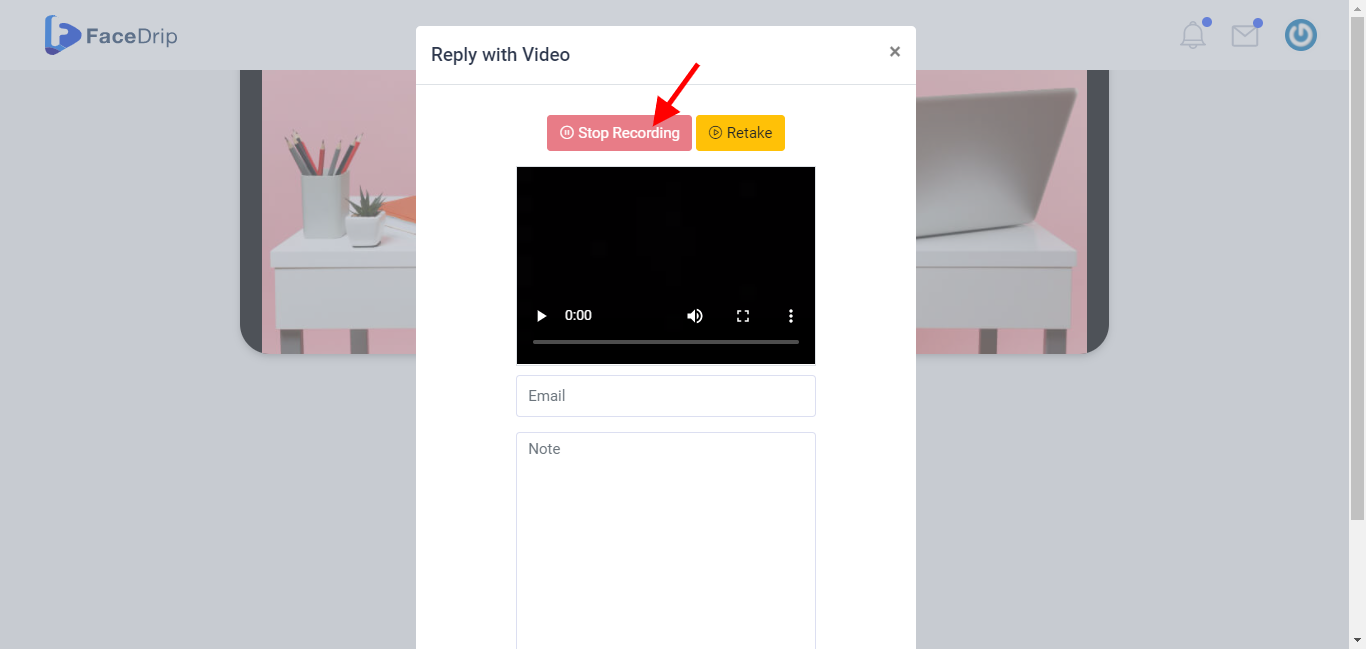
You can also click on the “Retake” button on the pop-up modal if you wish to retake your video recording.
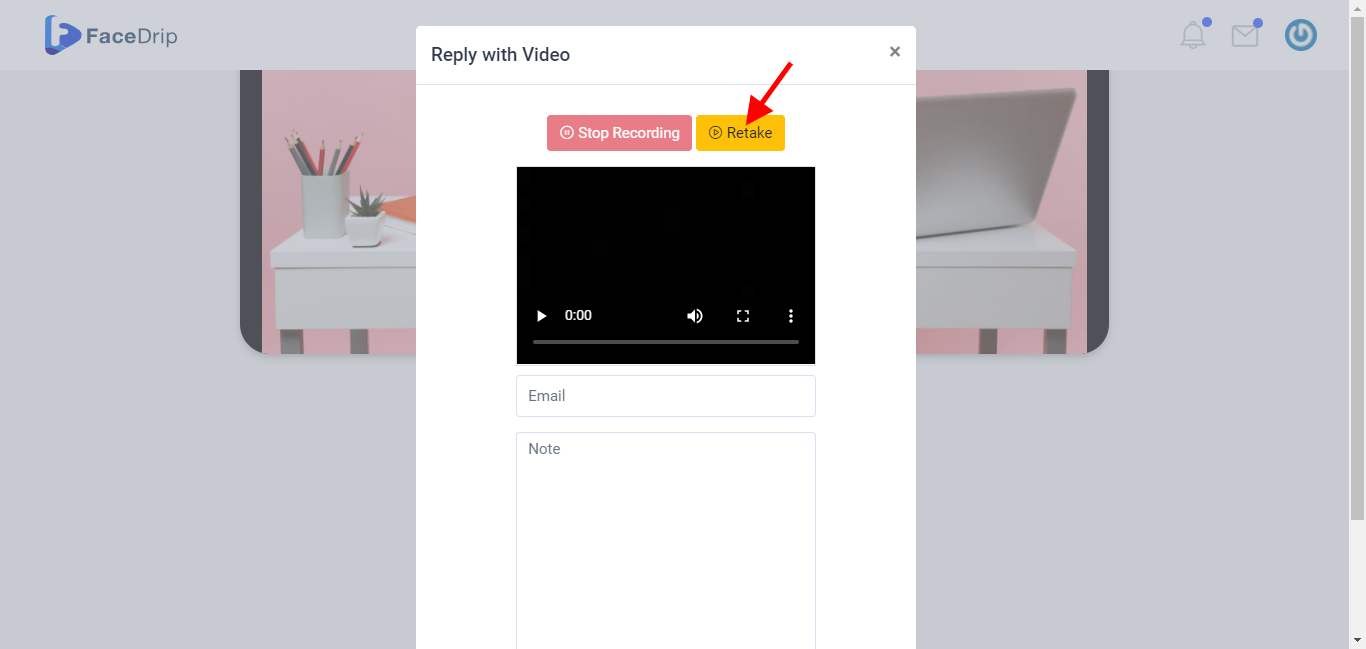
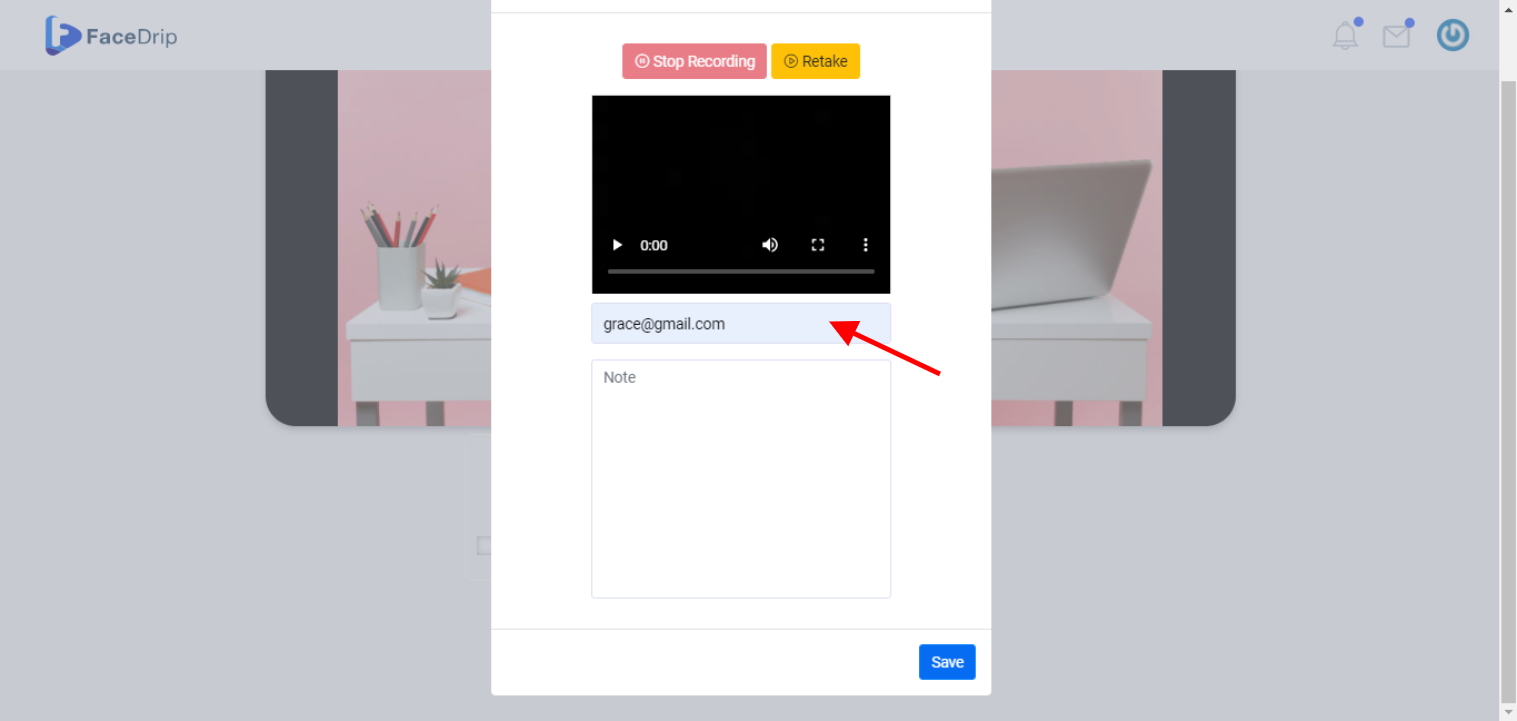
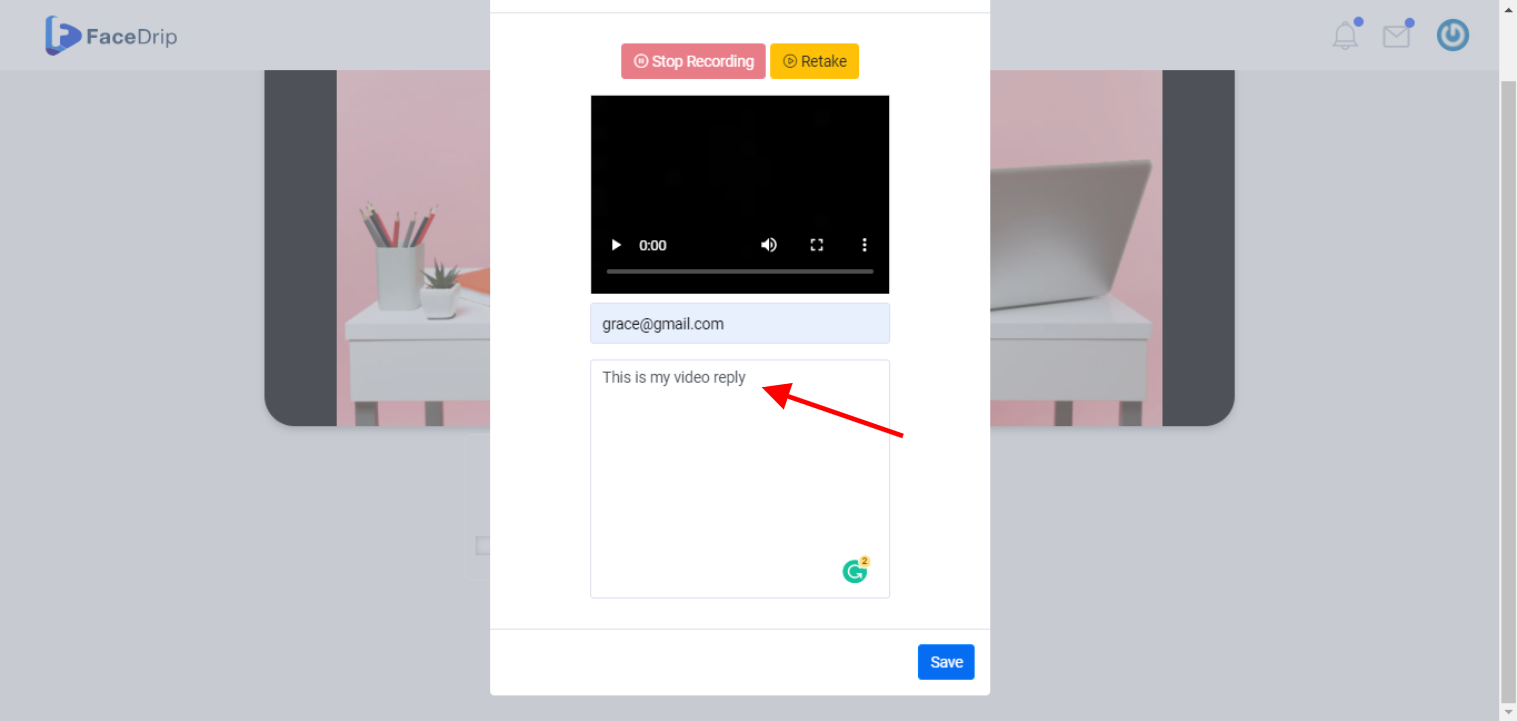
STEP 16: Enter information for the respective fields in the pop-up modal shown below.
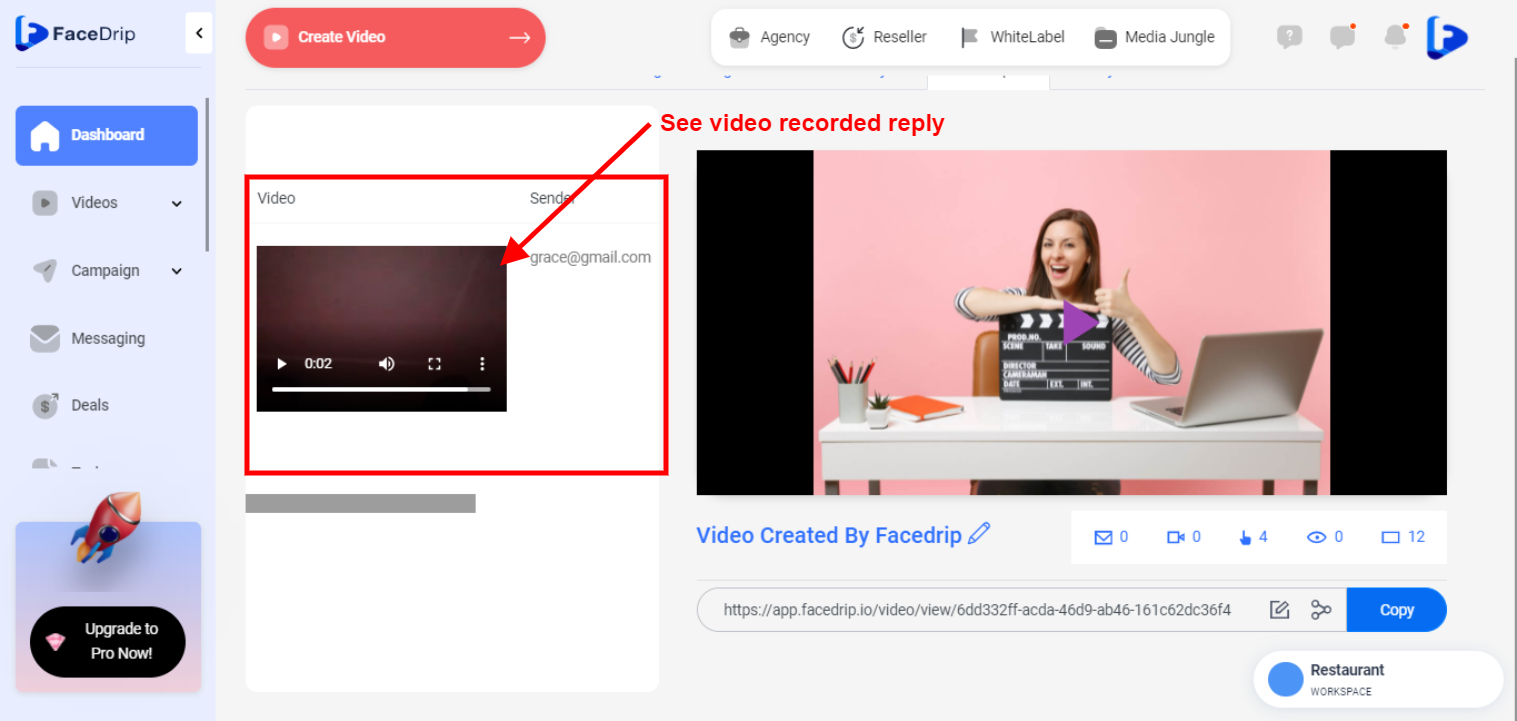
Provide a valid Email. (e.g grace@gmail.com)
Provide a Valid Note. (e.g. This is my video reply)
STEP 17: Click on the blue “Save” button to save your video.

STEP 18: Go back to your dashboard and click on the “Video Replies” in the editing tab on the top right-hand end of the middle section to see your recorded video.
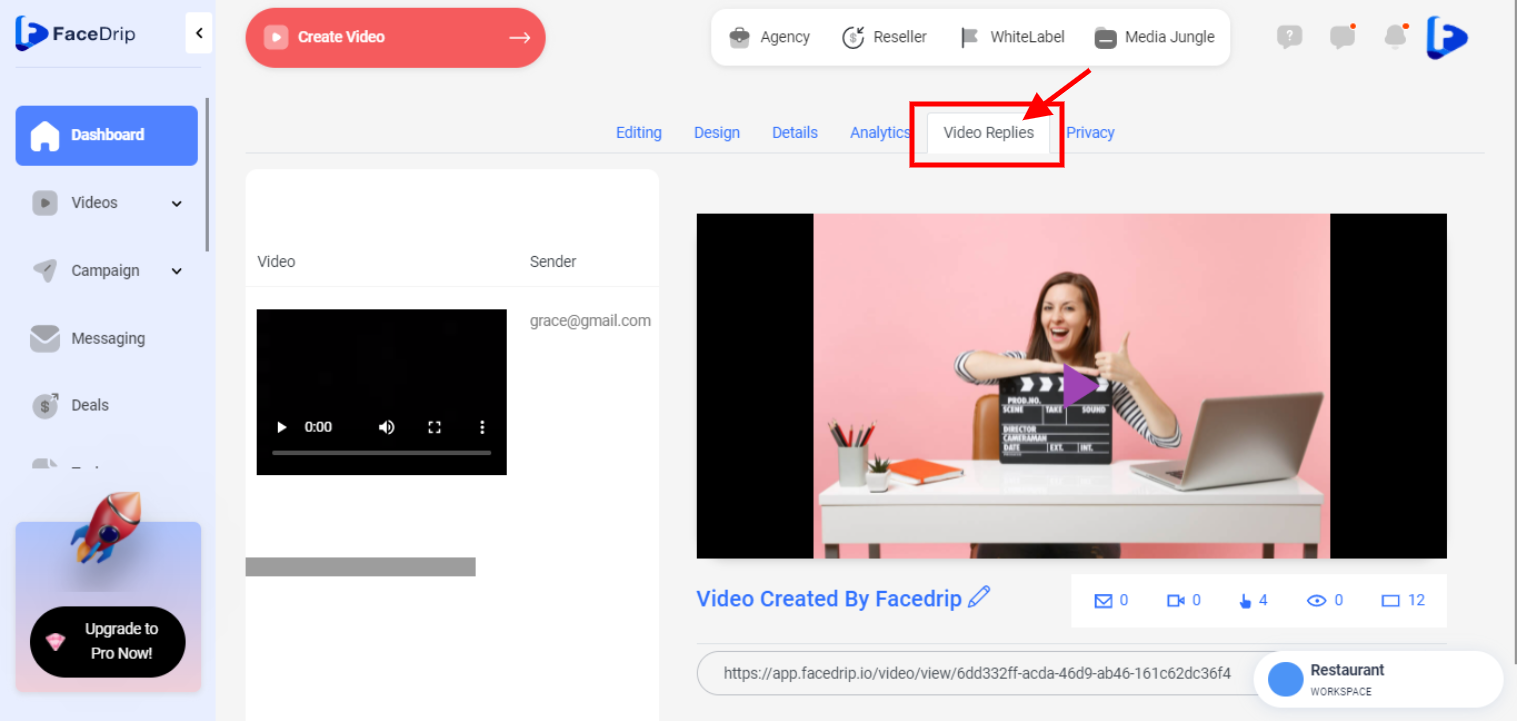
STEP 19: See recorded videos.