How To Edit Deals
Log in to your Facedrip account.
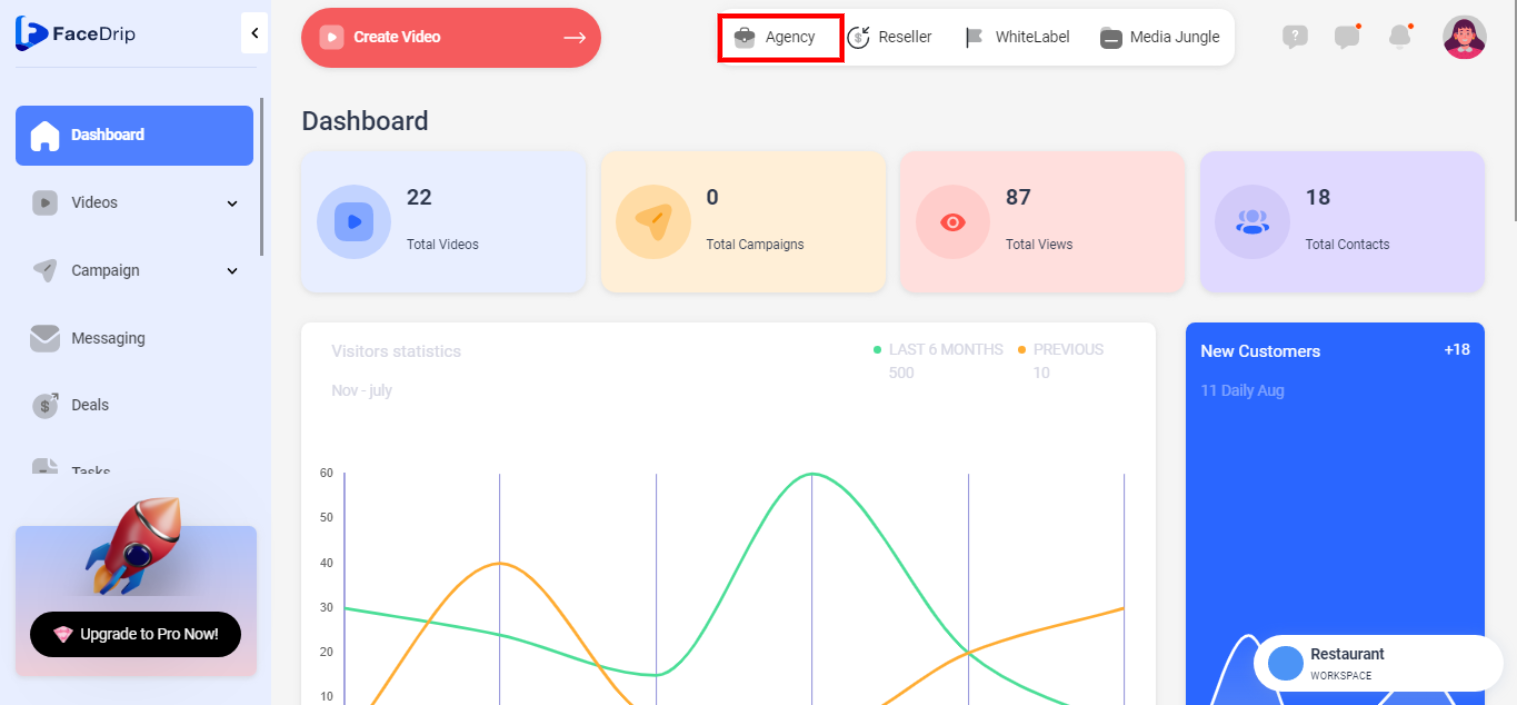
STEP 1: Click on the “Agency” on the top side menu bar of your dashboard
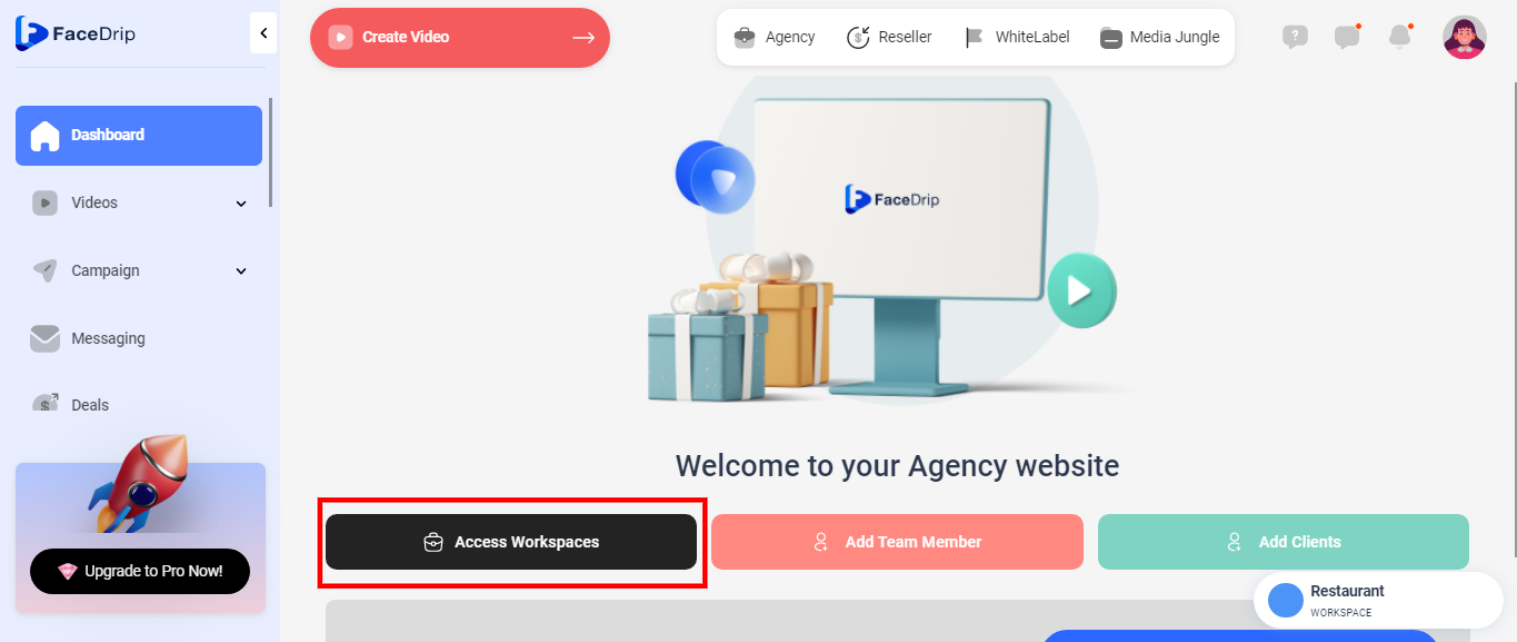
STEP 2: Click on “workspace” in the options below.
STEP 3: Choose the workspace you want to edit the deal and click the “activate workspace” button. (follow this link on How To Create New Workspace)
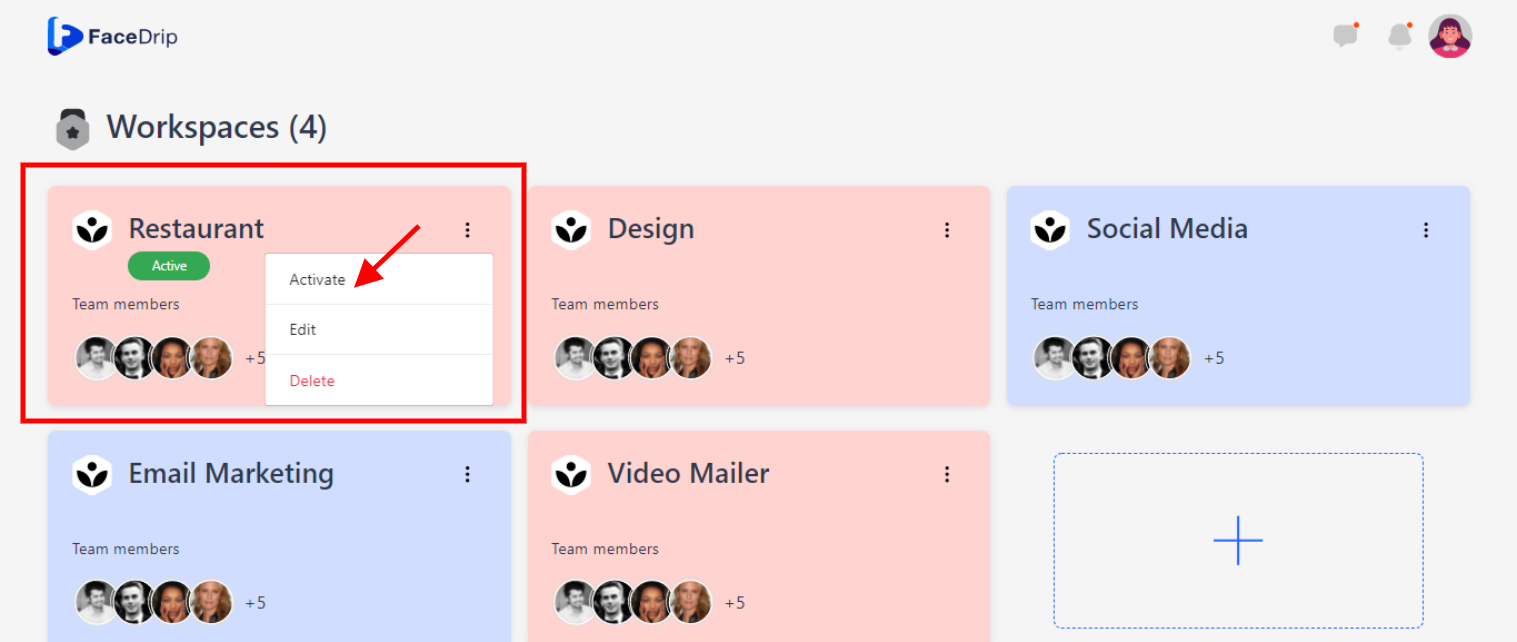
Your workspace will be activated successfully! (PS: Go back to your dashboard module to see the active workspace).
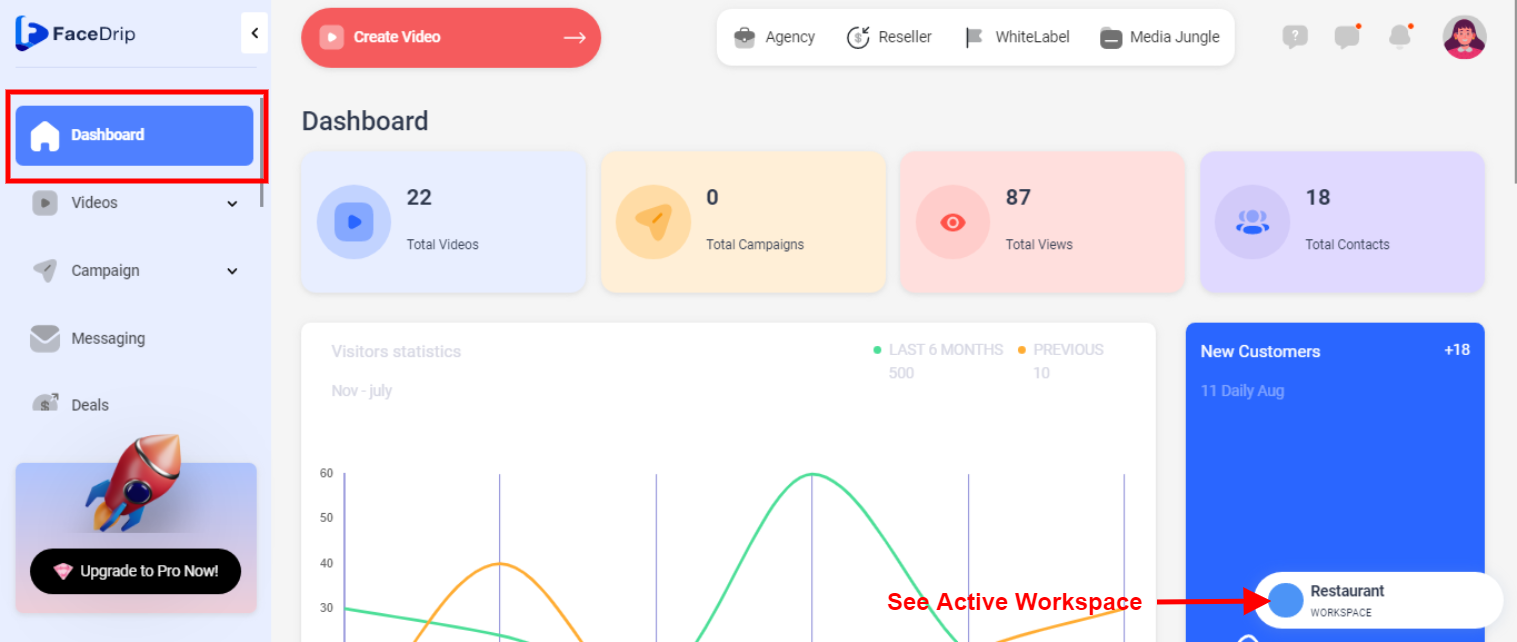
STEP 4: Click on the “Deals” menu on the left-hand side menu bar of your dashboard.
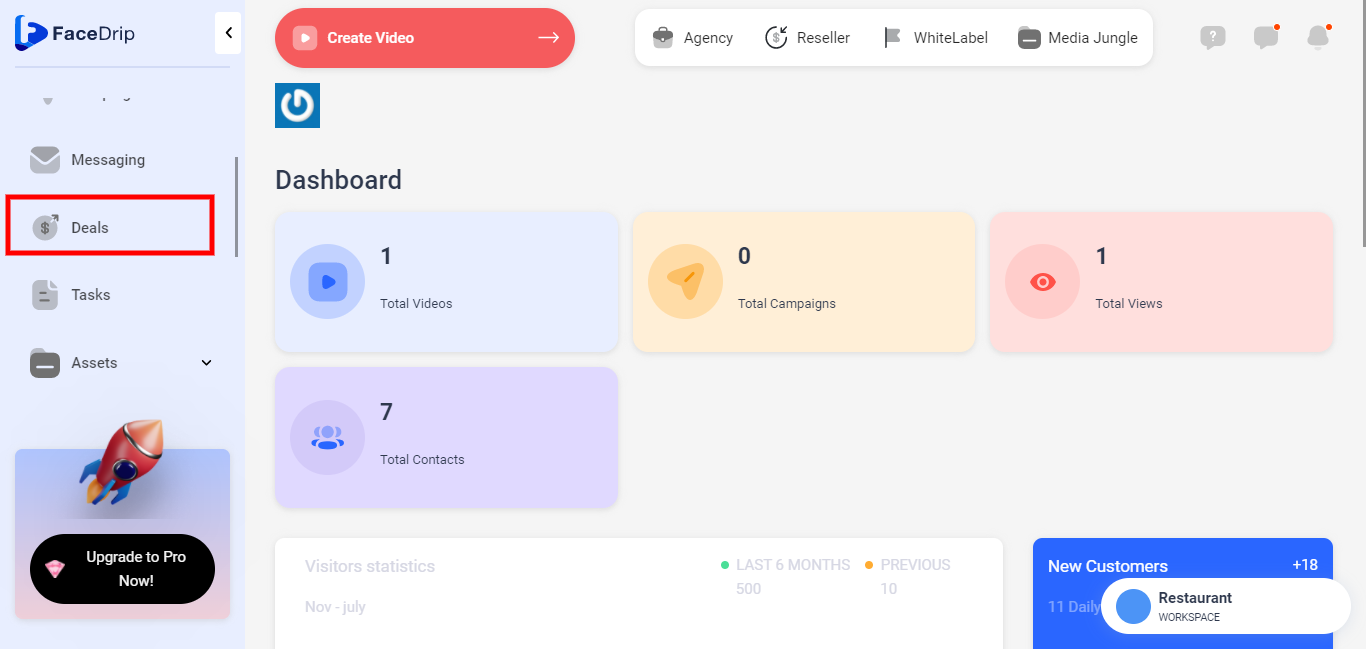
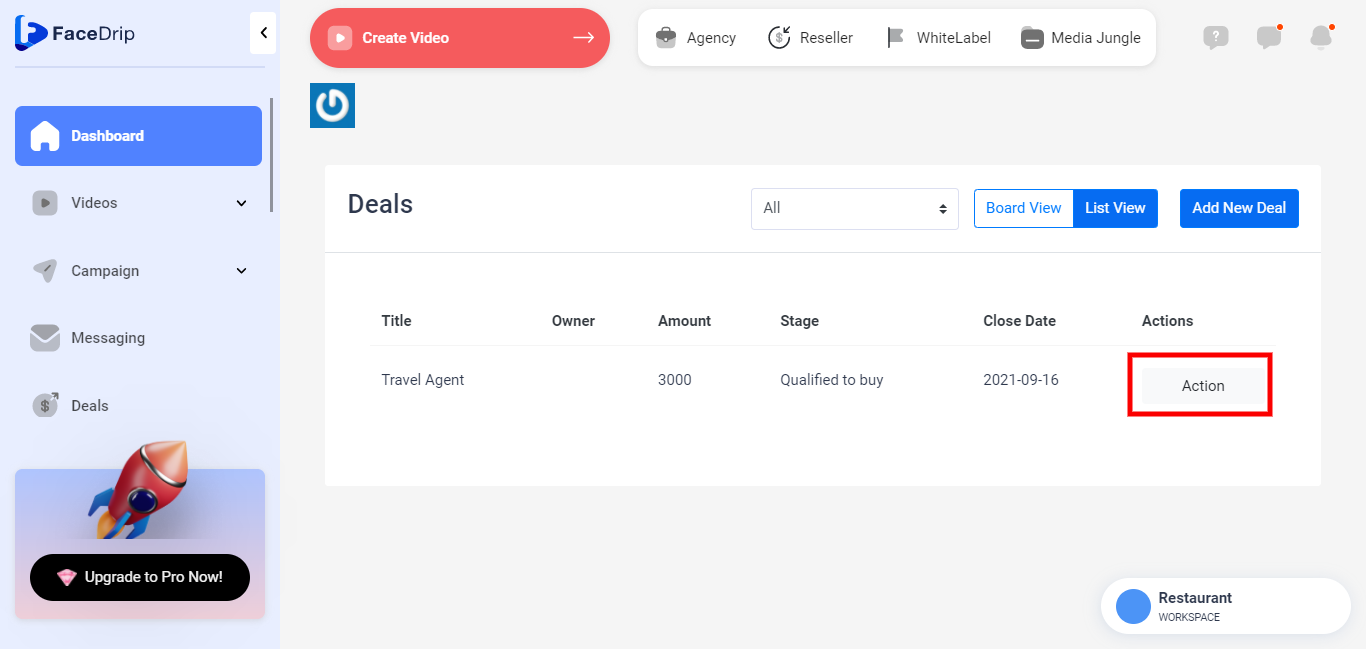
STEP 5: you will see the “Deals” table on the middle section.
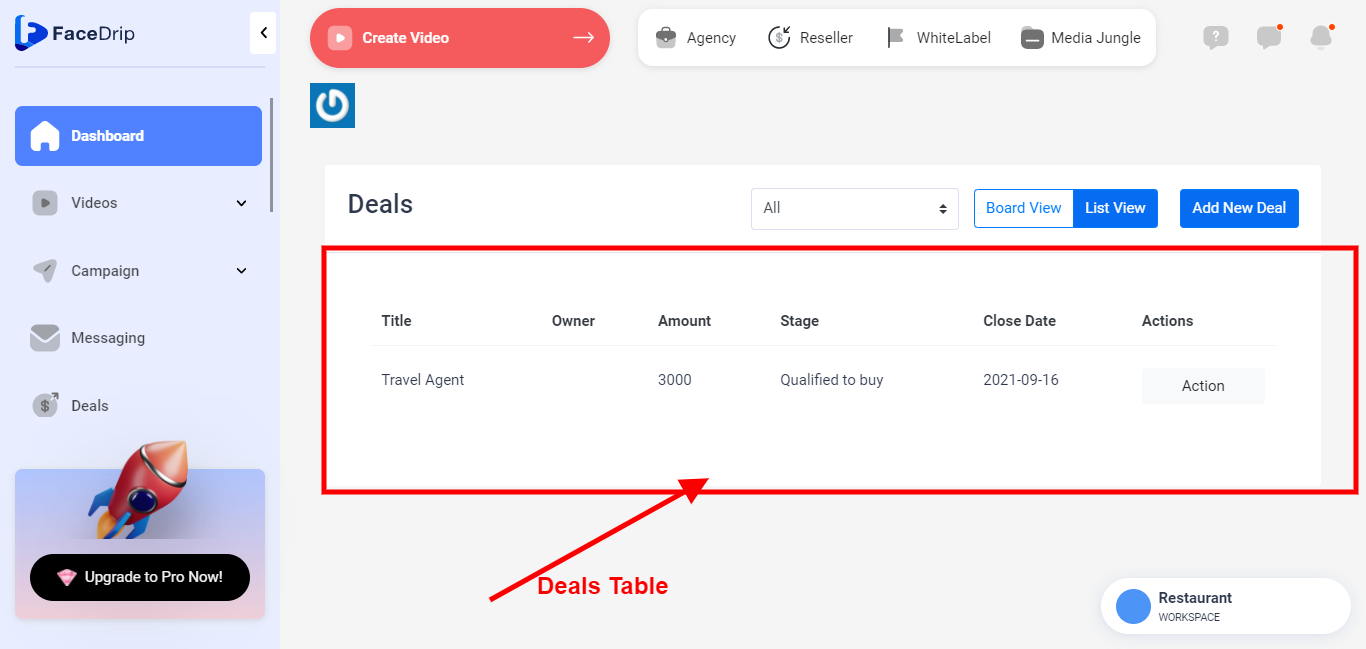
STEP 6: Select the preferred already existing deal you wish to edit from the table.
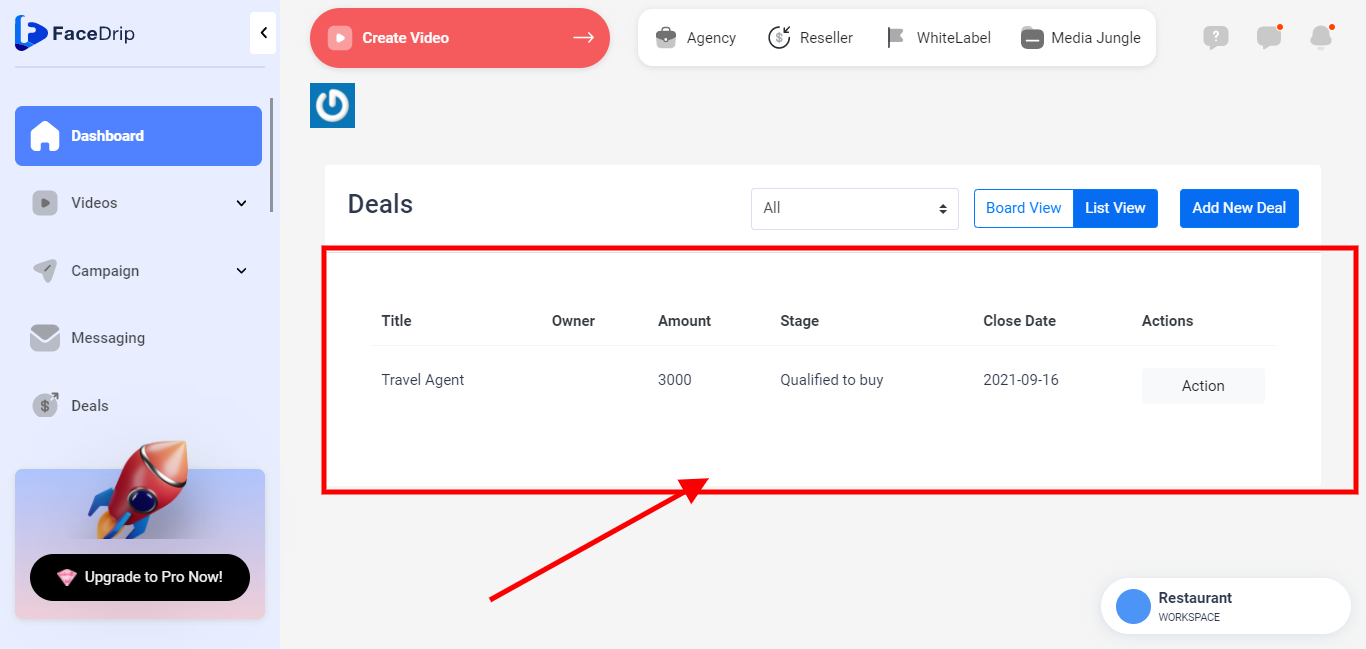
STEP 7: Click on the “Action” button.
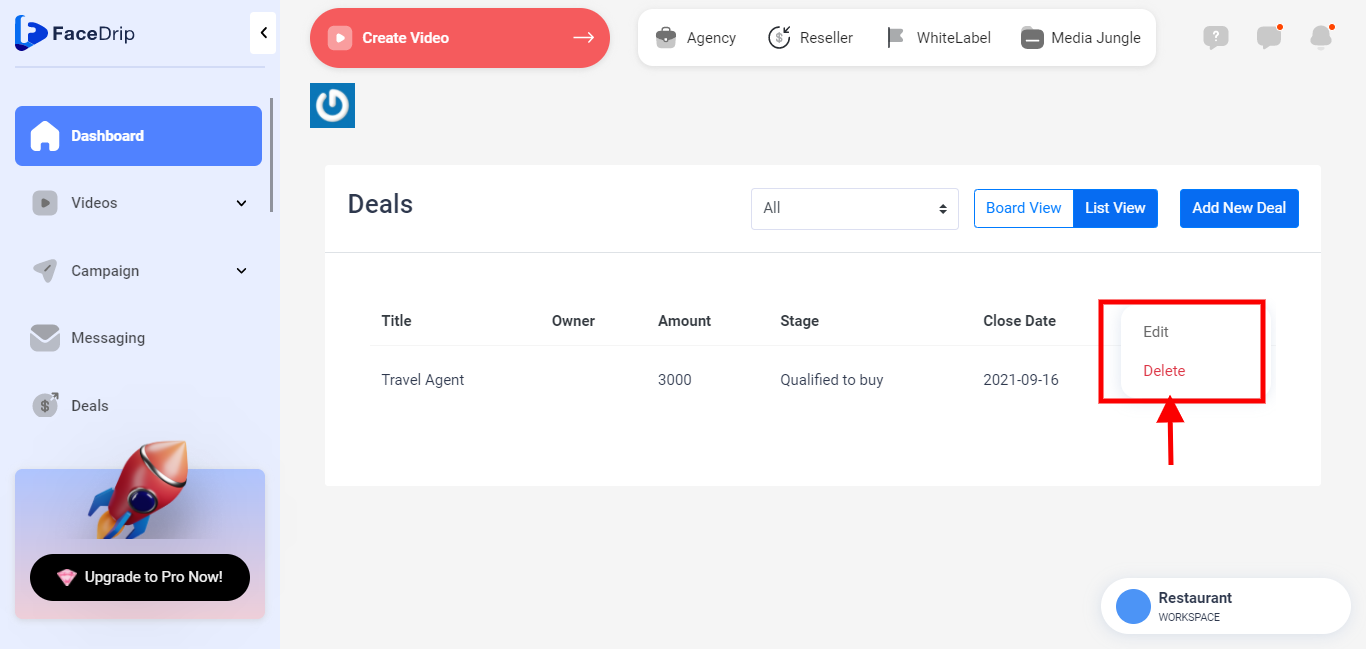
STEP 8: you will see a pop-up message stating “EDIT OR DELETE”
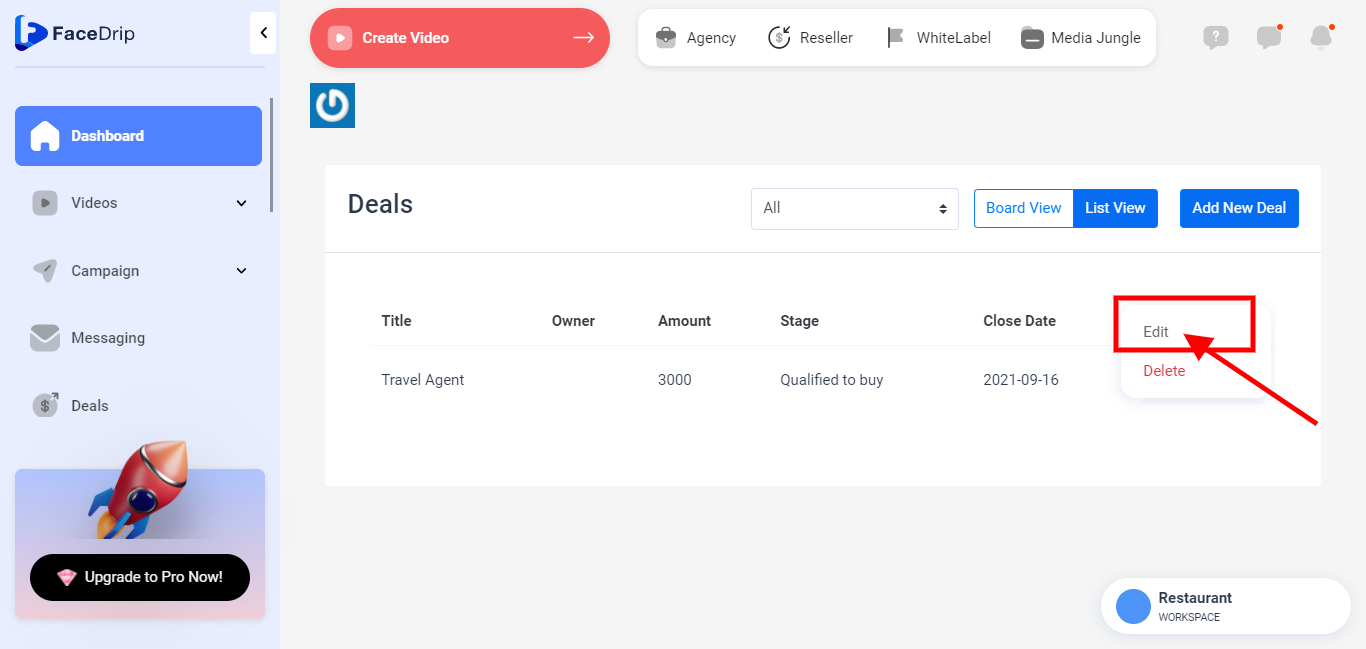
STEP 9: Select the “Edit” button.
STEP 10: Enter information for the respective fields you wish to edit on the “Edit Deal” form shown below
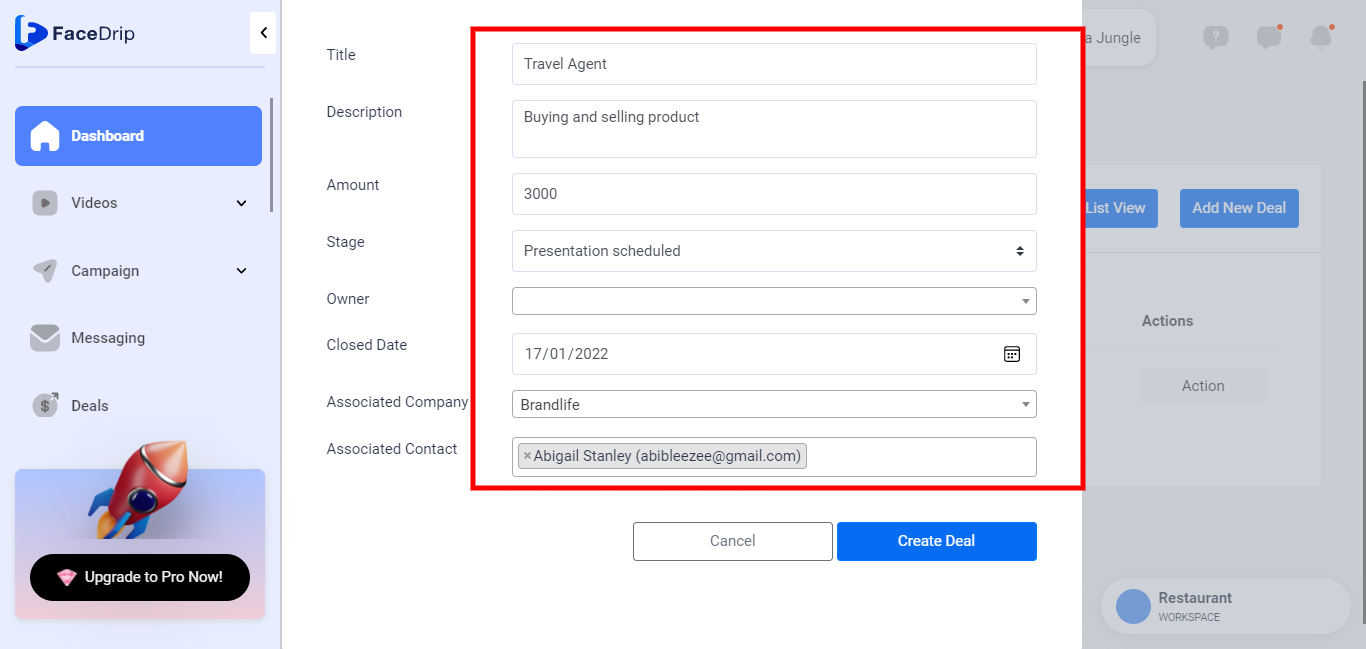
STEP 10: Click on the “Save Changes” button to save the edited deal.
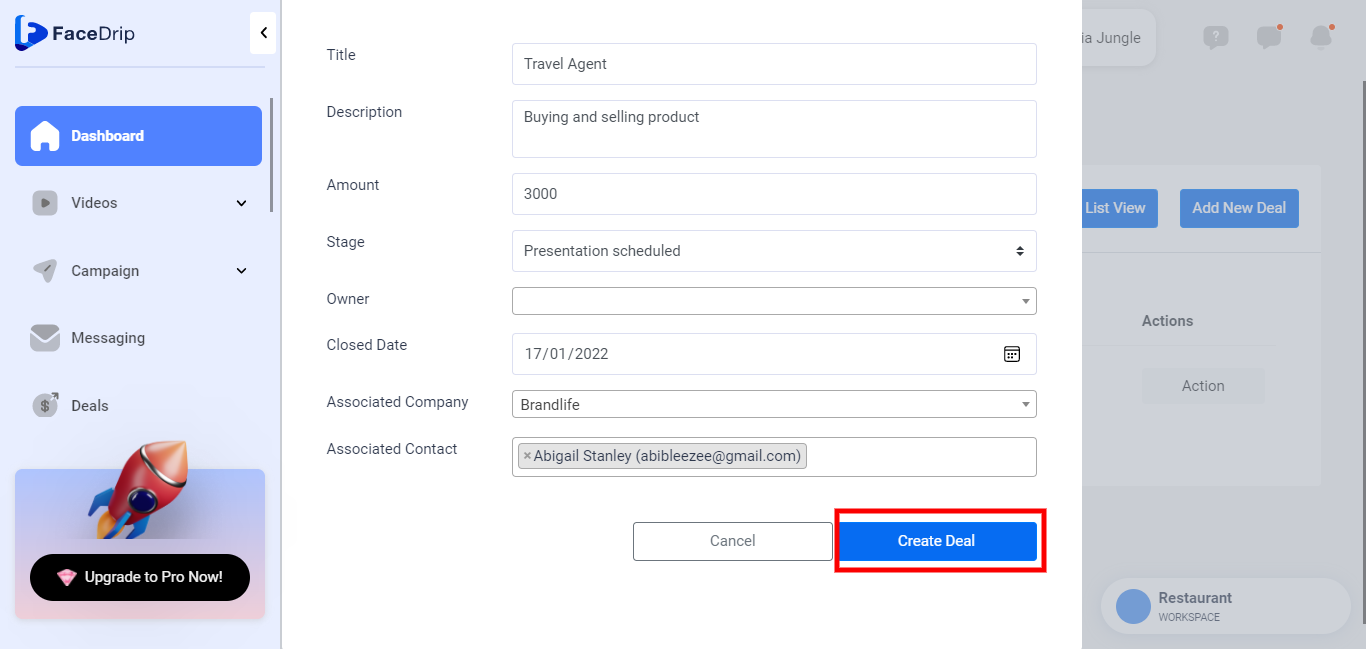
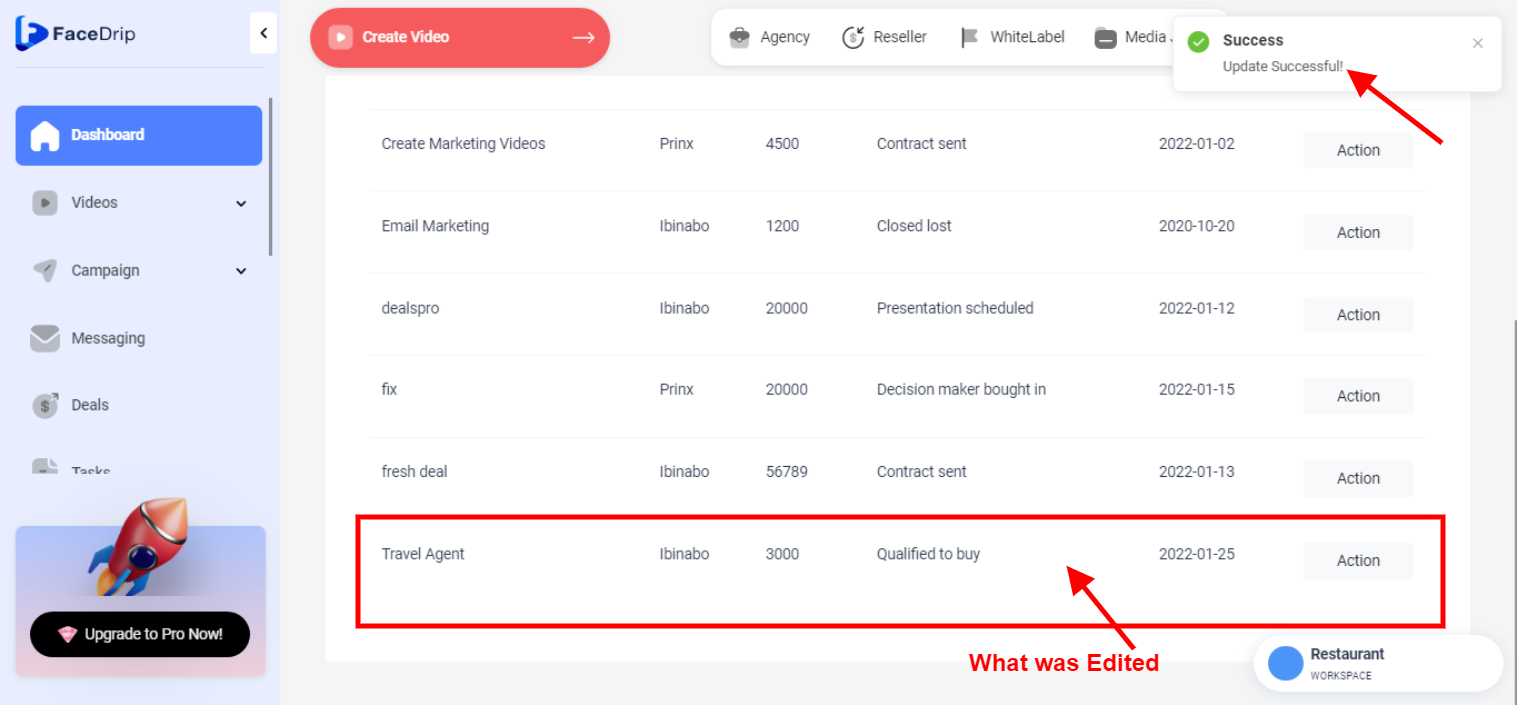
STEP 11: Deal edited and saved successfully with a pop-up success alert message stating (N/B: The stage was formerly “Qualified to buy, now edited to “presentation Scheduled) that is to say whatever you edit stays.
