You can edit an email campaign with these instructions however you need a workspace you would like to edit the campaign in. (please kindly follow this link to see how to create email campaign)
Getting Started On How To Edit Email Campaign
Log in to your Facedrip account.
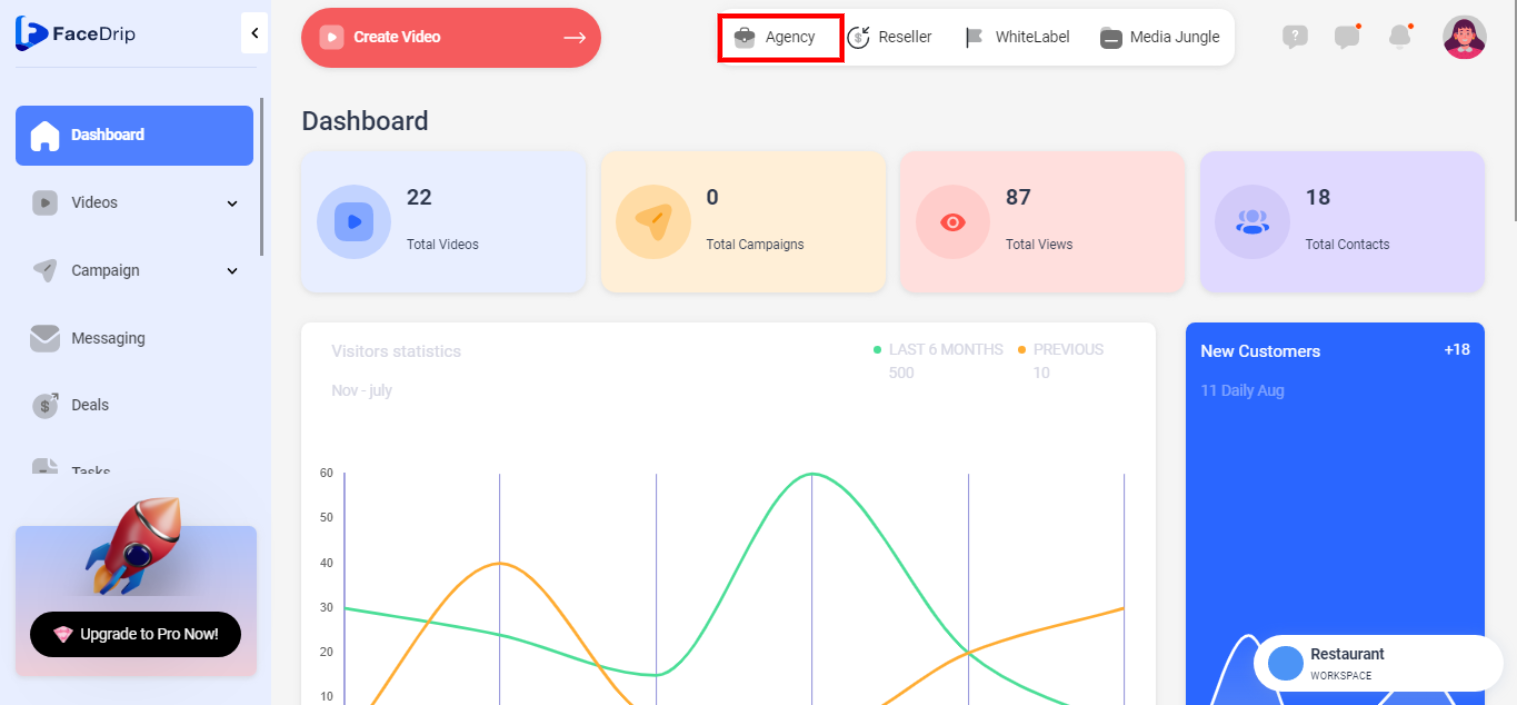
STEP 1: Click on the “Agency” on the top side menu bar of your dashboard
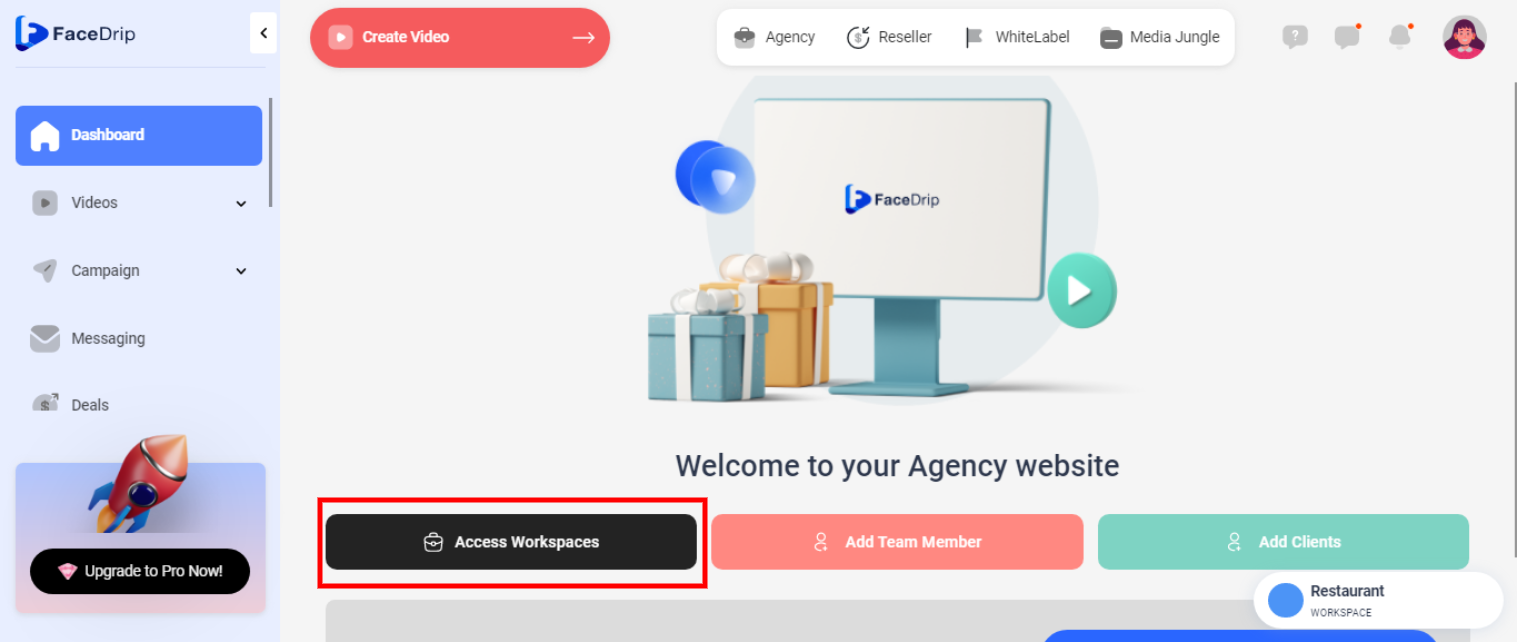
STEP 2: Click on “Workspace” in the options.
STEP 3: Choose the workspace you want to edit an email campaign in and click the “activate workspace” button. (follow this link on How To Create New Workspace)
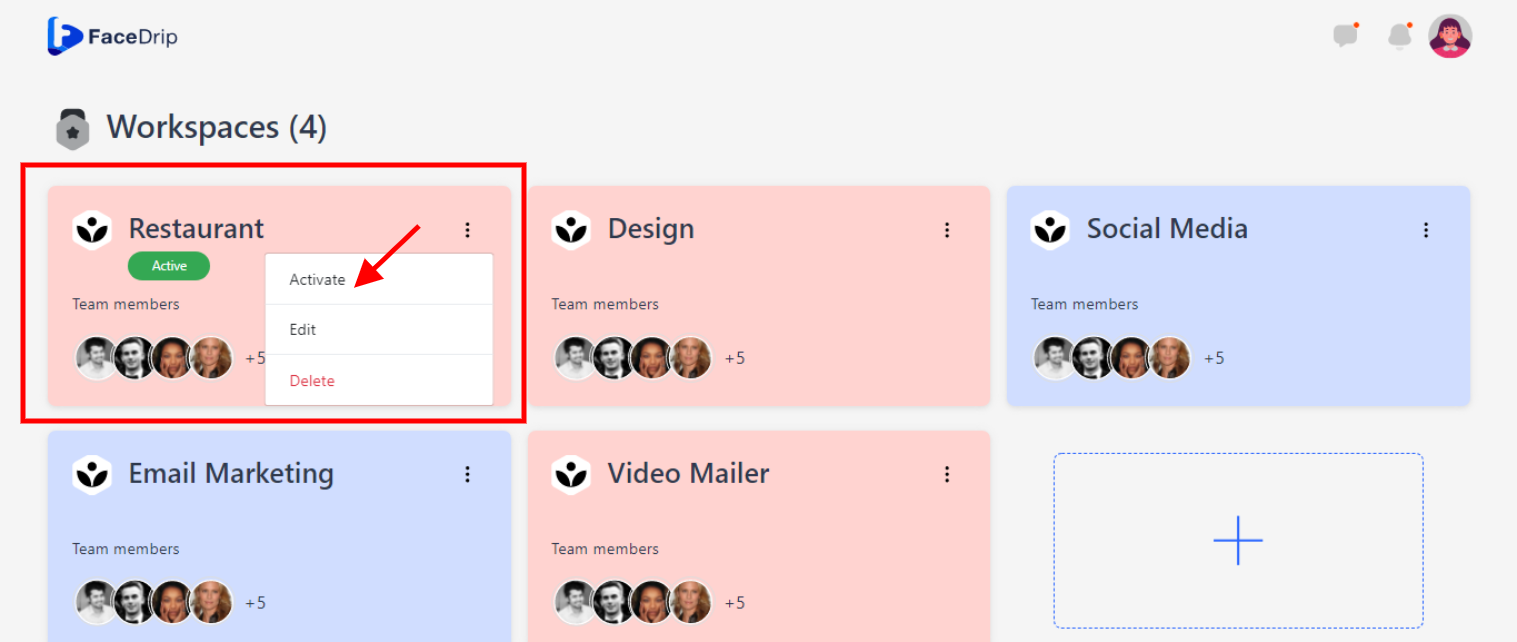
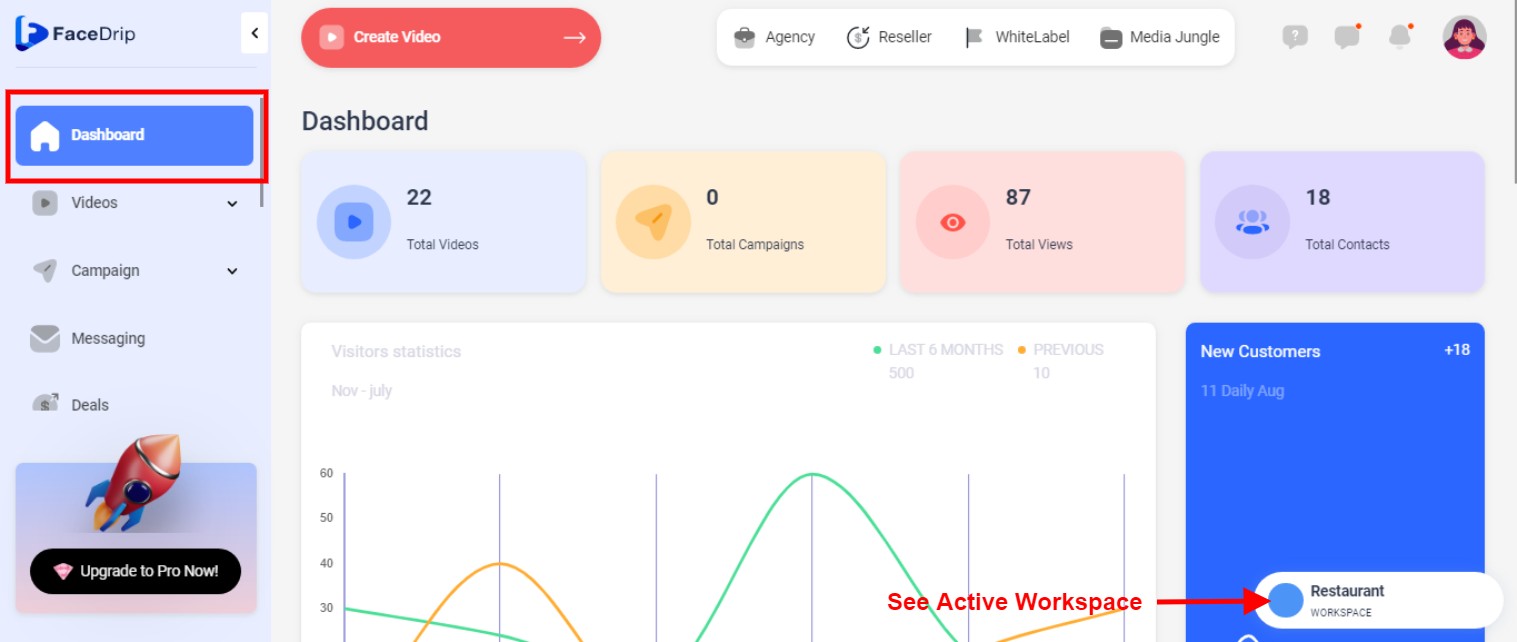
Your workspace will be activated successfully! (PS: Go back to your dashboard module to see the active workspace).
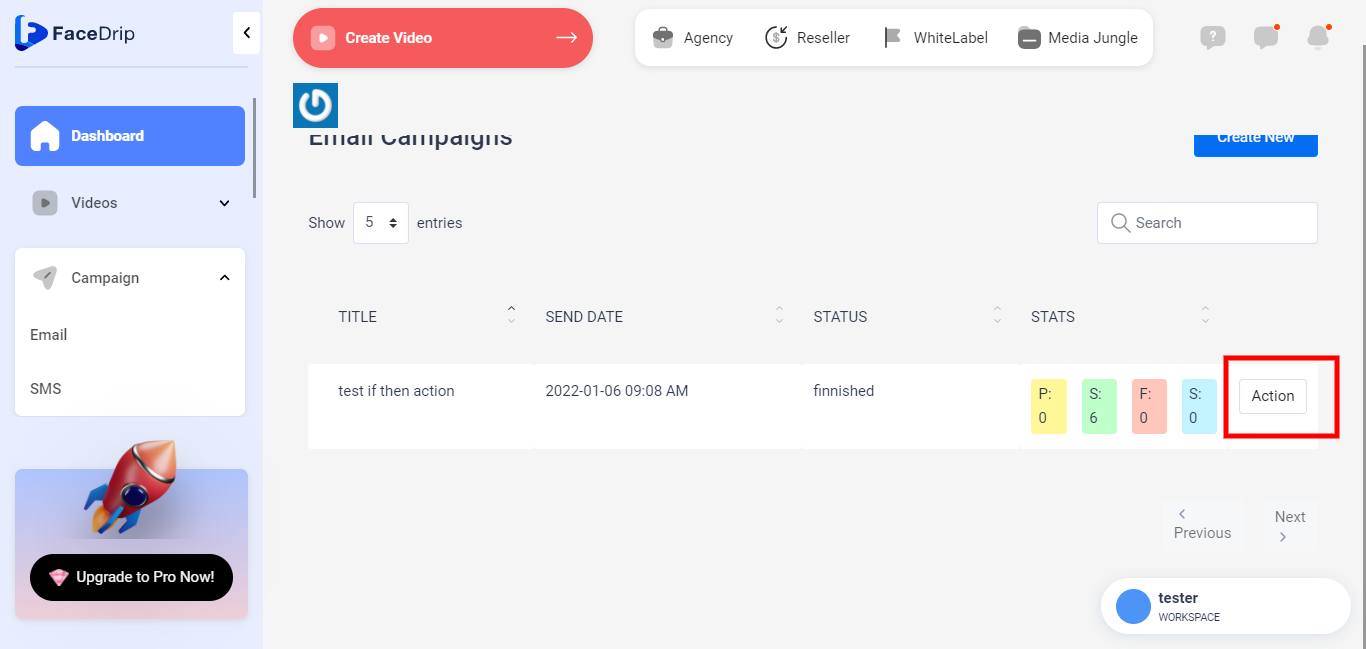
STEP 4: Click on the “campaign” menu on the left-hand side menu bar of your dashboard then click on “email” in the drop-down option.

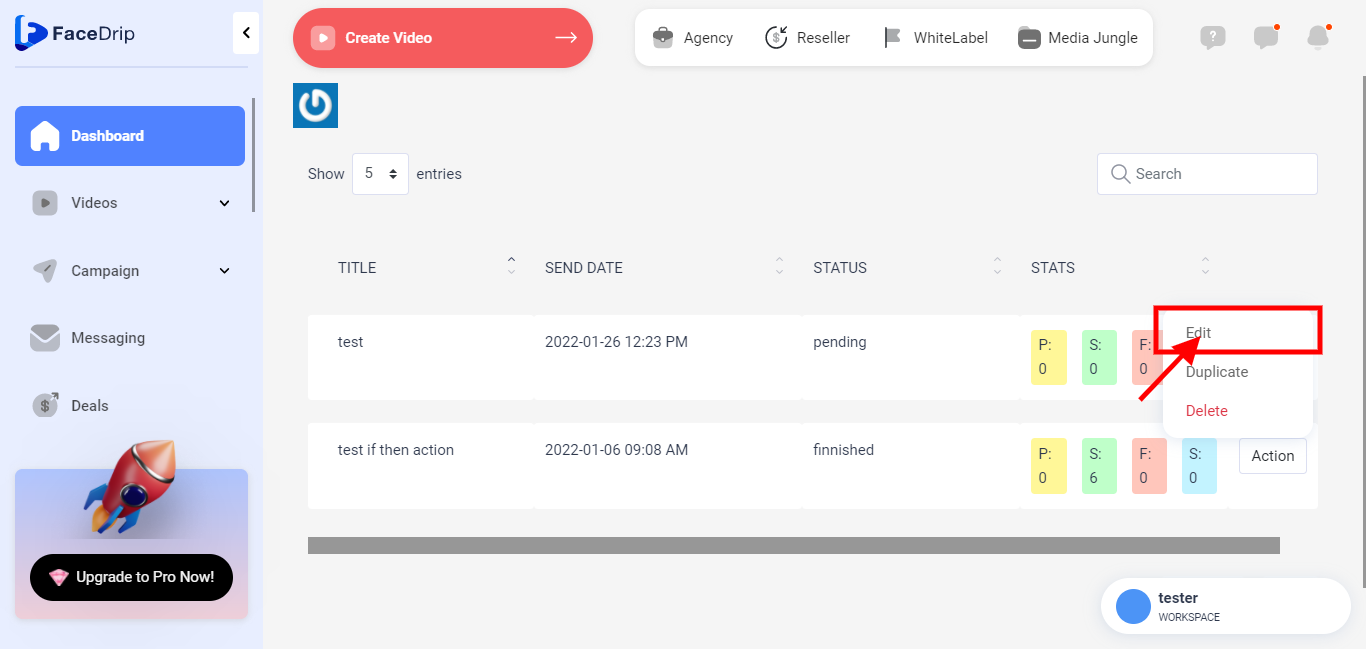
STEP 5: Go to the preferred campaign you would like to edit for example ( Monday campaign) then click on “action”,
STEP 6: In the drop-down menu click on “edit “.
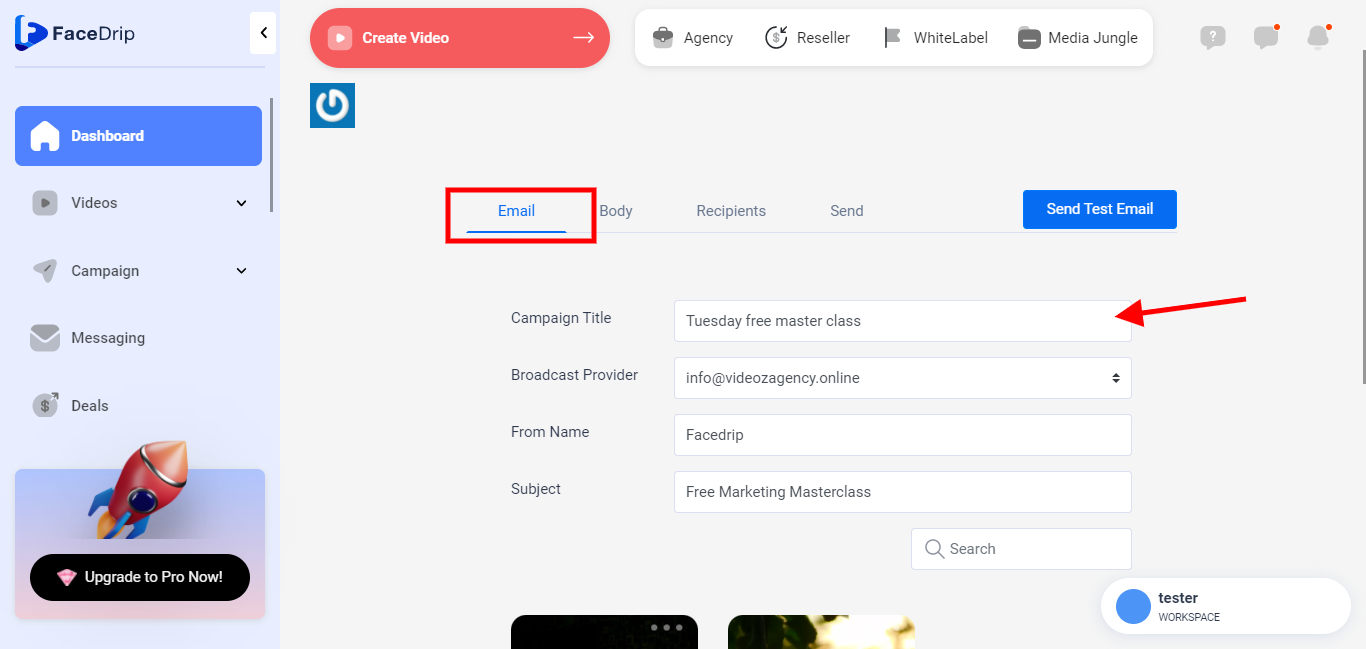
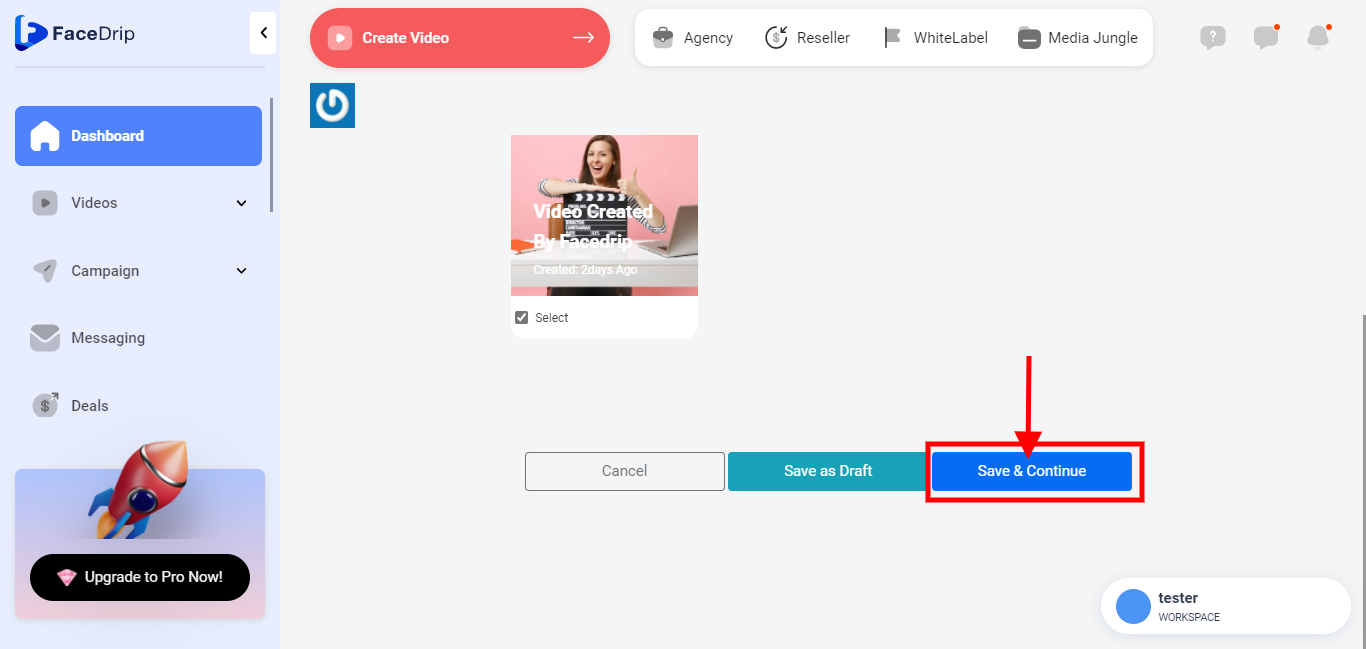
STEP 6: Go to the email tab in the pop-up form to edit campaign title, broadcast provider, from name, subject, and video as desired.
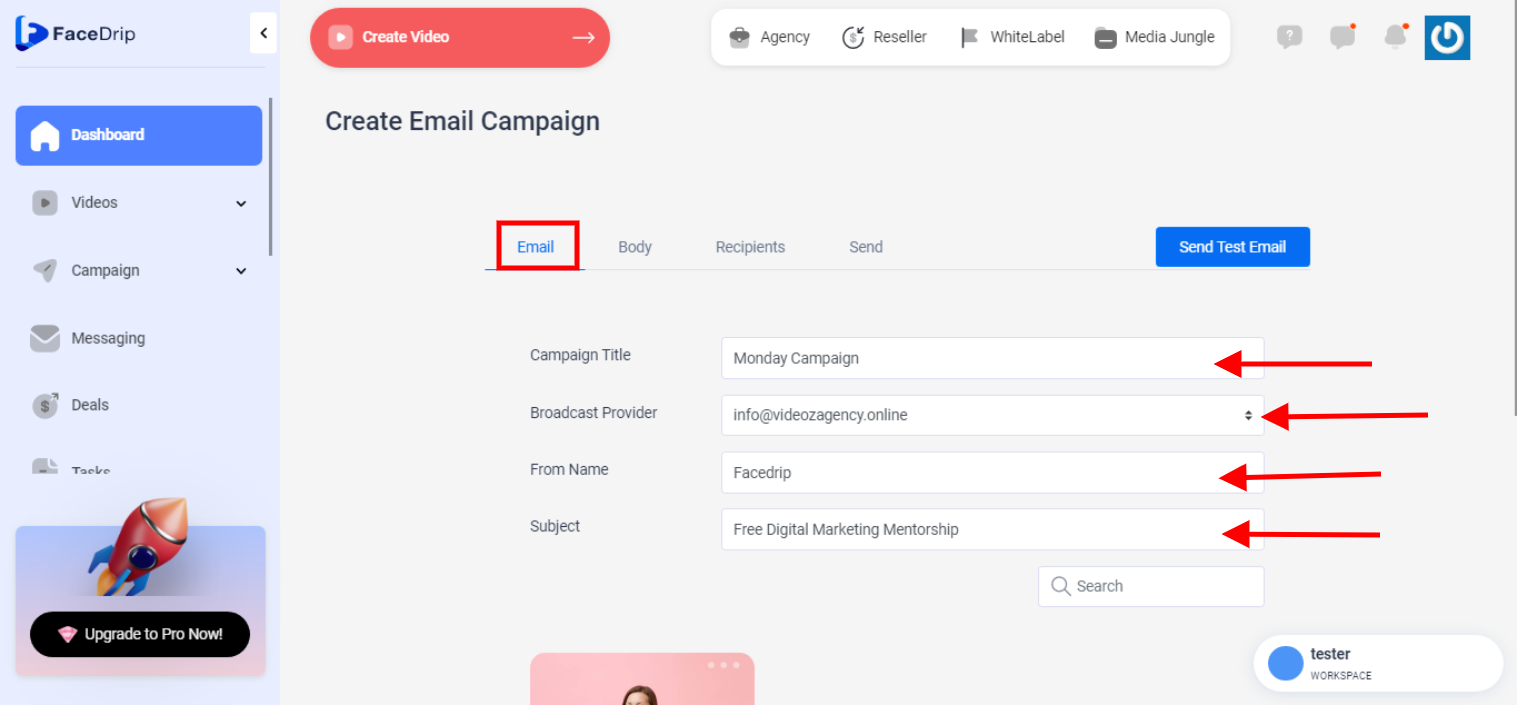
To edit details to the respective fields as shown in the screenshot above please follow this guide;
Click on “campaign title” field to edit your title
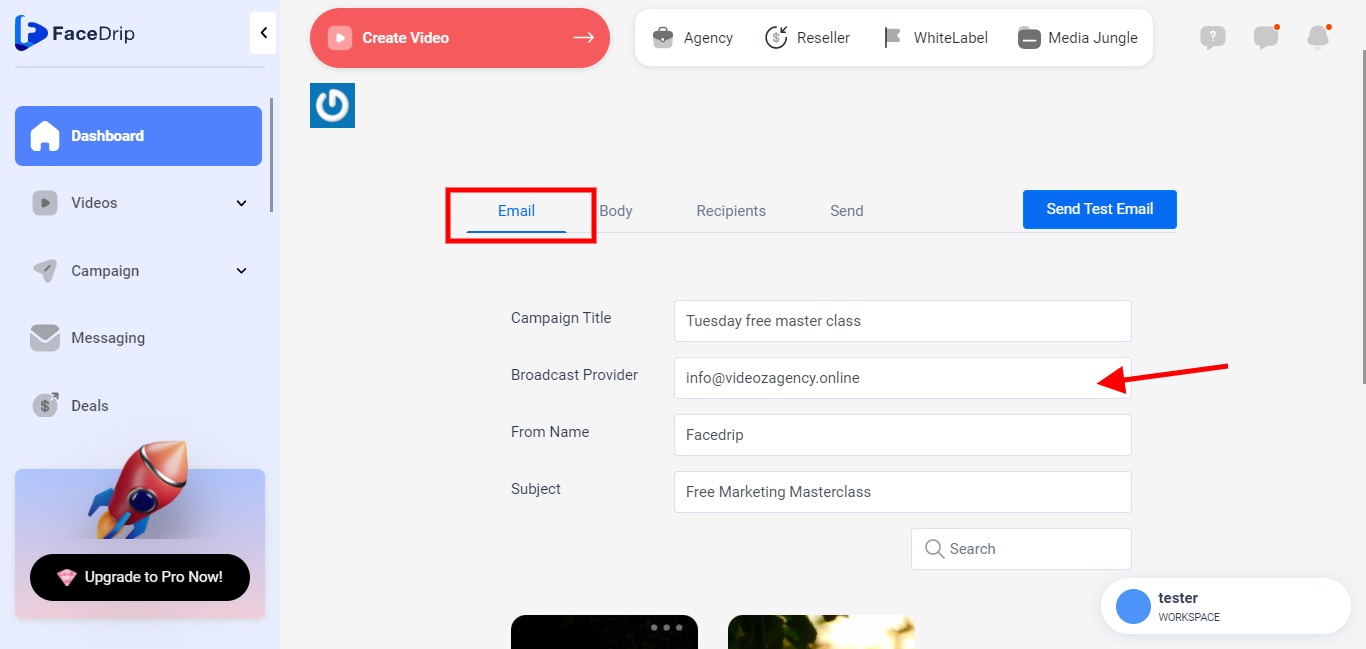
Click on “broadcast provider” field to edit your previously selected email (please kindly follow this link to see how to create broadcast provider)
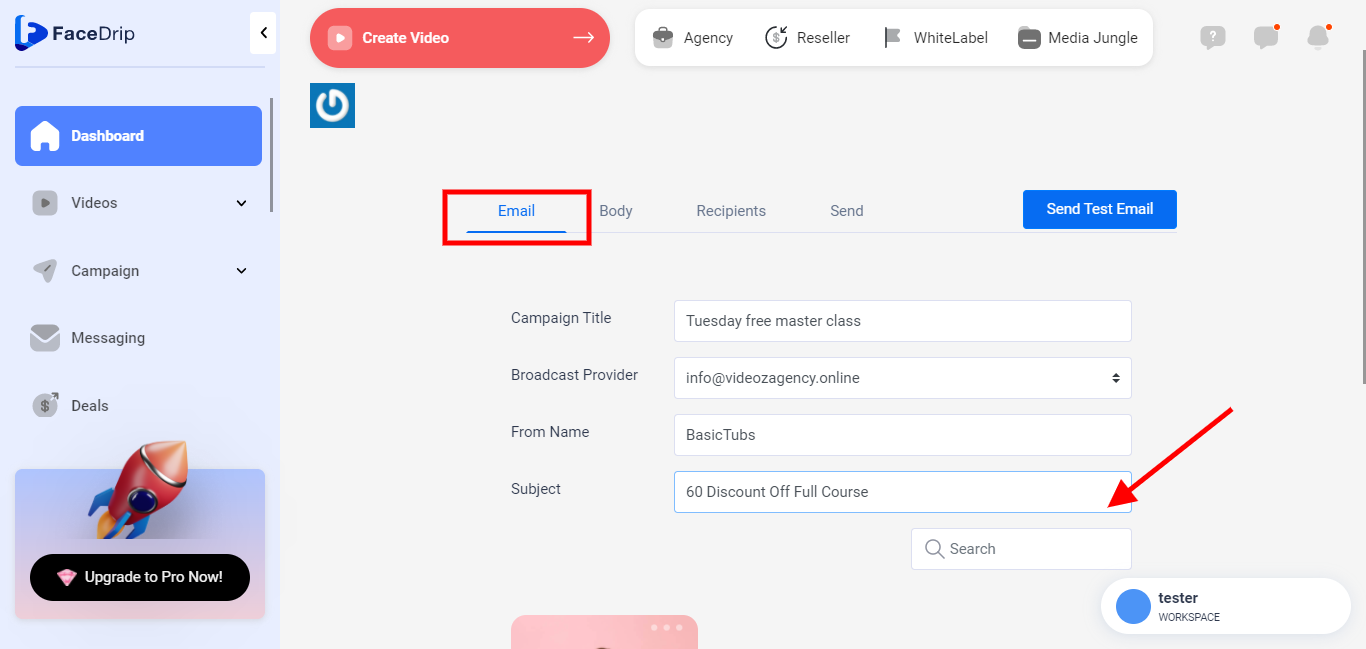
Click on “from name” field to edit sender name

Click on “subject” field to edit details
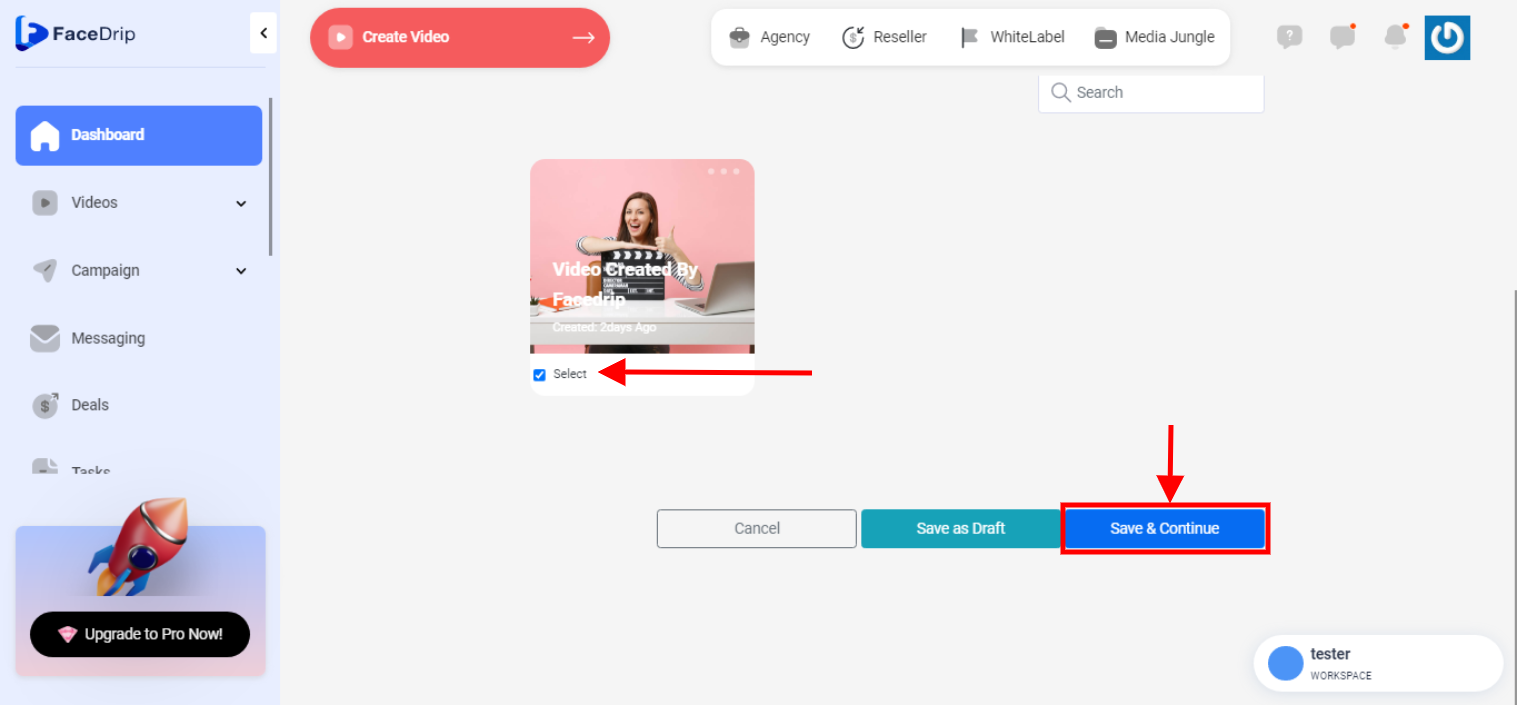
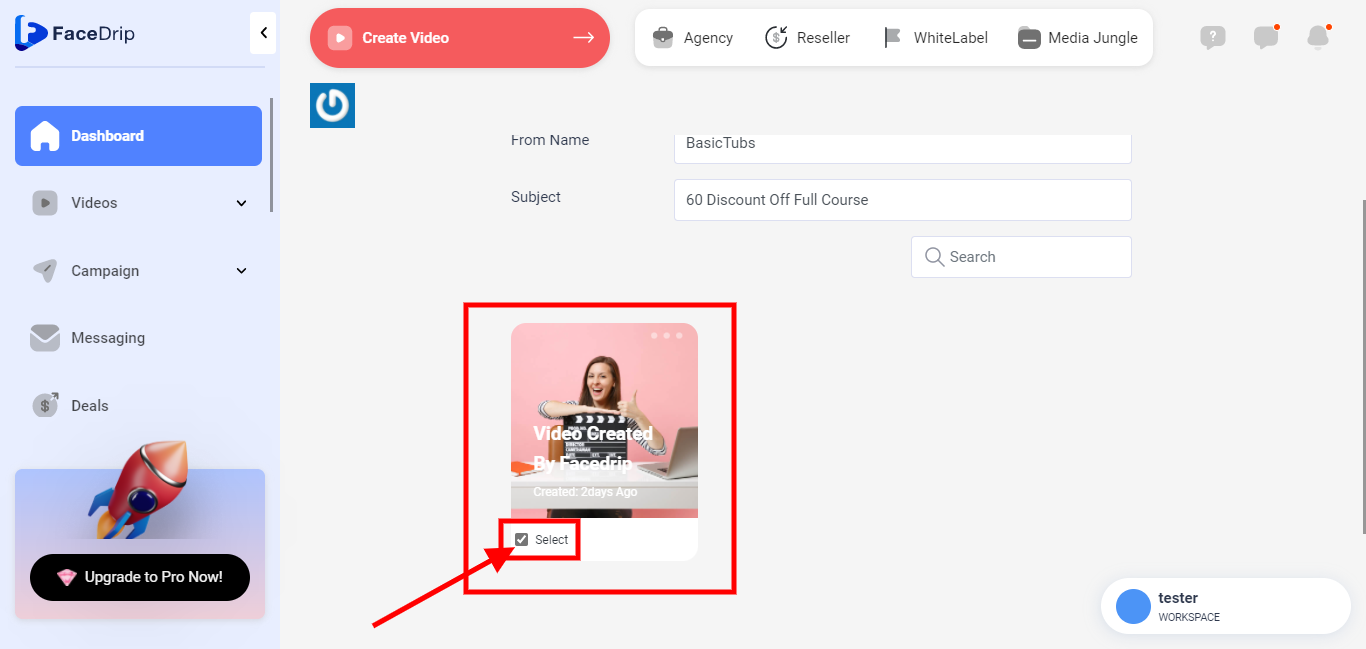
Edit your video choice by clicking on the “select check box” (please kindly follow this link to see how to upload video)
Click on the save and continue button (P.S you would be redirected to the body tab pop up form to continue editing the email campaign with a success message stating that draft was updated successfully)
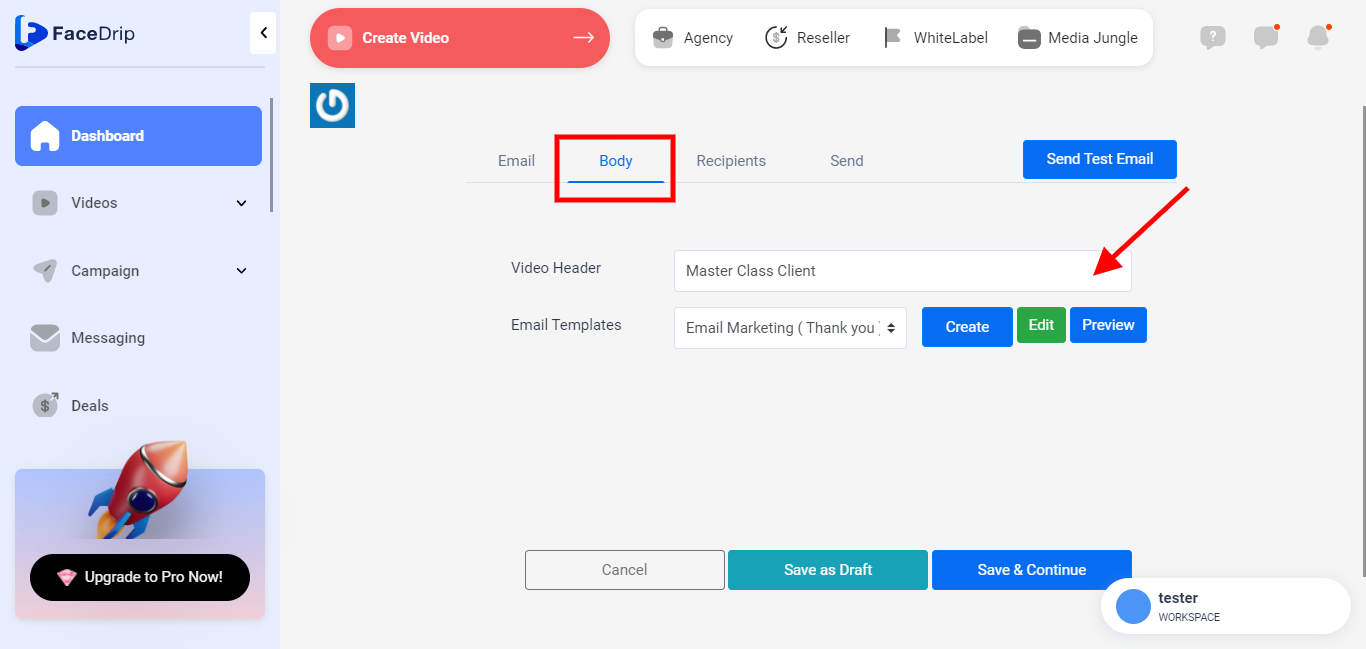
STEP 7: This is the page you will be redirected to see the body tab pop-up form and to edit “video header” and “email templates”.
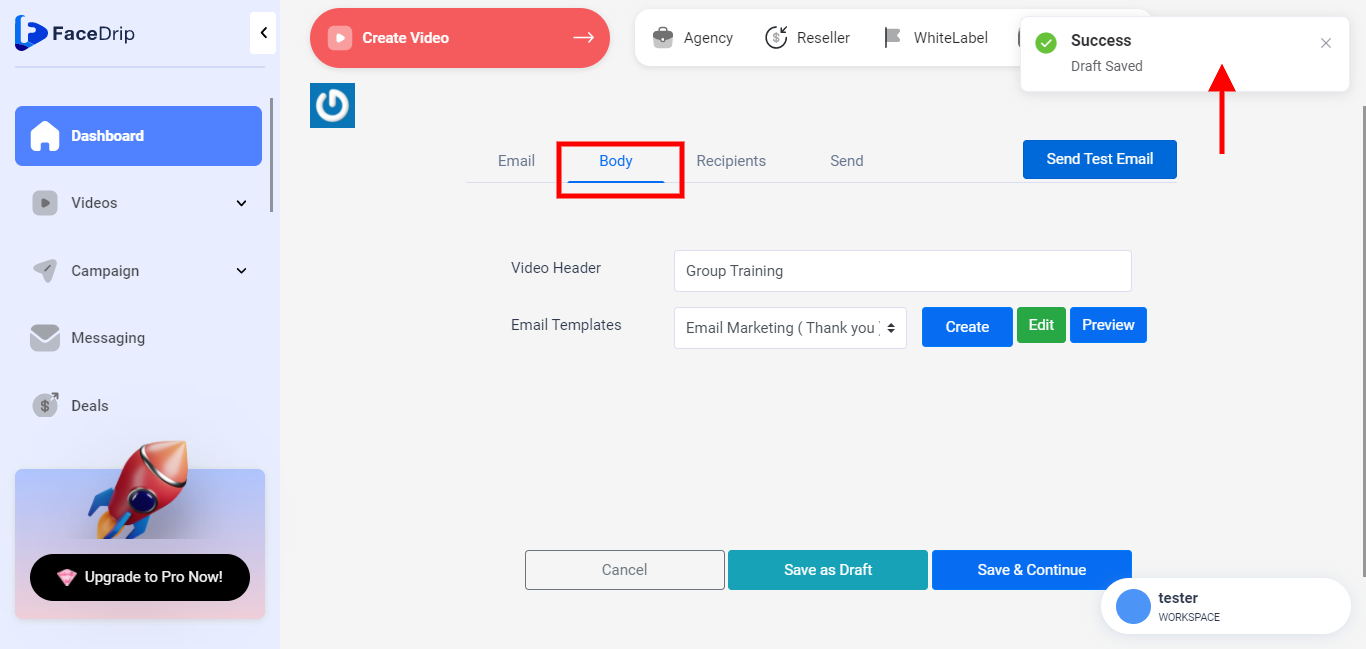
To edit the respective fields in the body tab (“video header” and “email templates”) as shown in the screenshot above please follow this guide;
Click on the “video header” field to edit your video header name
The email templates field has two options to edit;
(a) edit “simple editor” by clicking on the dropdown from the email templates field.
(b) edit “already existing email template” by clicking on the dropdown from the email templates field.
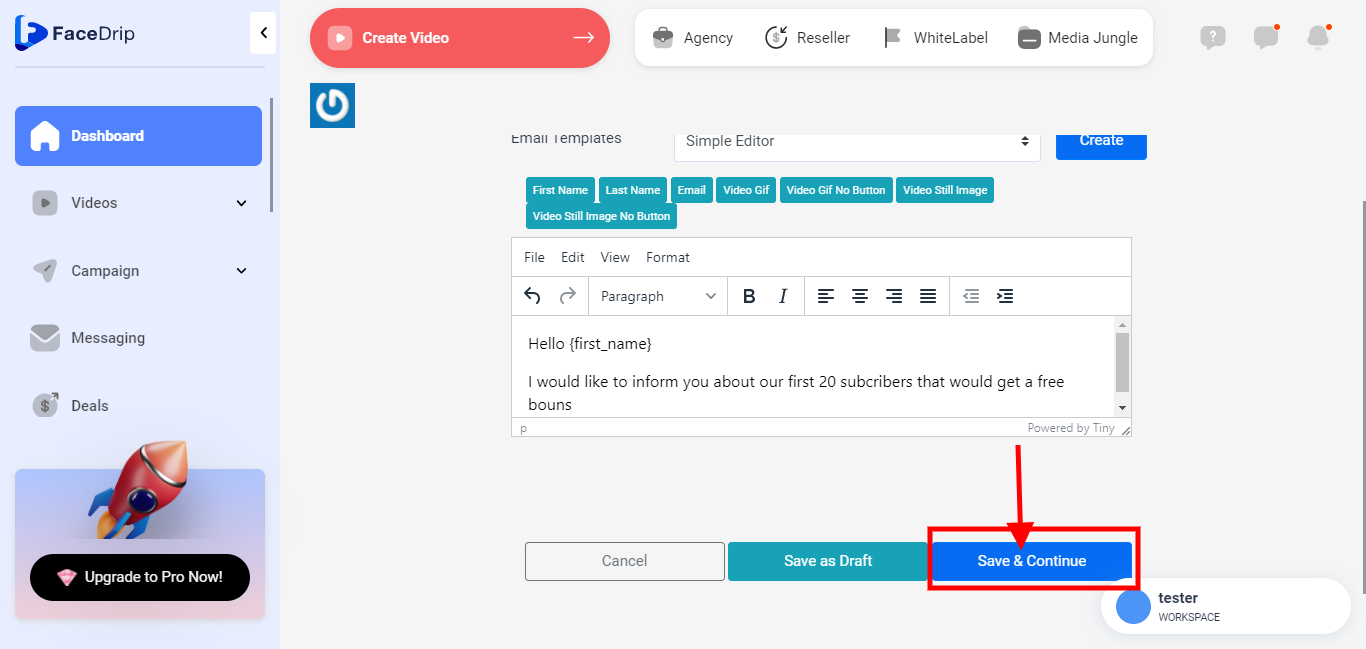
Edit “simple editor” by clicking on the “email templates” field
P.S When you click on the email templates field drop-down select simple editor.

P.S After you select simple editor, edit your text description and also your preferred widget in the text box as shown in the screenshot below
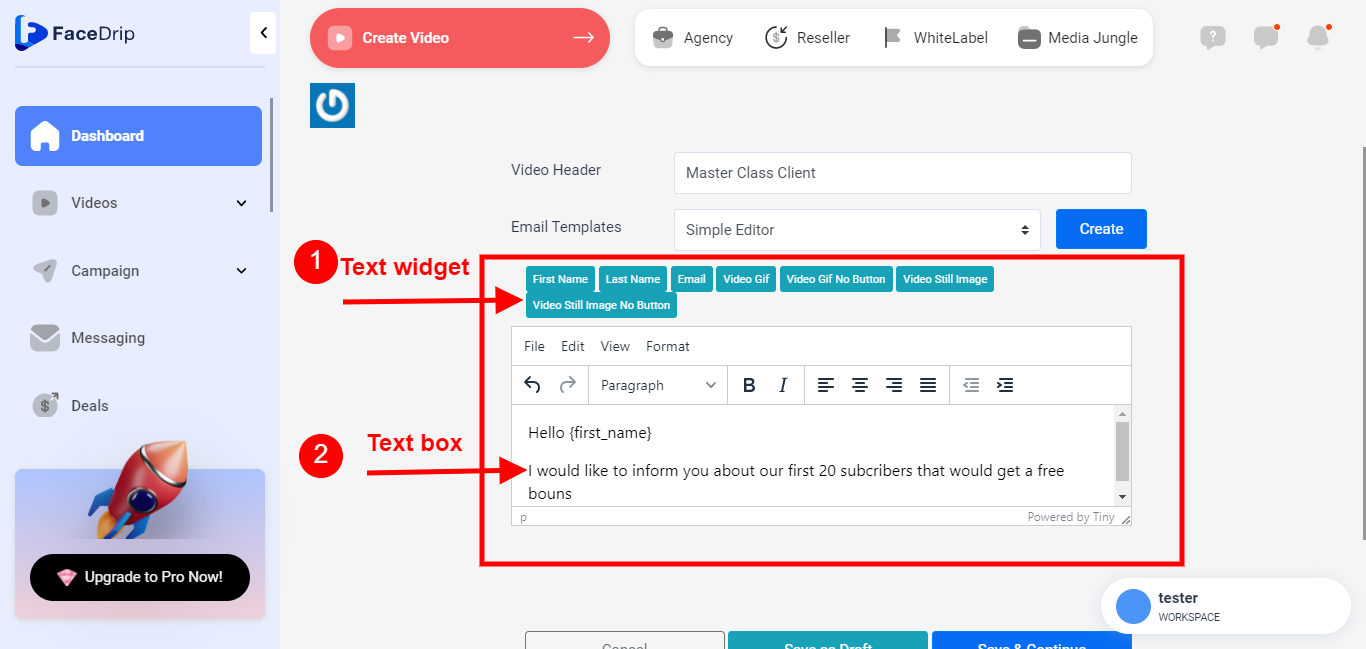
You can click on any of the text widgets to embed a particular element into your email campaign. In the example above, after I entered Hello in the text box I clicked on the {first_ name} widget and {email} widget then when my email campaign is being sent to selected recipients( also known as contact) it will automatically fetch their respective first name and email address. ( i.e. any text widget you click on will automatically be attached to your email campaign e.g. Video Gif, Video Still Image, etc.)
Click on the save and continue button (P.S you would be redirected to the recipient’s tab form to continue editing the email campaign with a success message stating that draft was updated successfully)
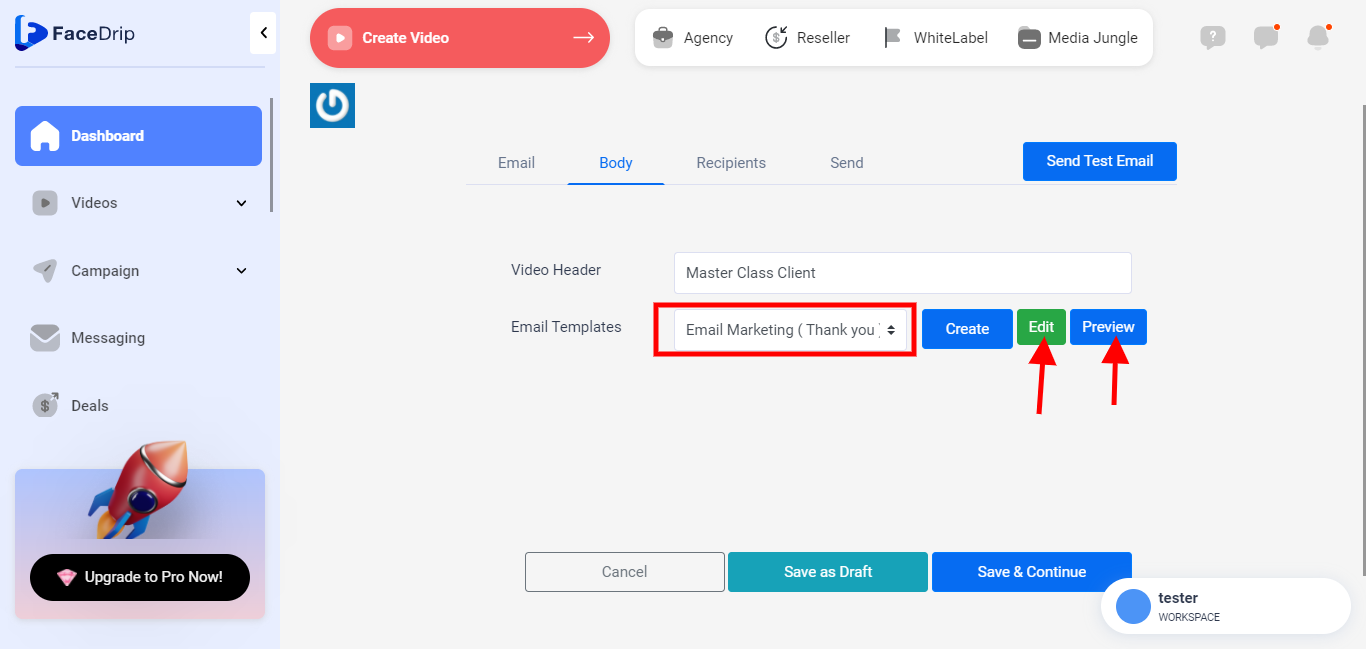
Edit “already existing templates” by clicking on the “email templates” field
P.S When you click on the email templates field drop-down select preferred already existing templates.
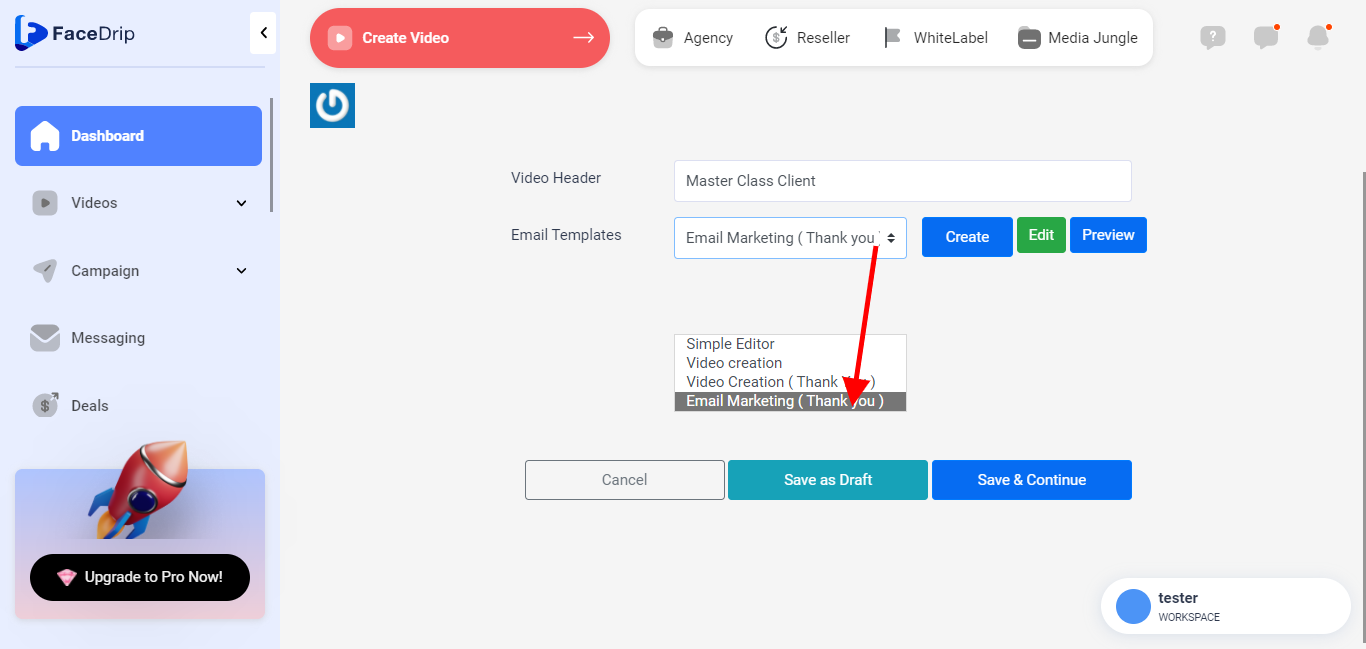
(click on this link to see how to create a new email template)
Green Edit Button: This button would redirect you to a page builder to enable you to make changes to your selected email template.
Blue Preview Button: This button would redirect you to a preview page builder to enable you to see your selected email template.
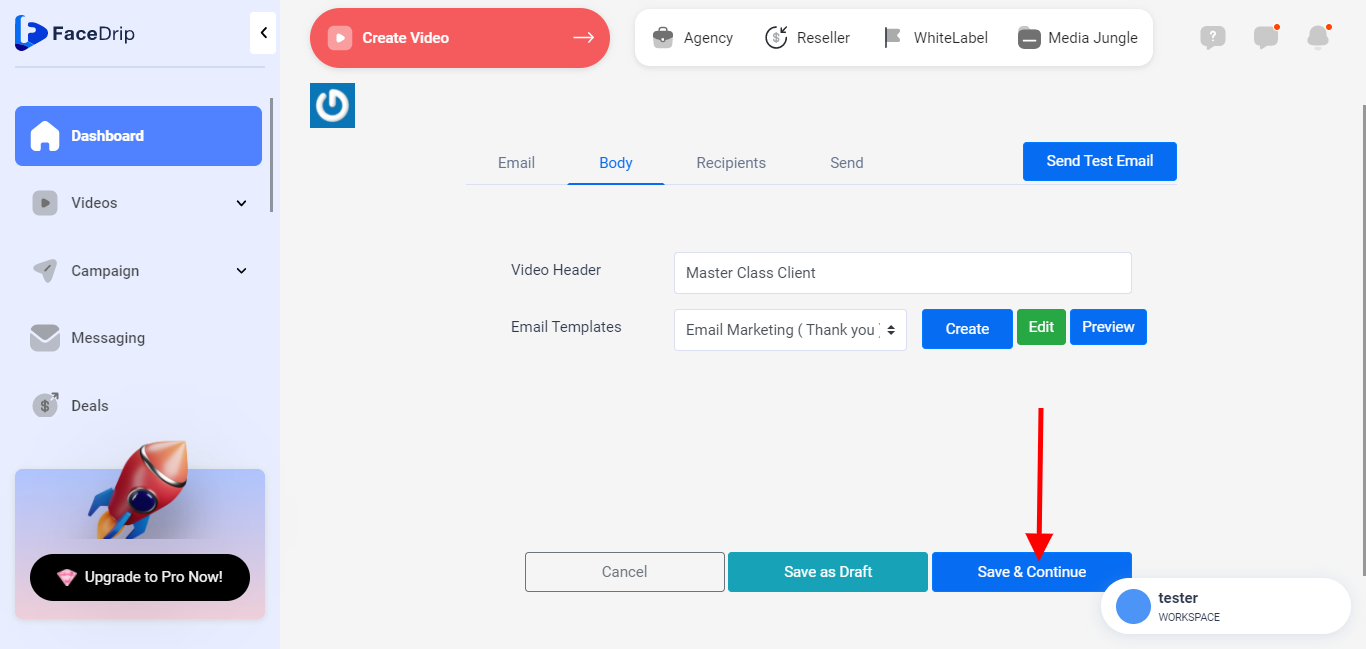
Click on the save and continue button (P.S you would be redirected to the recipient’s tab form to continue editing the email campaign with a success message stating that draft was updated successfully)
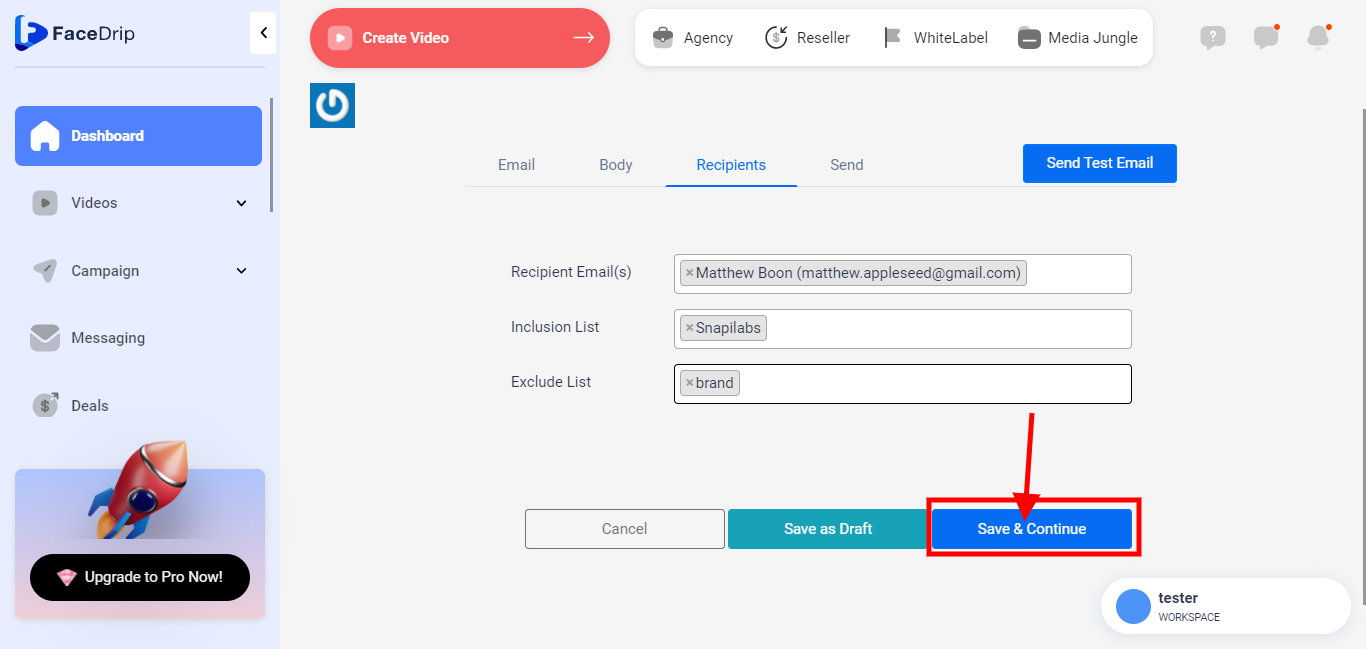
STEP 8: This is the page you will be redirected to see the recipients tab in the pop-up form to edit “recipient email(s)”, “inclusion list” and “exclude list”.
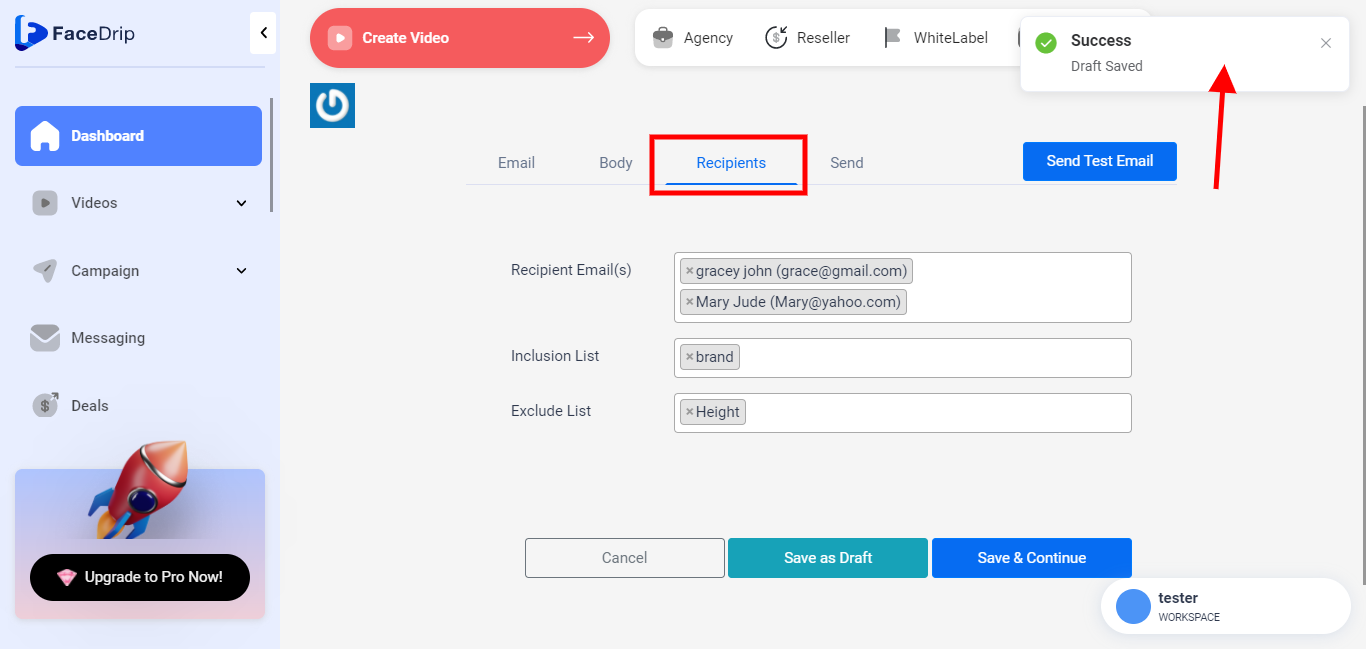
To edit details to the respective fields in the recipients’ tab (“recipient email(s)”, “inclusion list” and “exclude list”) as shown in the screenshot above please follow this guide;
Click on the “recipient email(s)” field to edit contact email(s) (please kindly follow this link to see how to create contact)
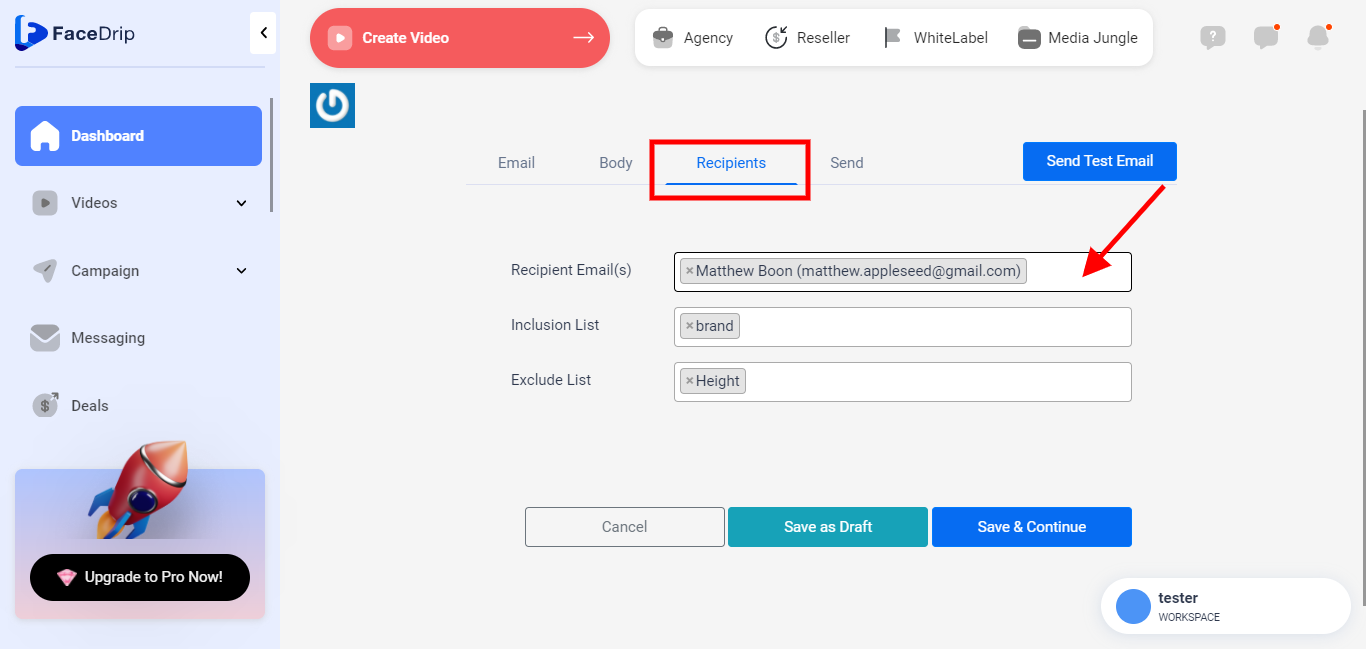
P.S You can select multiple contacts to add as your recipient email(s)
Recipient Email: The recipient email is the particular contact(s) that you would want to receive your email campaign.
Click on the “Inclusion list” field to edit contact tag(s) (please kindly follow this link to see how to create connection tag)
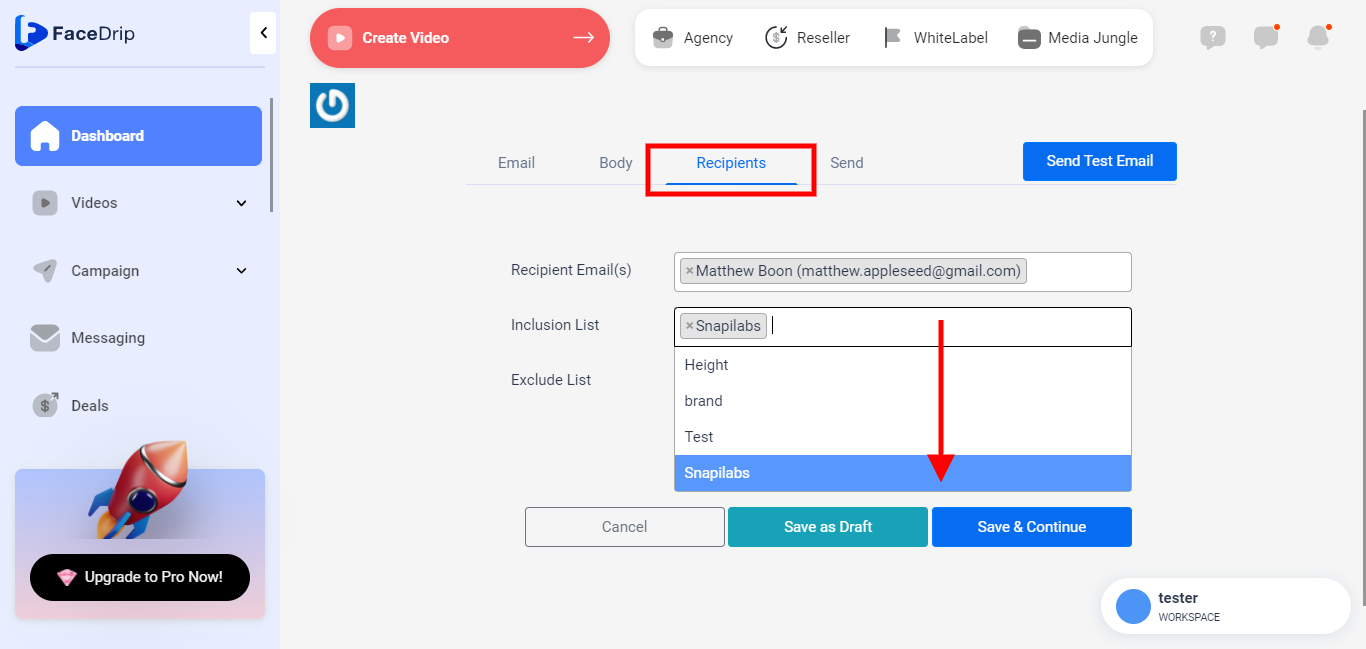
P.S You can select multiple contact tag(s) to add to your inclusion list
Inclusion List: The inclusion list is a segment list that only includes the specific contact(s) already tagged e.g. e-commerce customers, Mobile customers, (Height, Brand, Test, Snapilabs ), etc. to receive a particular email campaign.
If you want to edit this email campaign using our example above it would only include contacts tagged as Snapilabs and strictly for “women” within the age range of “18-29”.
Click on “exclude list” field to edit contacts that aren’t tagged to receive a particular email campaign (please kindly follow this link to see how to create connection tag)
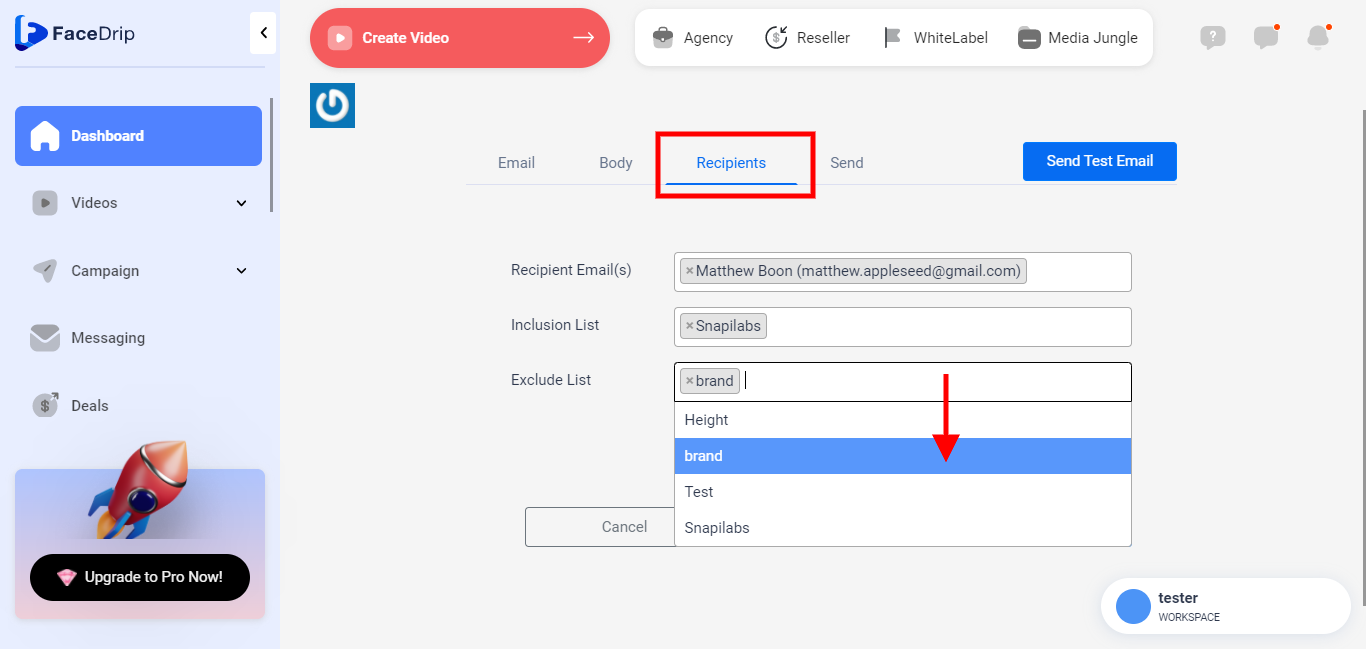
P.S You can select multiple contact tag(s) to add to your exclude list
Exclude List: The exclude list is also a segment list of contact(s) that do not belong to the already tagged list to receive a particular email campaign e.g. ( BRAND, TEST, SNAPILABS ).
If you want to send this email campaign using our example in the inclusion list it would exclude contacts not tagged as “Brand” for “women” within the age range of “18-29”. This means that even contact tagged under the general fashion customers (women) would be uniquely identified just by the age range of “18-29”.
Click on the save and continue button (P.S you would be redirected to the send tab pop up form to continue editing the email campaign with a success message stating that draft was updated successfully)
STEP 9: This is the page you will be redirected to see the send tab in the pop up form to edit as desired to “send email campaign”
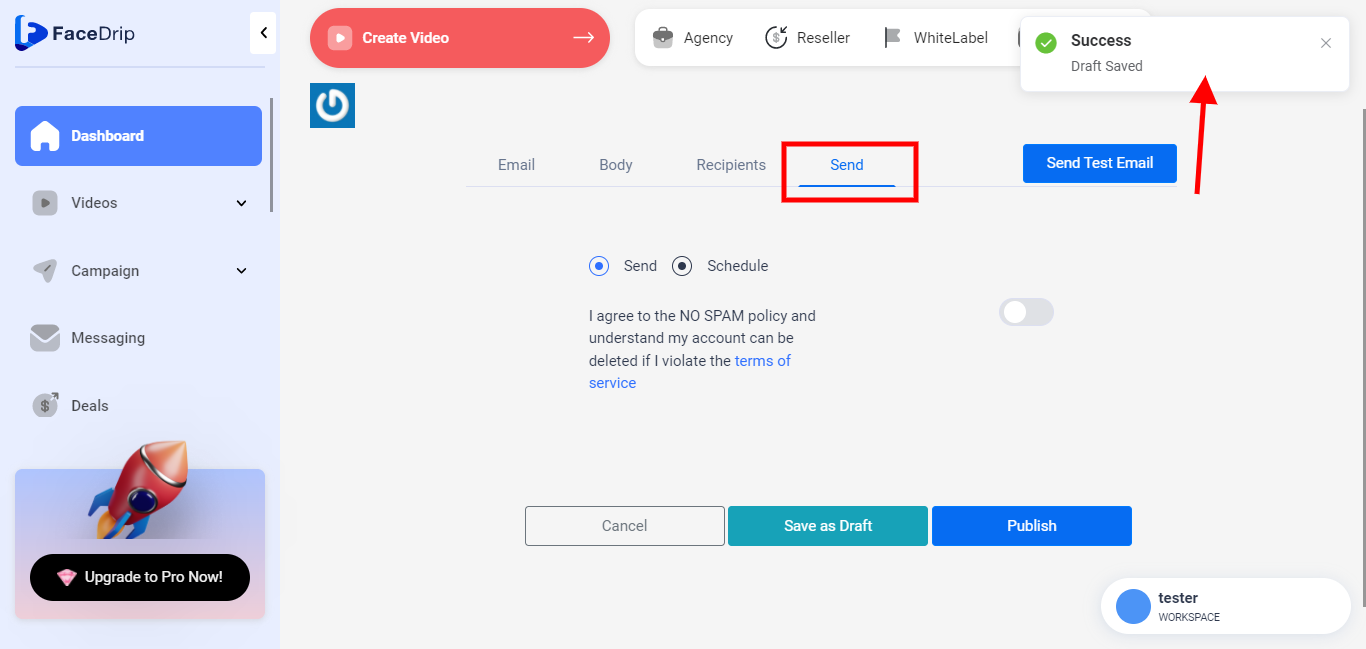
You can send an email campaign with the following options;
(a) clicking on the send test email button
(b) clicking on the send radio button
(b) clicking on the schedule radio button
Send “email campaign” by clicking on the “send test email” button
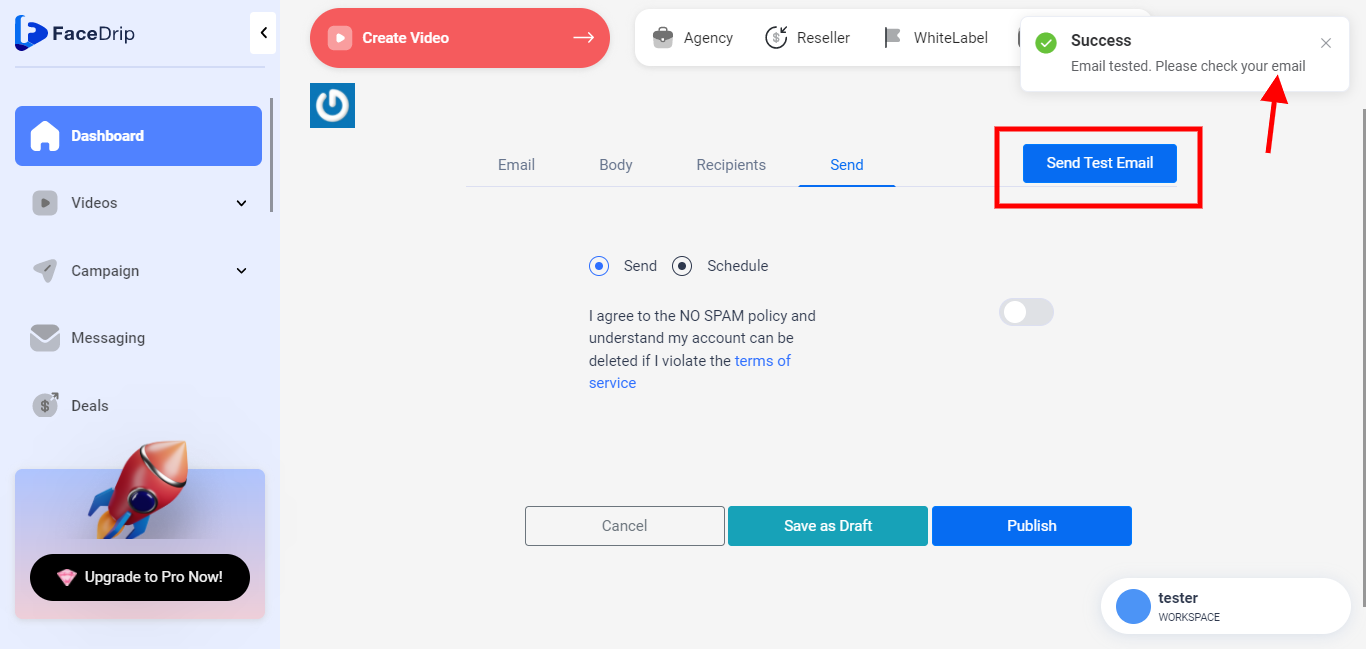
The test email is usually sent to the email used in setting up your facedrip account.
P.S You can send a test email by clicking on the “blue send test email button” and you will be able to see a pop-up success message stating that the email has been tested as shown above in the screenshot and you should check your email.
Send “email campaign” by clicking on the “send radio button” button and click the no-spam policy toggle button then publish.
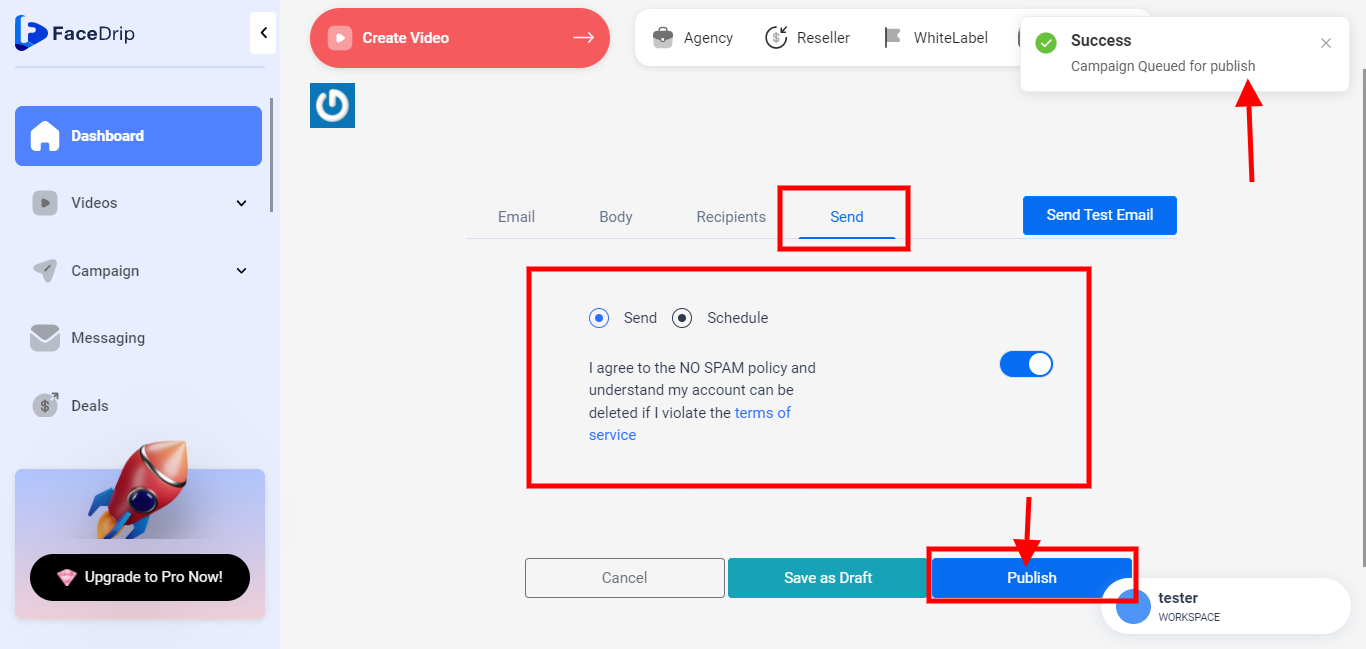
P.S After you click the publish button you will see a pop-up success message stating that the campaign has been queued for publishing then you will be redirected to your campaign dashboard.
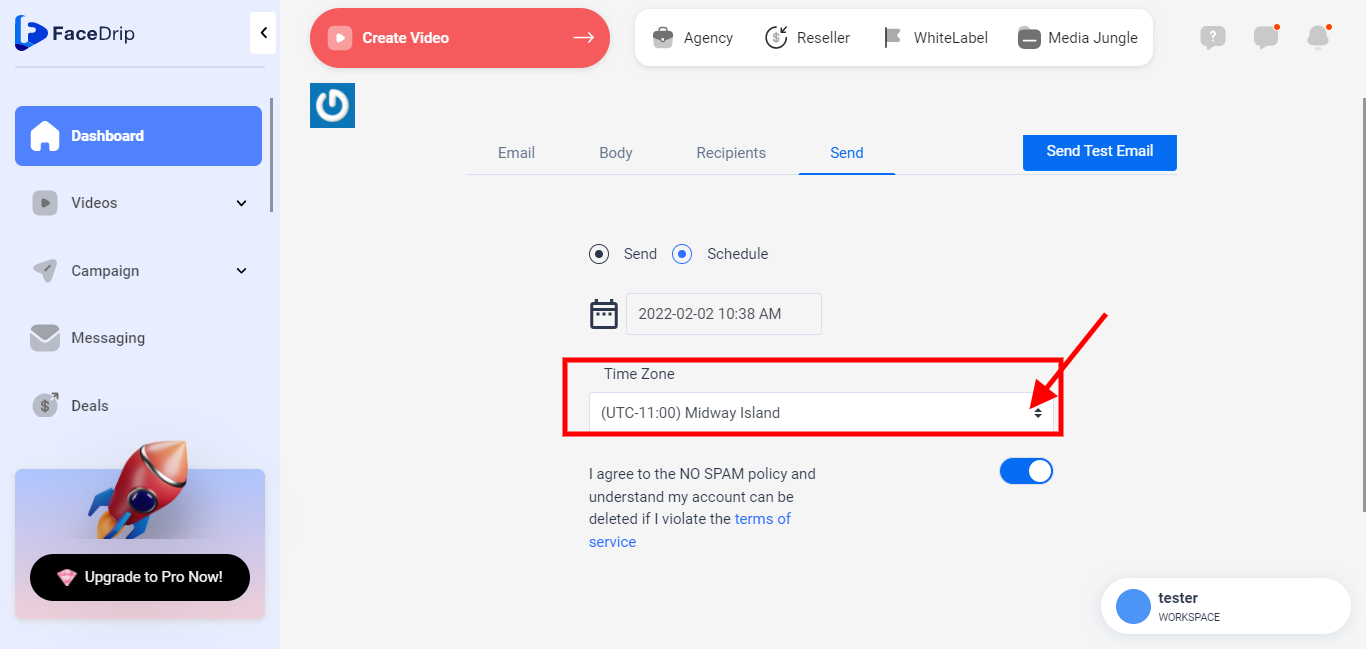
Send “email campaign” by clicking on the “schedule radio button”, click on the calendar field to see the dropdown, and edit preferred month, year, date and time then edit your preferred time zone as well, and turn on the no-spam policy toggle button.

P.S You can edit your time zone by clicking on the field as shown in the screenshot below;
Click on either the save as draft, publish, or the cancel button.
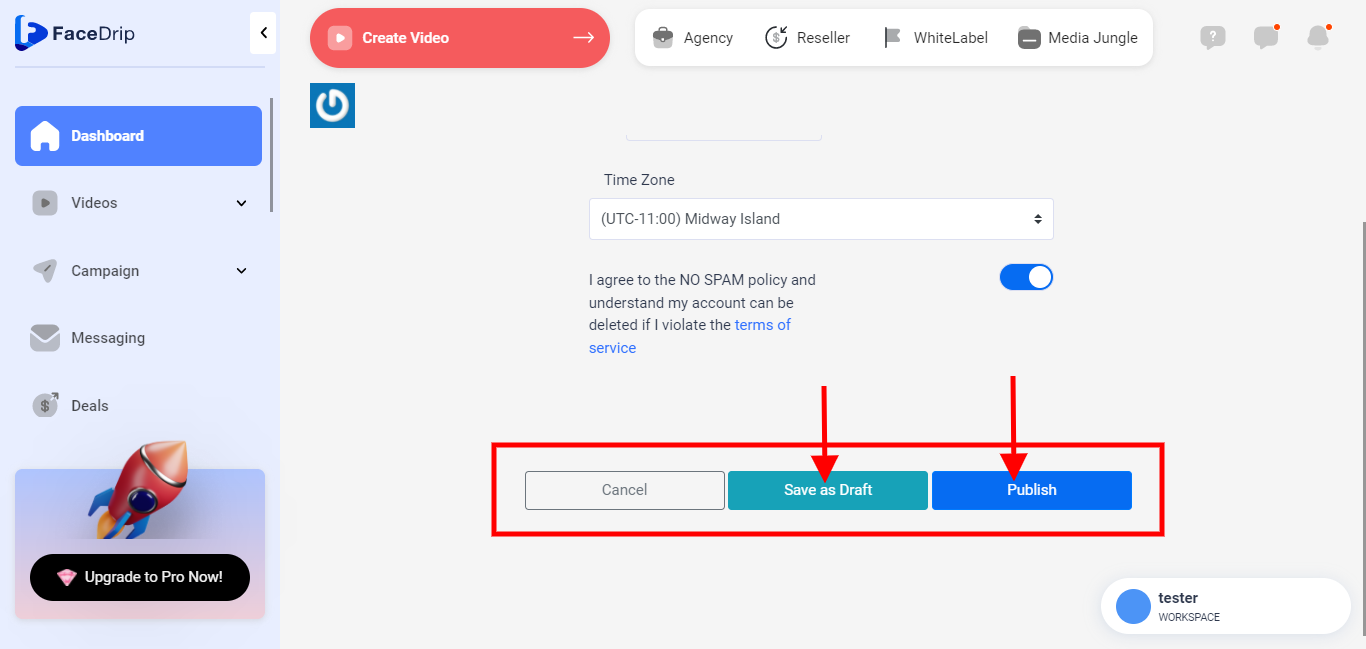
Publish Button: This button would save and publish your email campaign either with the send or schedule option and redirect you to the email campaign dashboard.
Save as Draft Button: This button would only save your email campaign and would not send it.
Cancel Button: This button would not save your changes and will redirect you to the email campaign dashboard.