To get started, you only need the basics:
- Sign Up from the Acuity scheduler home page (the Acuity scheduler will walk you through the whole process).
- Set your availability for appointments.
- Set up at least one appointment type.
- Send your clients to your scheduling page.
Let Acuity know when you’re available:
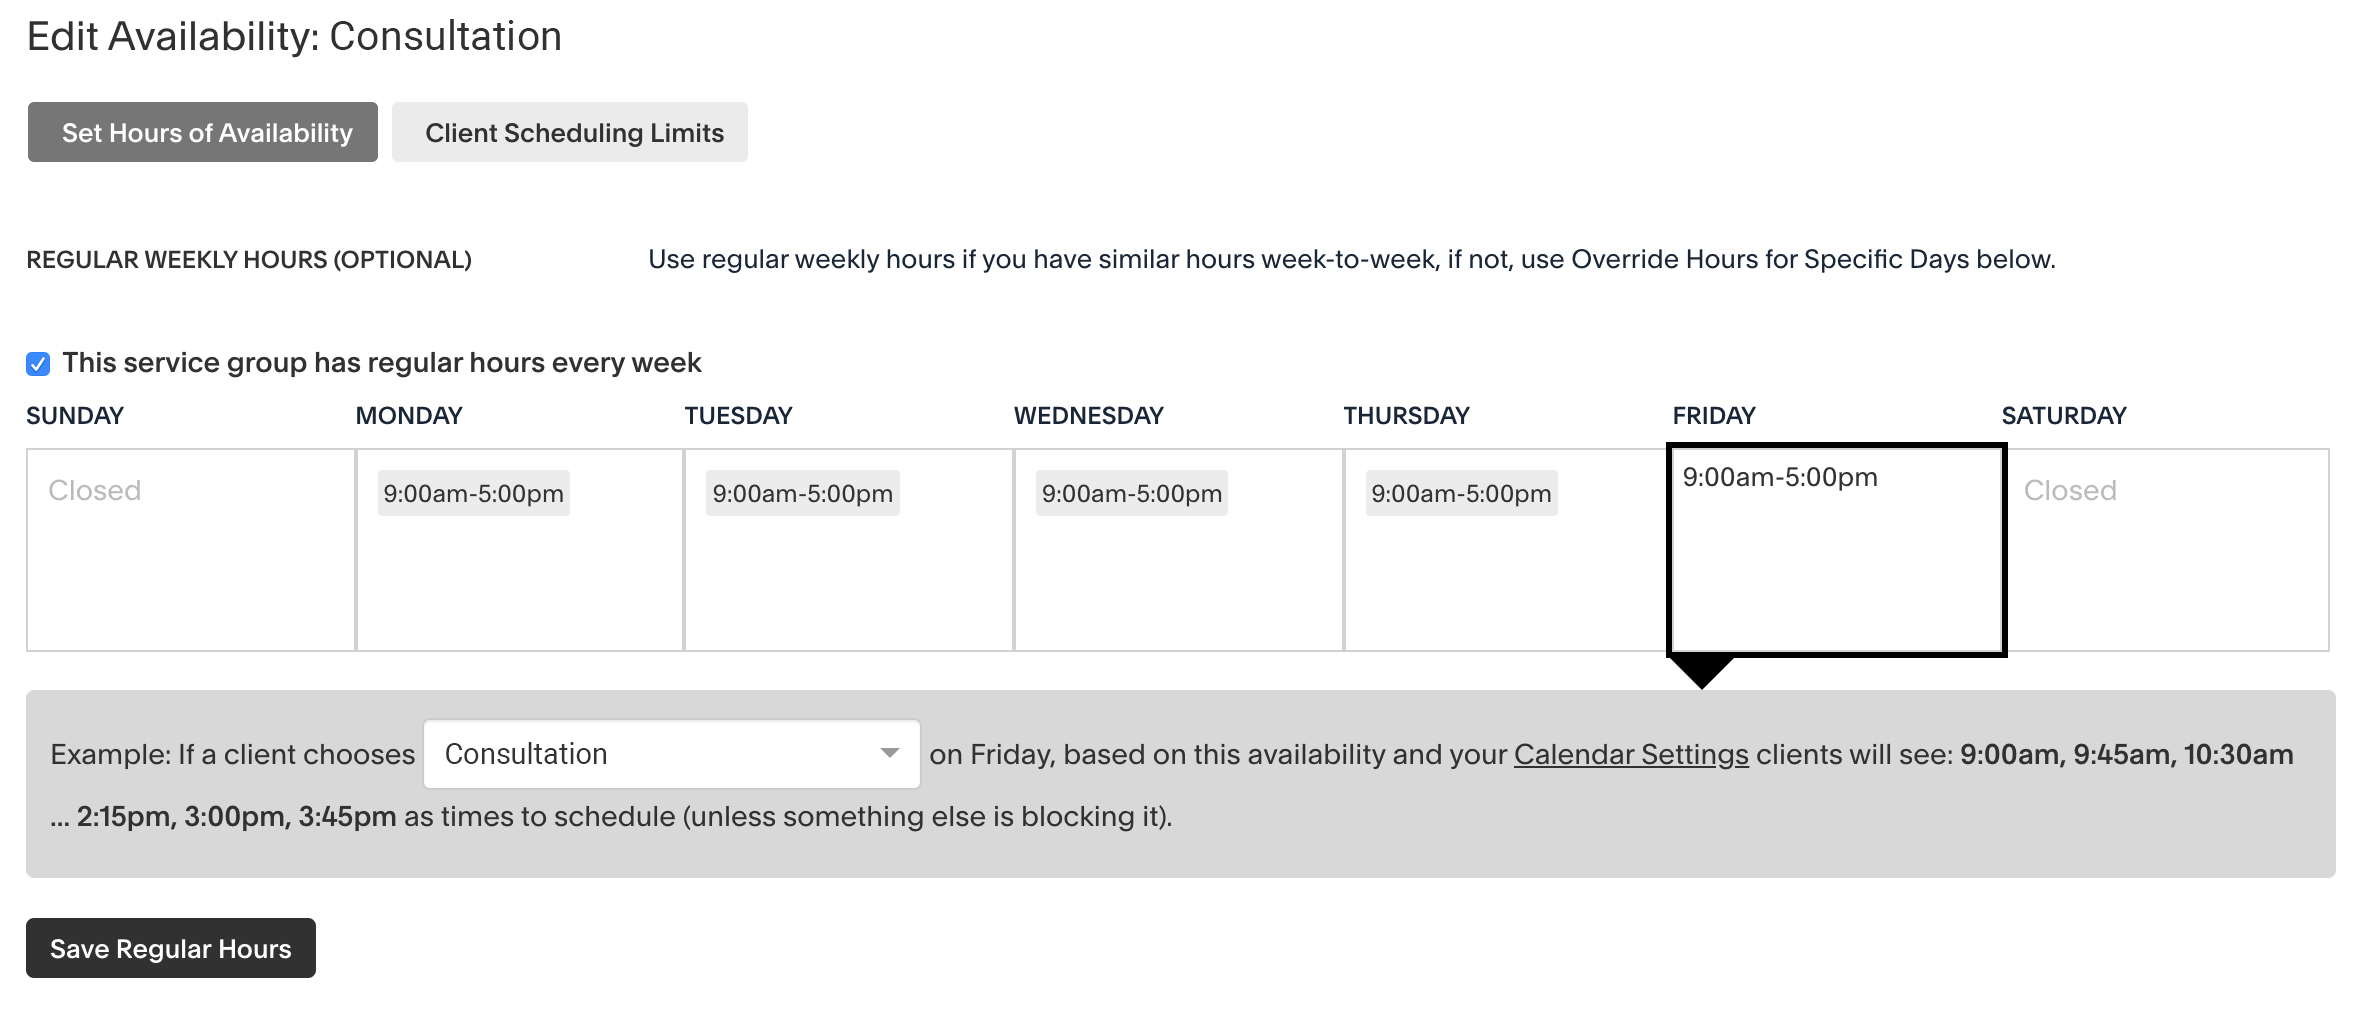
- Go to your Availability settings.
- If you have more than one calendar, click the Edit Availability/Limits button for the calendar for which you want to set availability.
- If there are days of the week that you are always available at the same times — the same hours each Monday, each Tuesday, etc. — you have regular weekly hours. Use the boxes at the top to enter your hours (replacing the default hours that Acuity has automatically entered for you), then click the Save Regular Hours button.
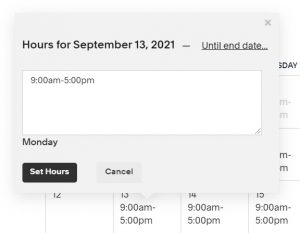
- If you don’t have regular weekly hours, uncheck the box next to I have regular hours every week, then click the Save, switch to Specific Days button that appears.
- Then click on individual days, enter your hours and click Set Hours.
Read More About Availability:
Set up an appointment type:
- Navigate to Business Settings > Appointment Types.
- Choose the Appointment types you want to setup
- Now go through and update the details to fit your needs.
- When you have everything the way you want it, click the Create Appointment Type button at the bottom of the page.
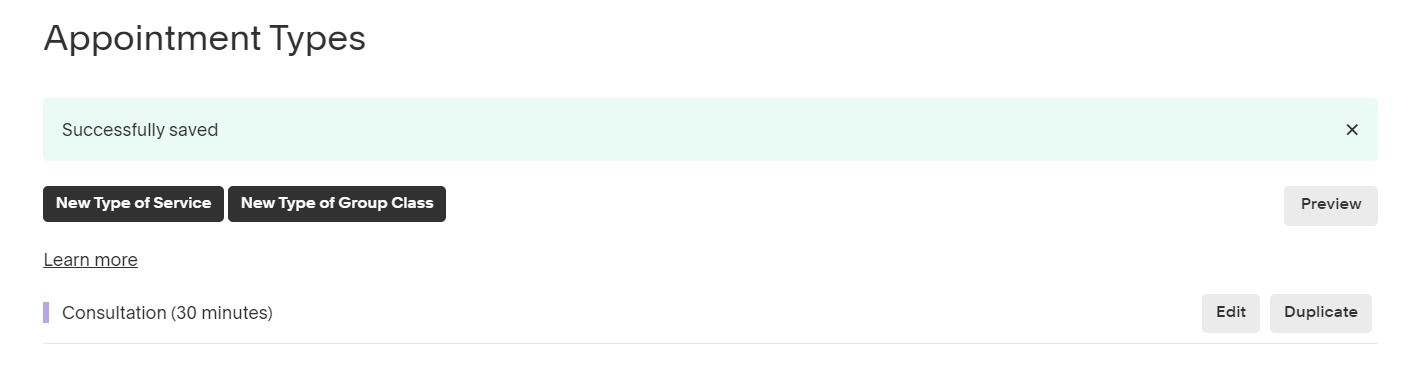
- If you need more than one appointment type, use the New Type of Service button to create it.

Read More About Appointment Types:
Public & Private Appointment Types
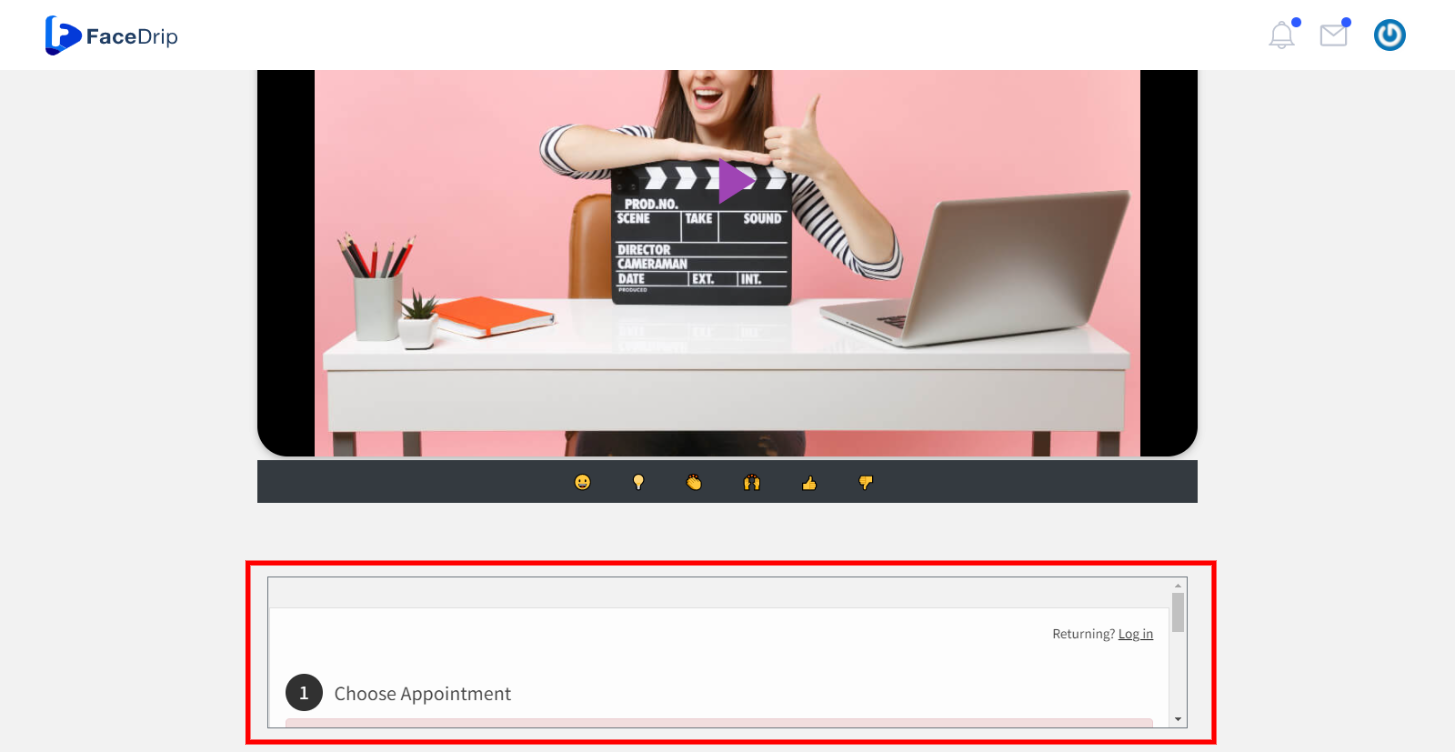
Send your clients to your scheduling page:
- Navigate to Client’s Scheduling Page > Scheduling Page Link and click on it. (Again, on desktop, this will be on the left side of your screen. On mobile, tap the icon with four horizontal lines in the upper left of the screen.)
- Copy the link that shows up at the top.

- Go to your Facedrip account and paste it directly in the field labeled Scheduling Link When creating Calendar CTA Type with the Acuity Scheduler Radio button Checked. Follow the link on How To Create Calendar CTA Type to learn more.
- Upon successfully adding the Calendar CTA type for Acuity Scheduler to the video (Follow this link on how to add CTA to Video), you will find the Acuity Scheduler modal in the video view page as shown below