You can create a Call-To-Action (CTA) to add to your video in a few simple steps. Kindly follow the steps below:
Getting Started Creating a call-to-action (CTA)
Log in to your Facedrip account.
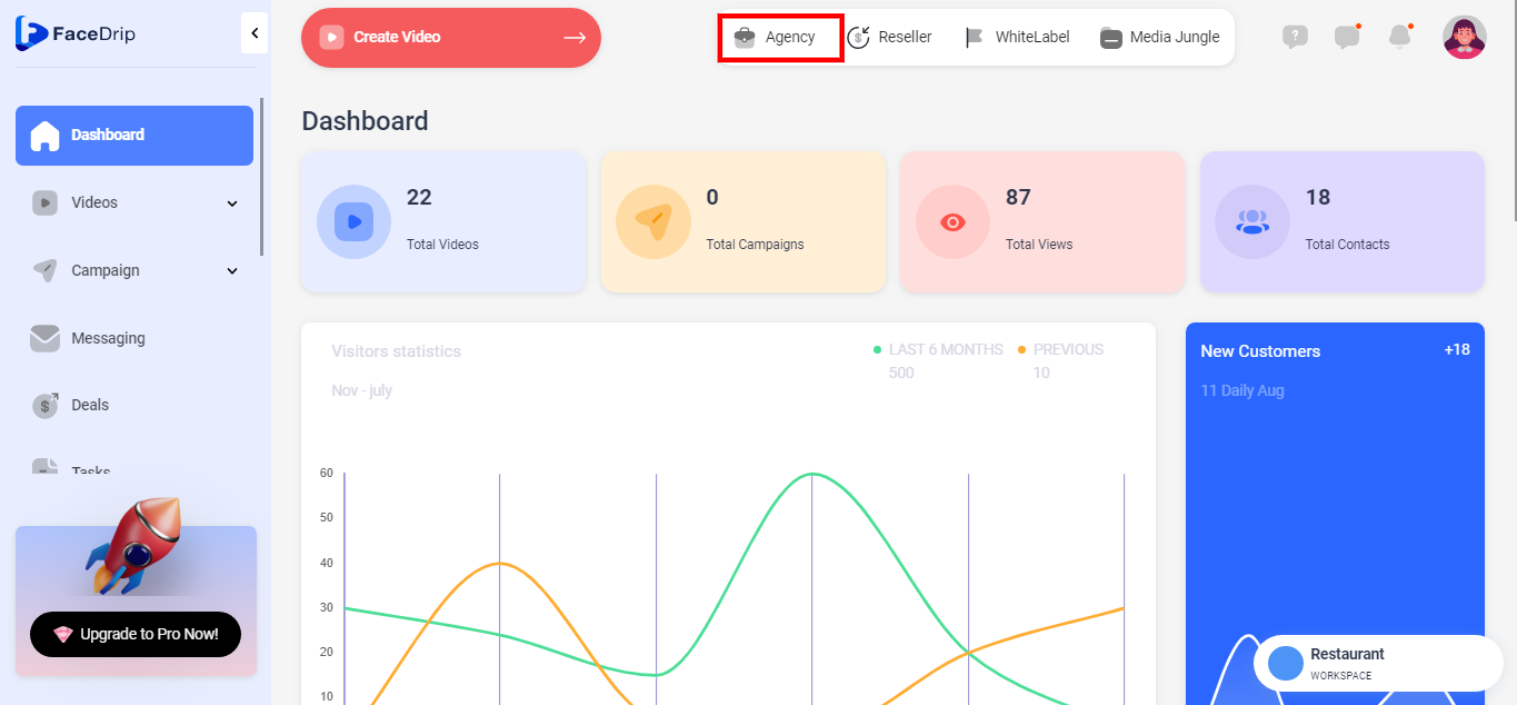
STEP 1: Click on the ‘Agency’ on the top side menu bar of your dashboard.
STEP 2: Click on ‘Workspace’ in the options below.
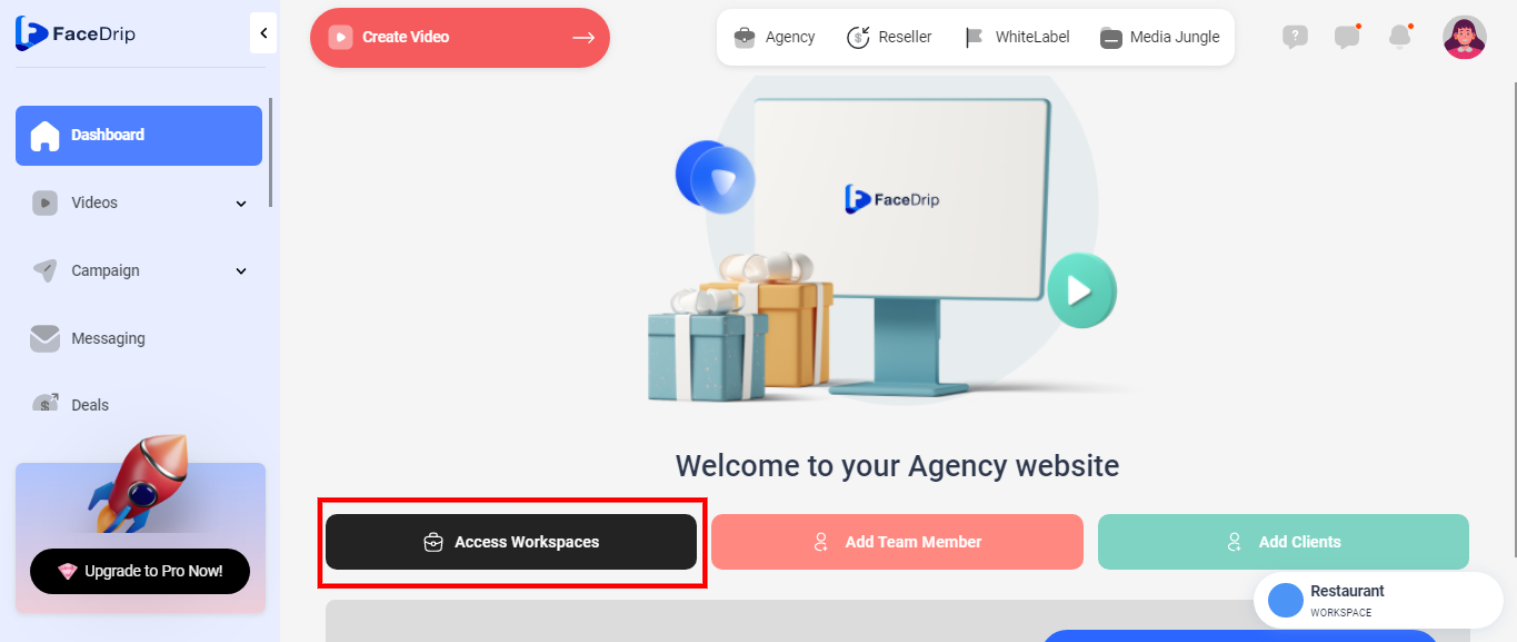
STEP 3: Choose the workspace you want to create New Call-to-action on and click the ‘Activate Workspace’ button. (follow this link on How To Create New Workspace)
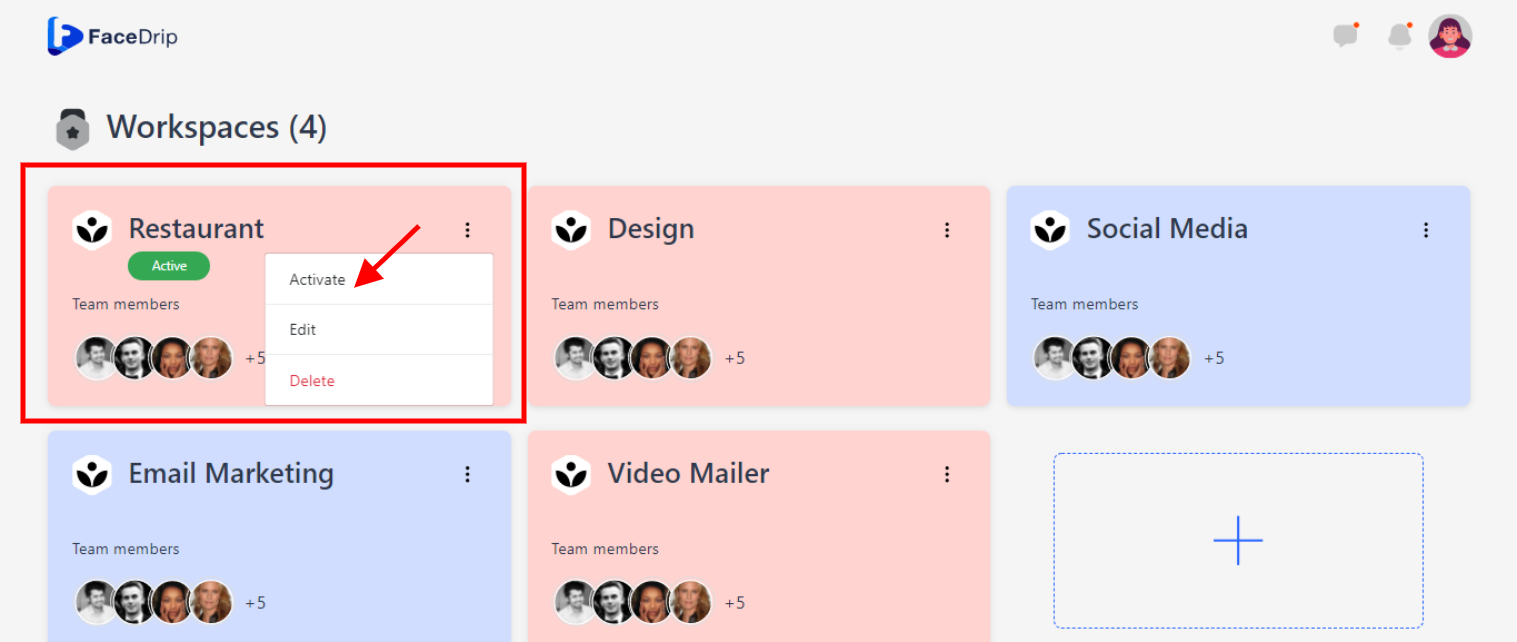
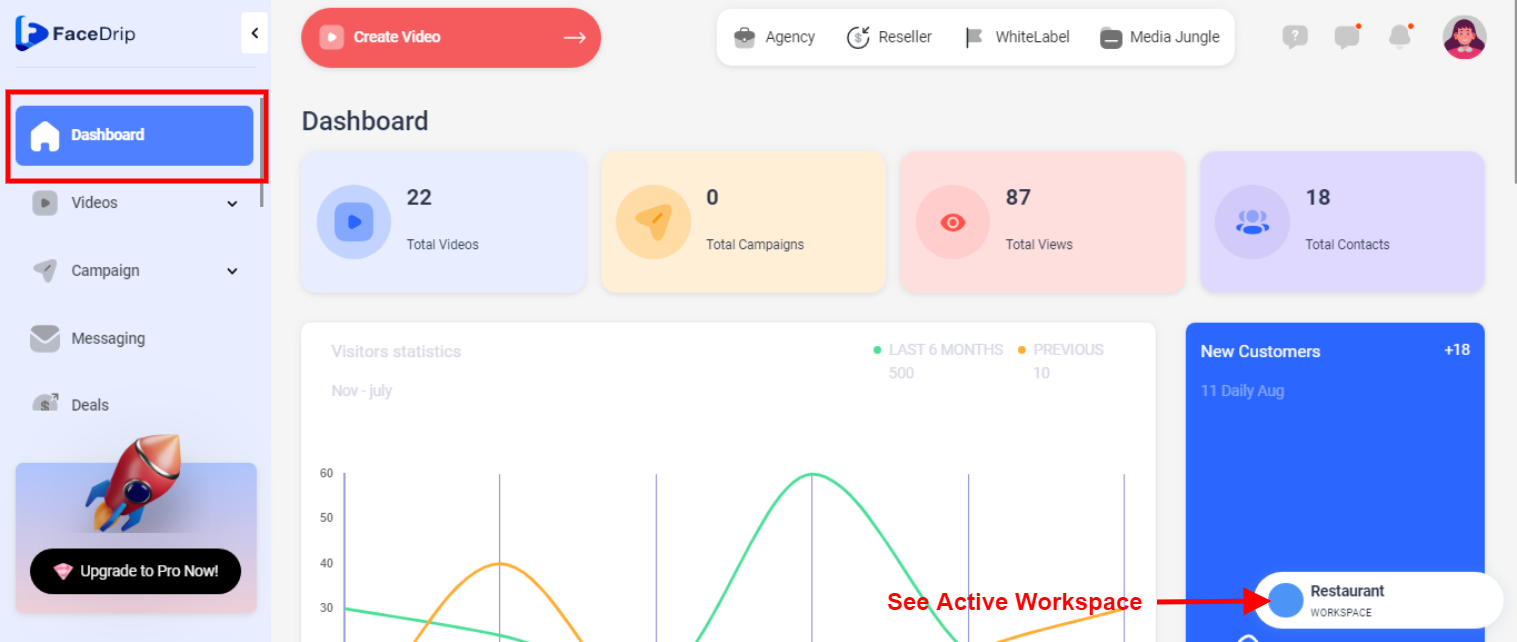
Your workspace will be activated successfully! (PS: Go back to your dashboard module to see the active workspace).
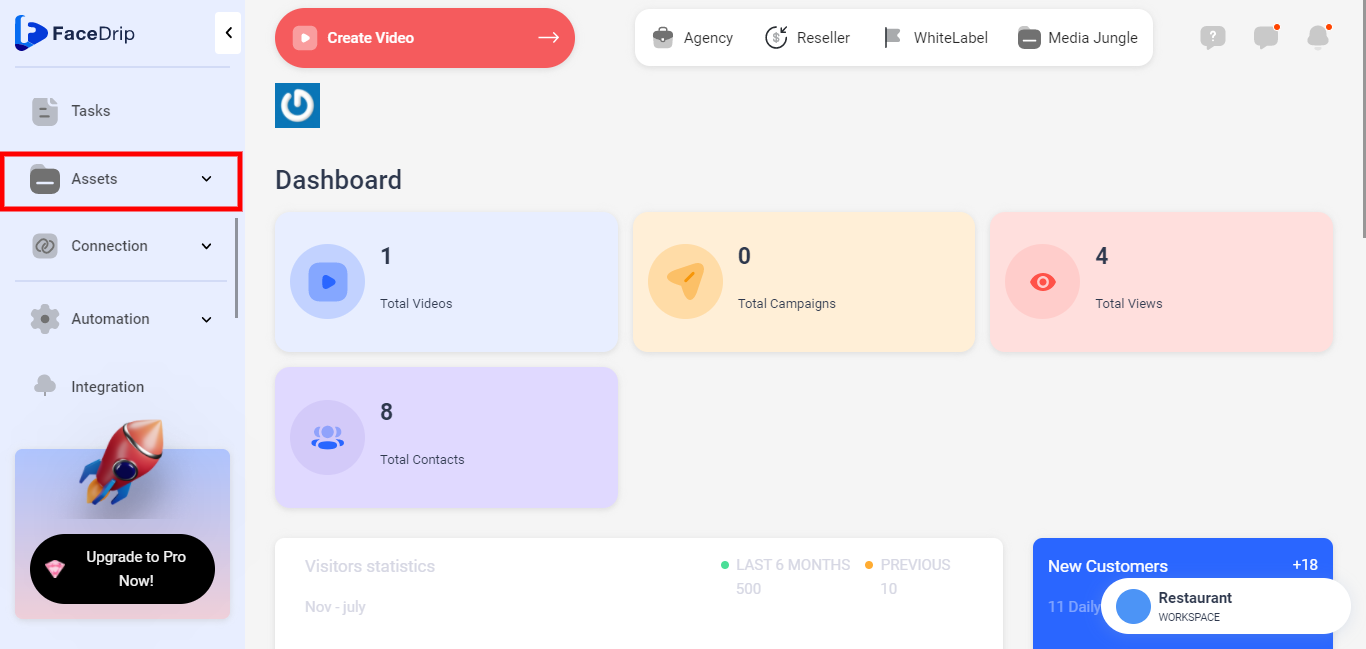
Step 4: Scroll down and click on the ‘Assets’ menu on the left-hand side of your dashboard.
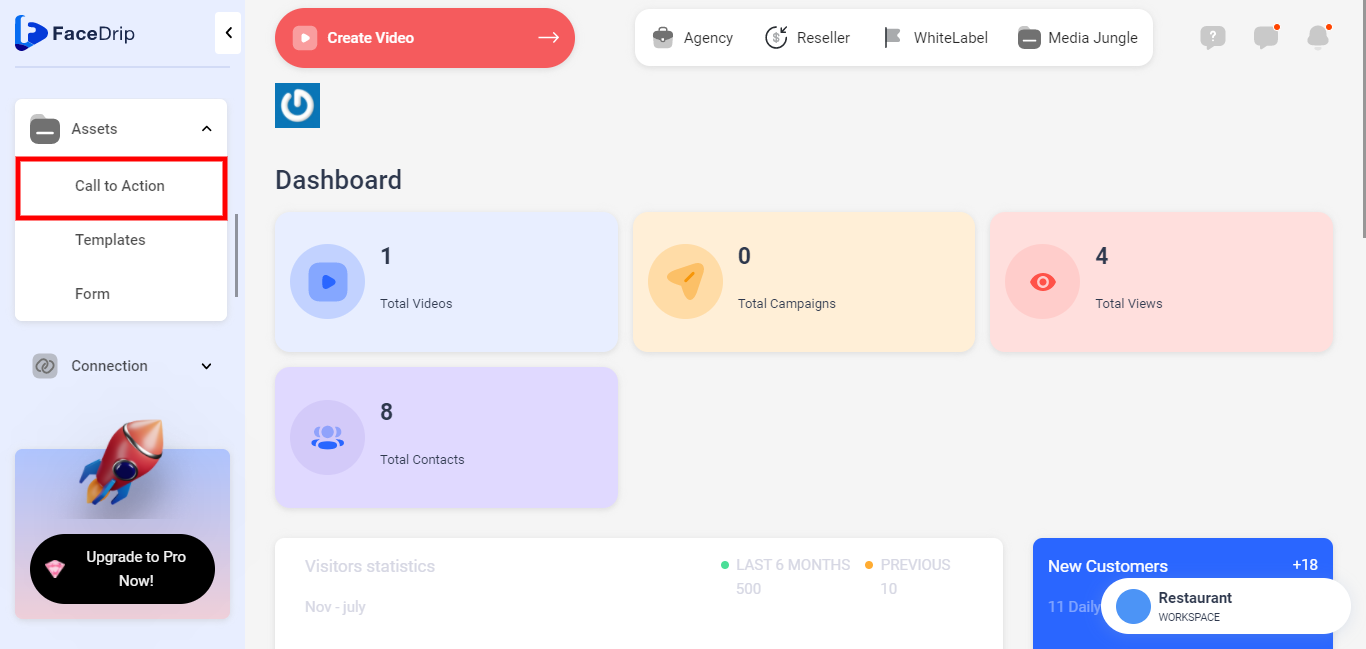
Step 5: Select ‘Call to Action’ from the drop-down menu.
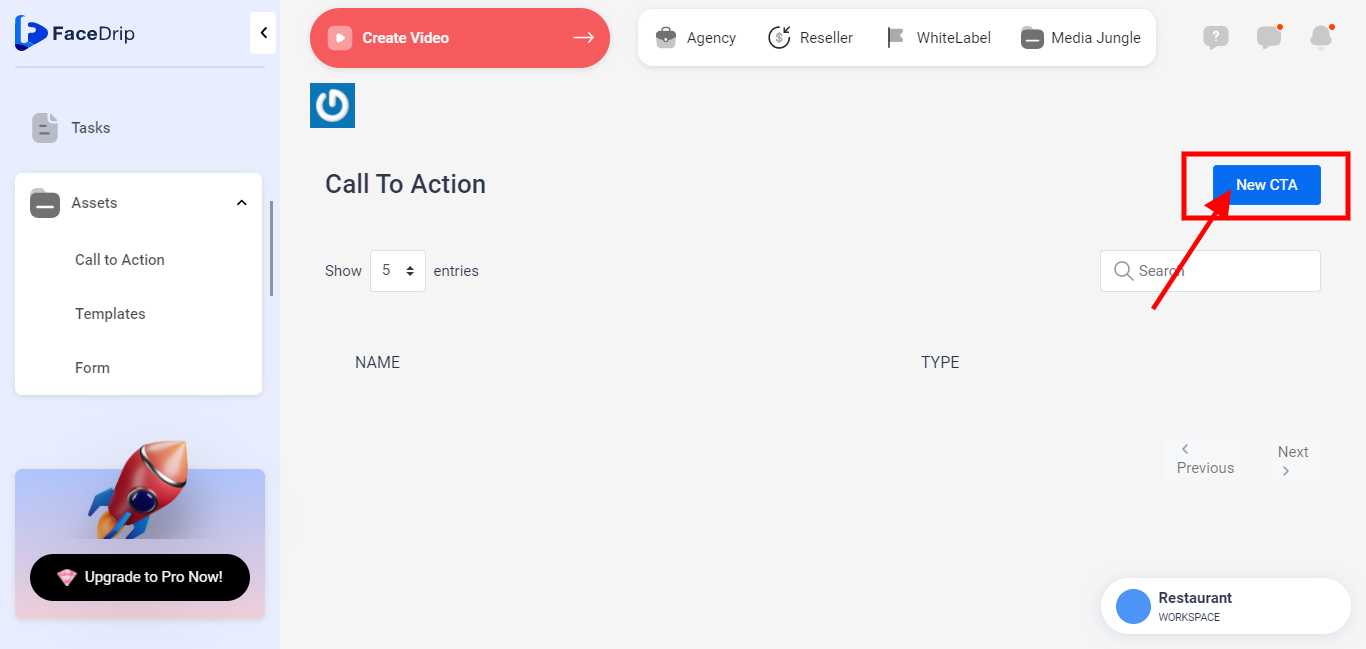
Step 6: Click on the ‘New CTA’ button by the top right corner of your Call To Action Dashboard.
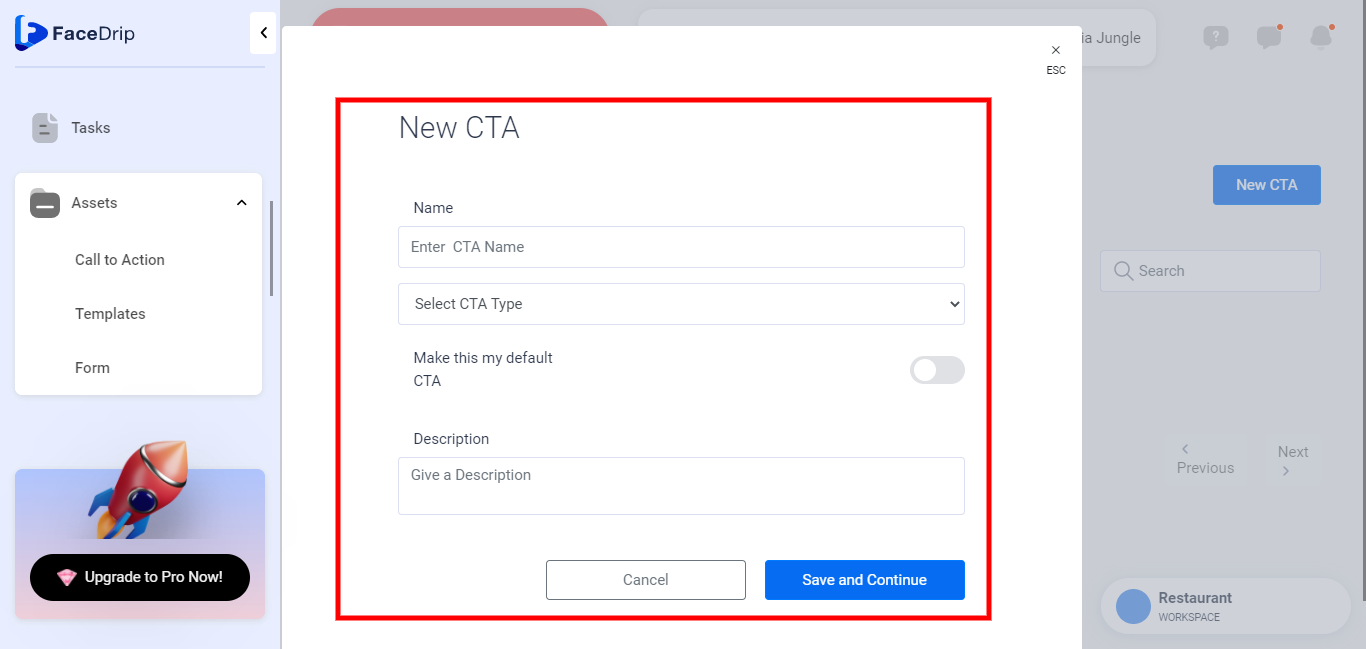
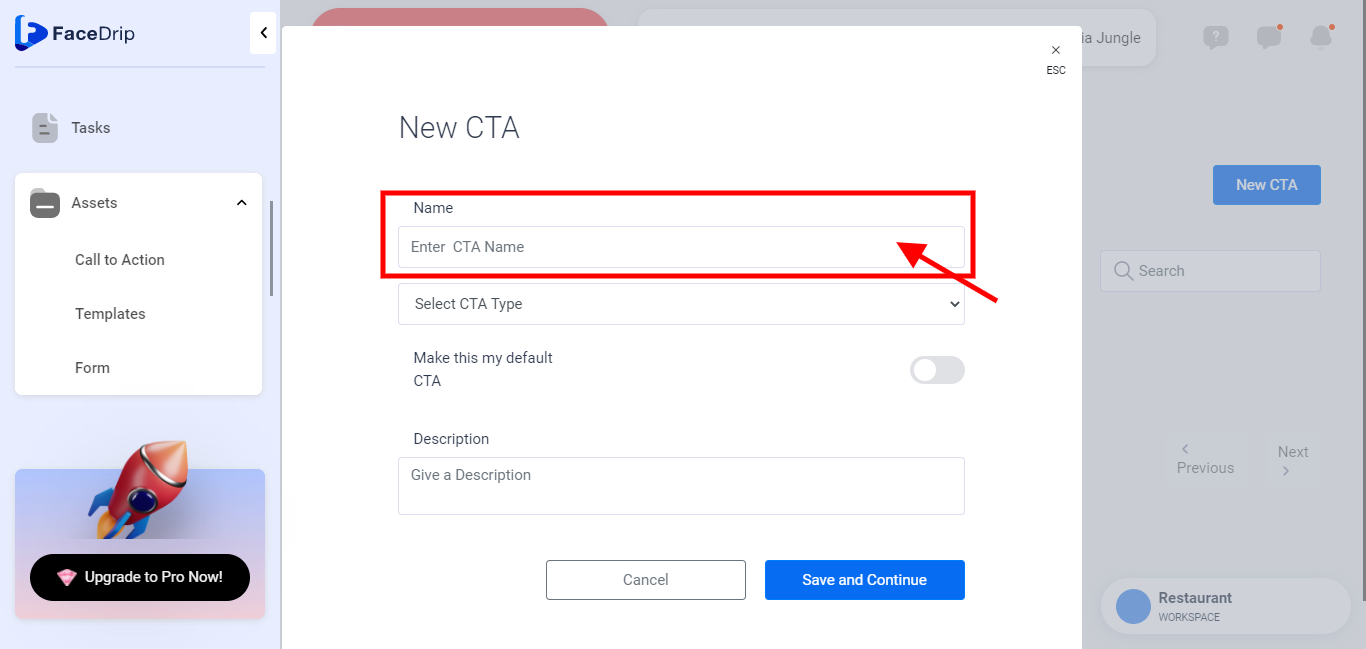
A popup form titled ‘New CTA’ appears.
After you must have undergone Steps 1-6 above, please follow the steps below to create a Calendar CTA Type.
How To Create Calendar CTA Type
Enter CTA Name
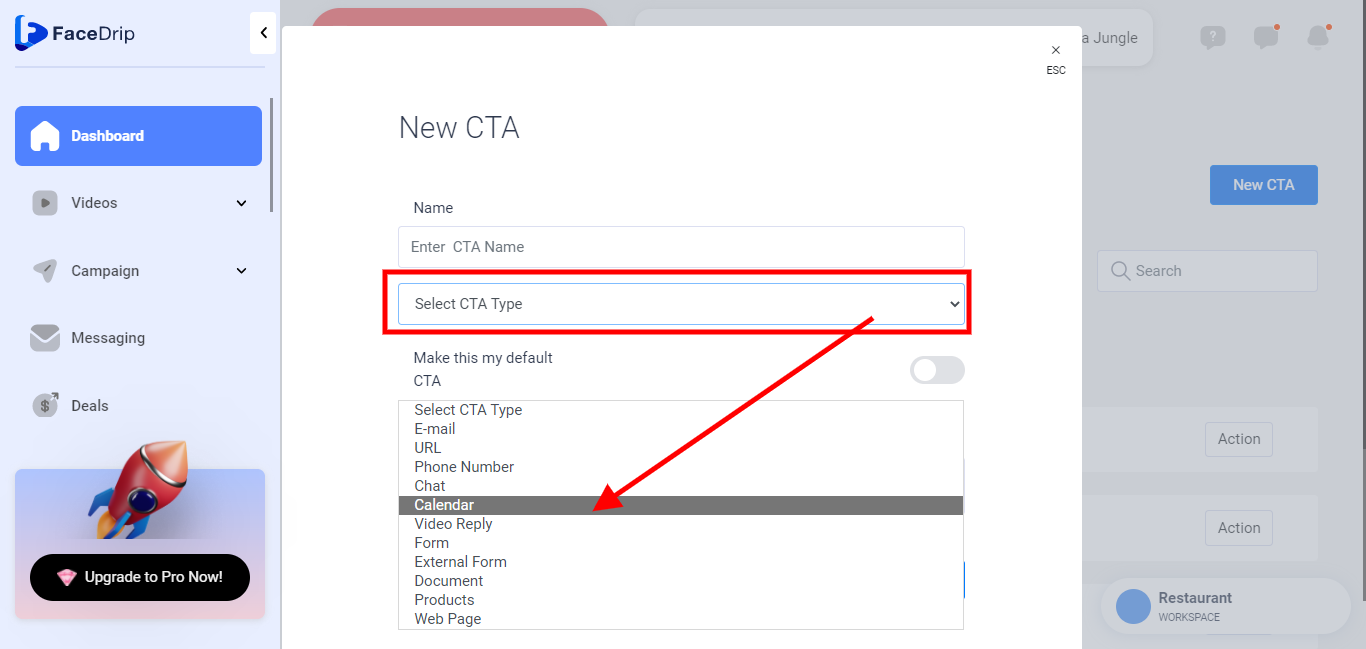
Click on the Select CTA Type field and select ‘Calendar’
How To Create Calendly Calendar CTA Type
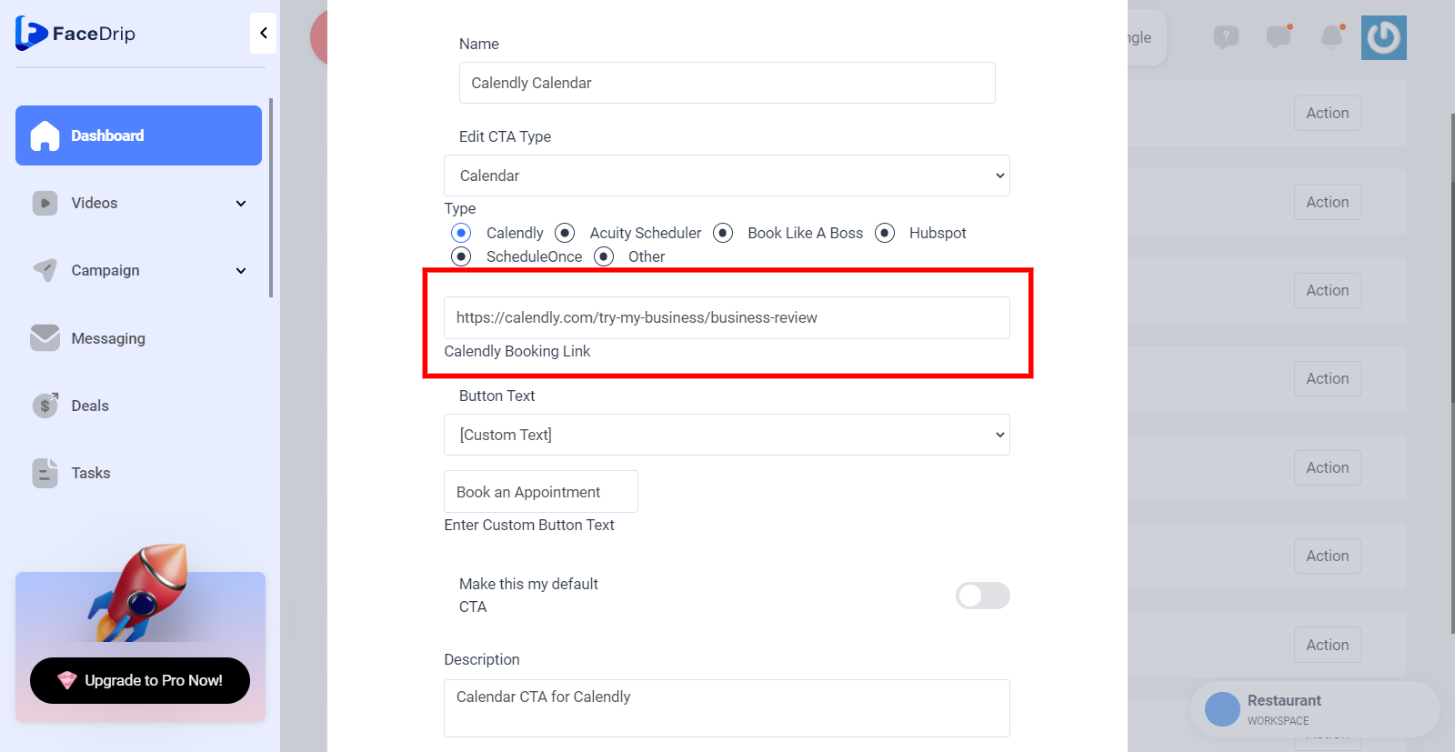
Click on the Calendly Radio button if you want to use Calendly

and in the box below input Your Calendly Booking Link.
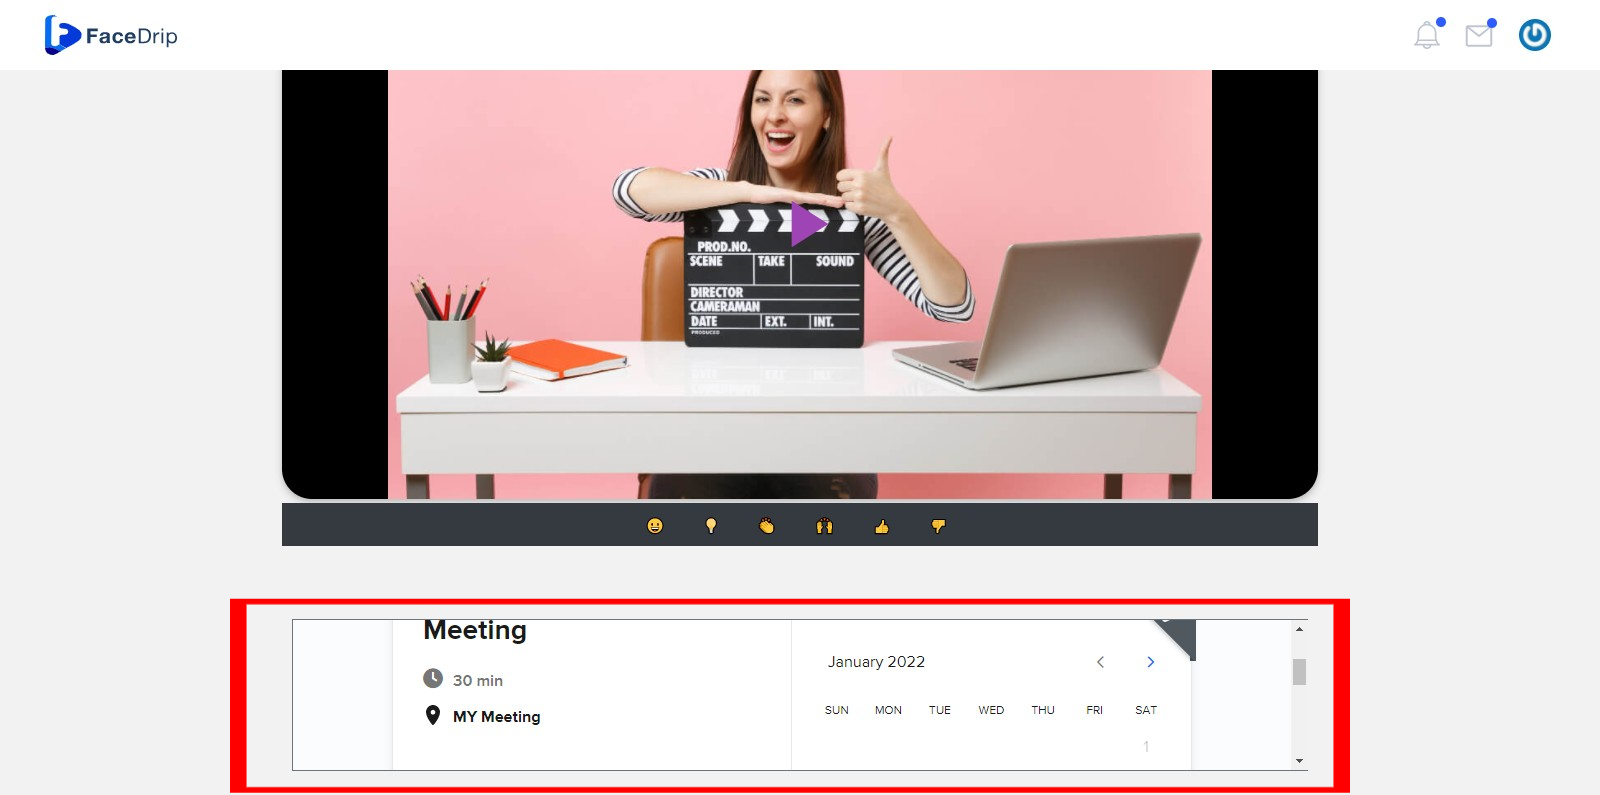
Please follow this link on How to set up a Calendly account and create a calendly booking link. Upon successfully adding the Calendar CTA type for Calendly to the video (Follow this link on how to add CTA to Video), you will find the Calendly modal in the video view page as shown below
How To Create Acuity Scheduler Calendar CTA Type
Click the Acuity Scheduler radio button if you want to use Acuity Scheduler

and in the box below input Your Scheduling Link.
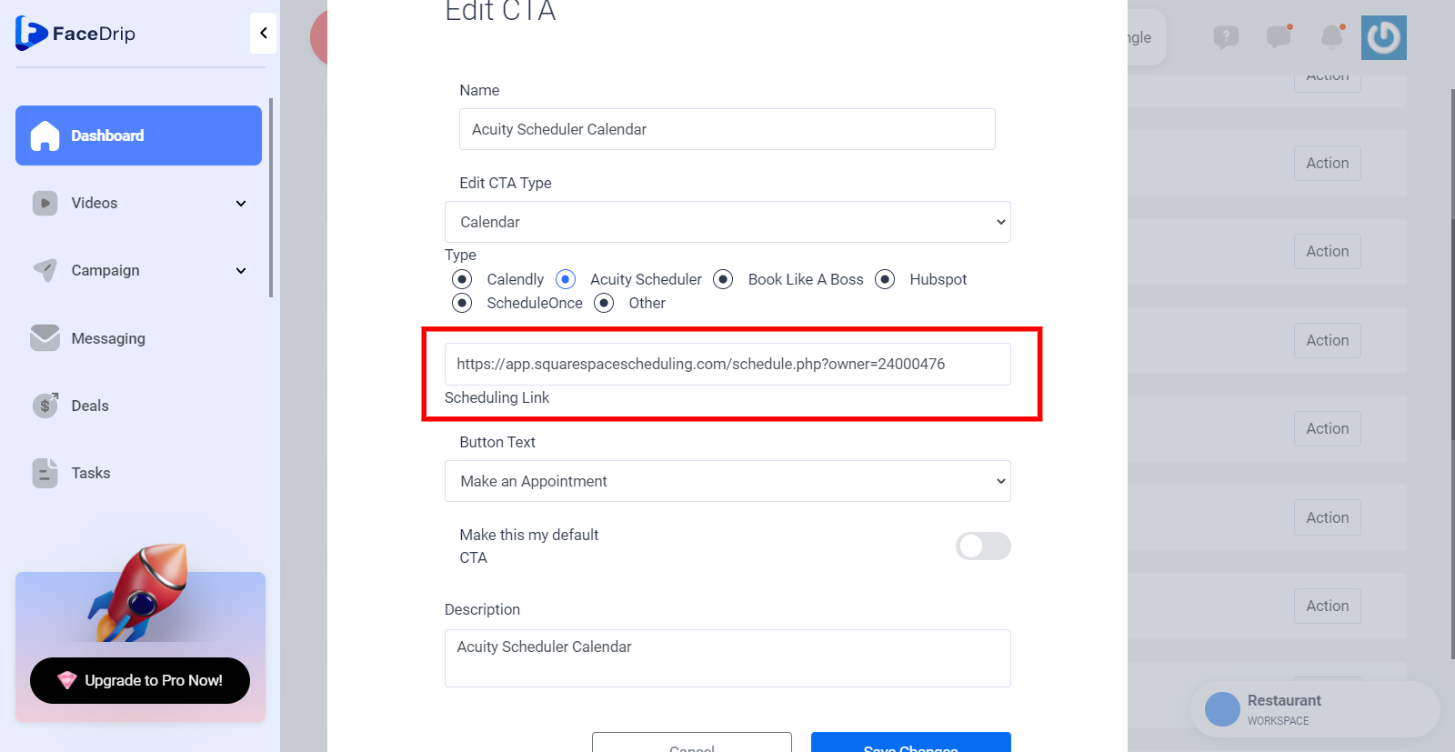
Please follow this link on How To Set Up Acuity Scheduler Calendar Type And Create An Appointment.
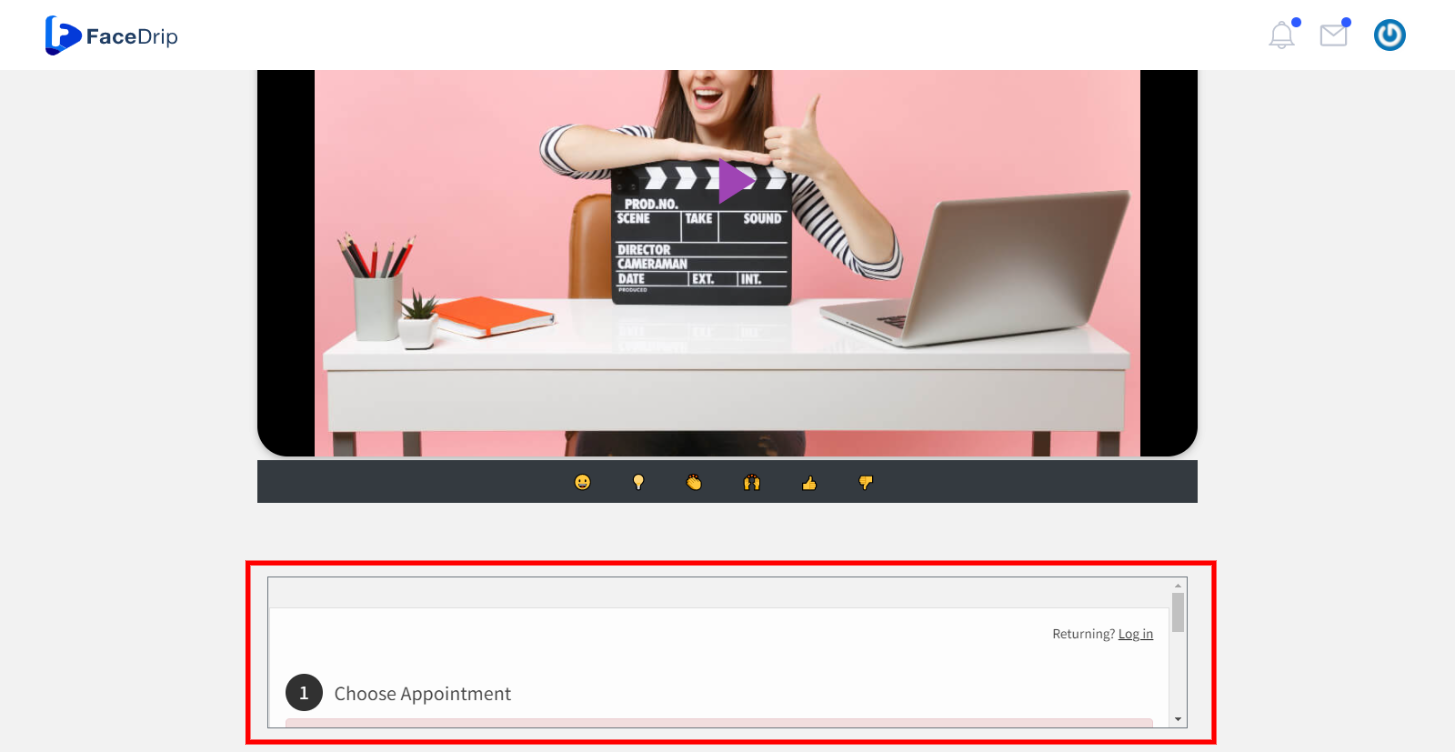
Upon successfully adding the Calendar CTA type for Acuity Scheduler to the video (Follow this link on how to add CTA to Video), you will find the Acuity Scheduler modal in the video view page as shown below
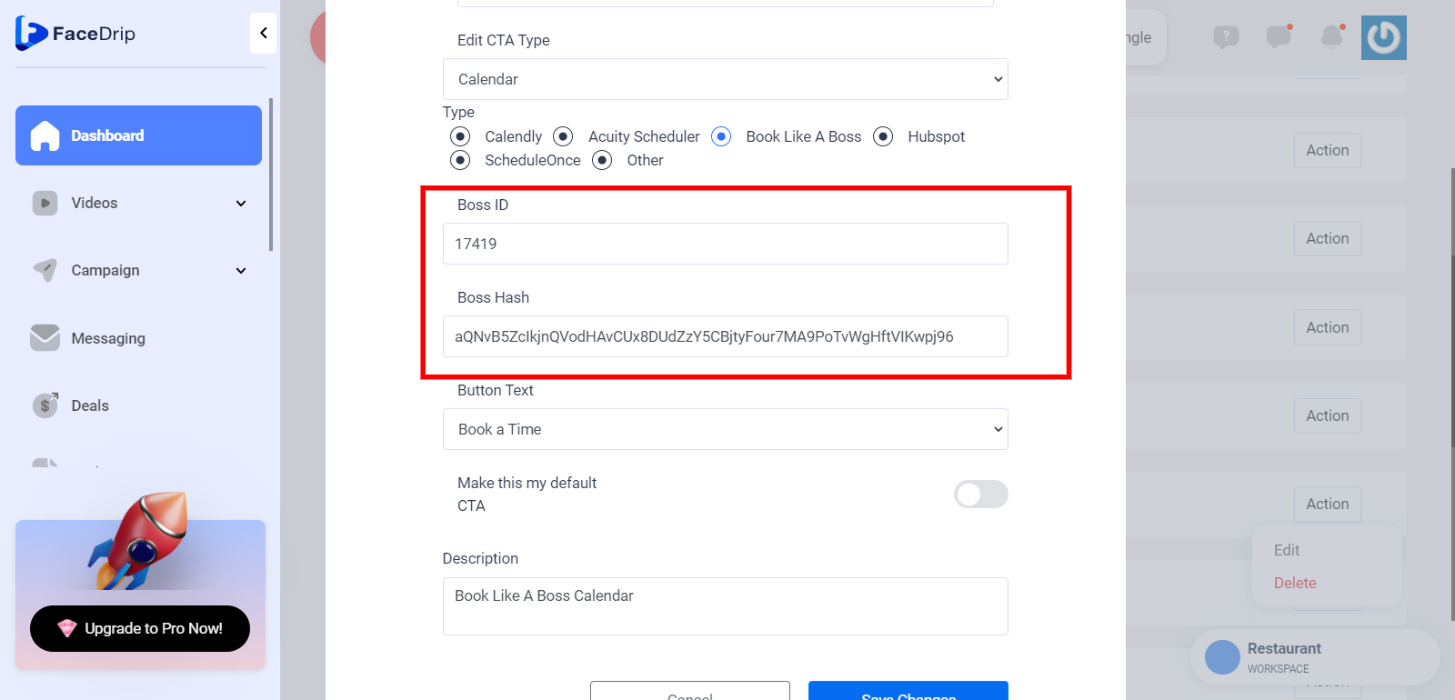
How To Create BookLikeABoss Calendar CTA Type
Click on the Book Like A Boss Radio button if you want to use Book Like A Boss
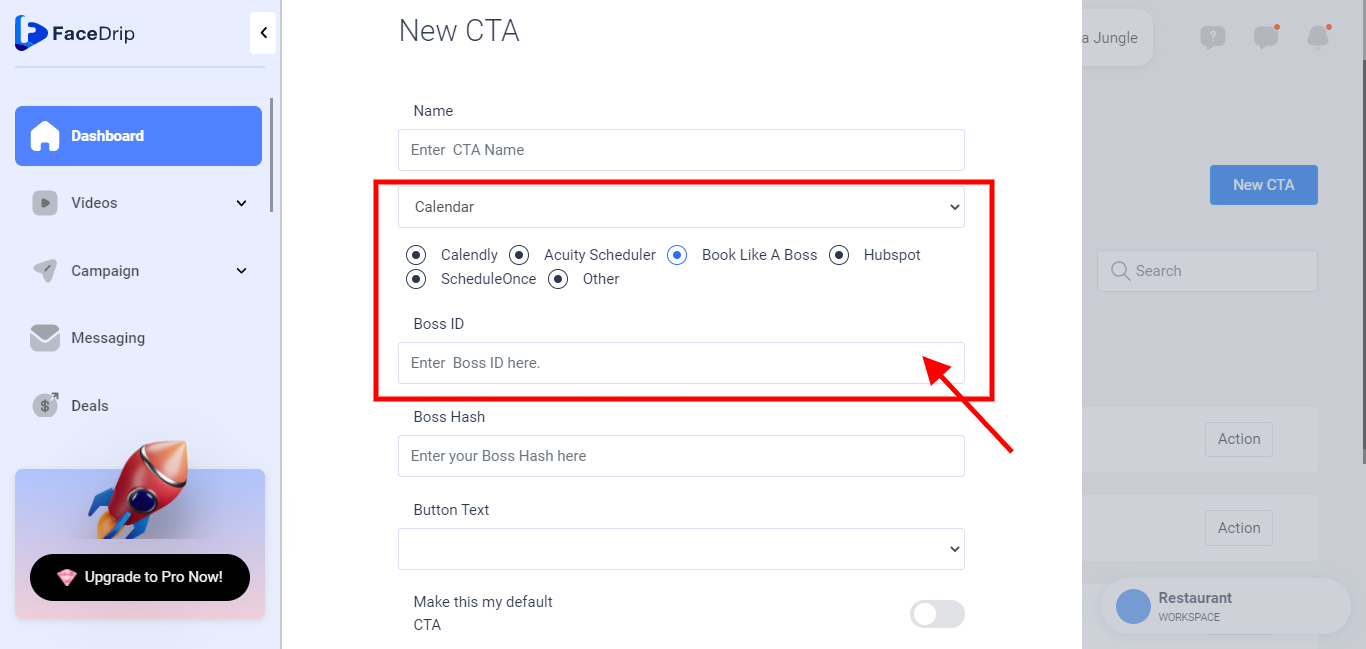
and in the first box below input Your Boss ID. In the second box input Your Boss Hash Hem.
Please follow this link on How To Set Up Book Like A Boss Calendar Type And Create An Appointment.
Upon successfully adding the Calendar CTA type for Book Like A Boss to the video (Follow this link on how to add CTA to Video), you will find the Book Like A Boss modal on the video view page as shown below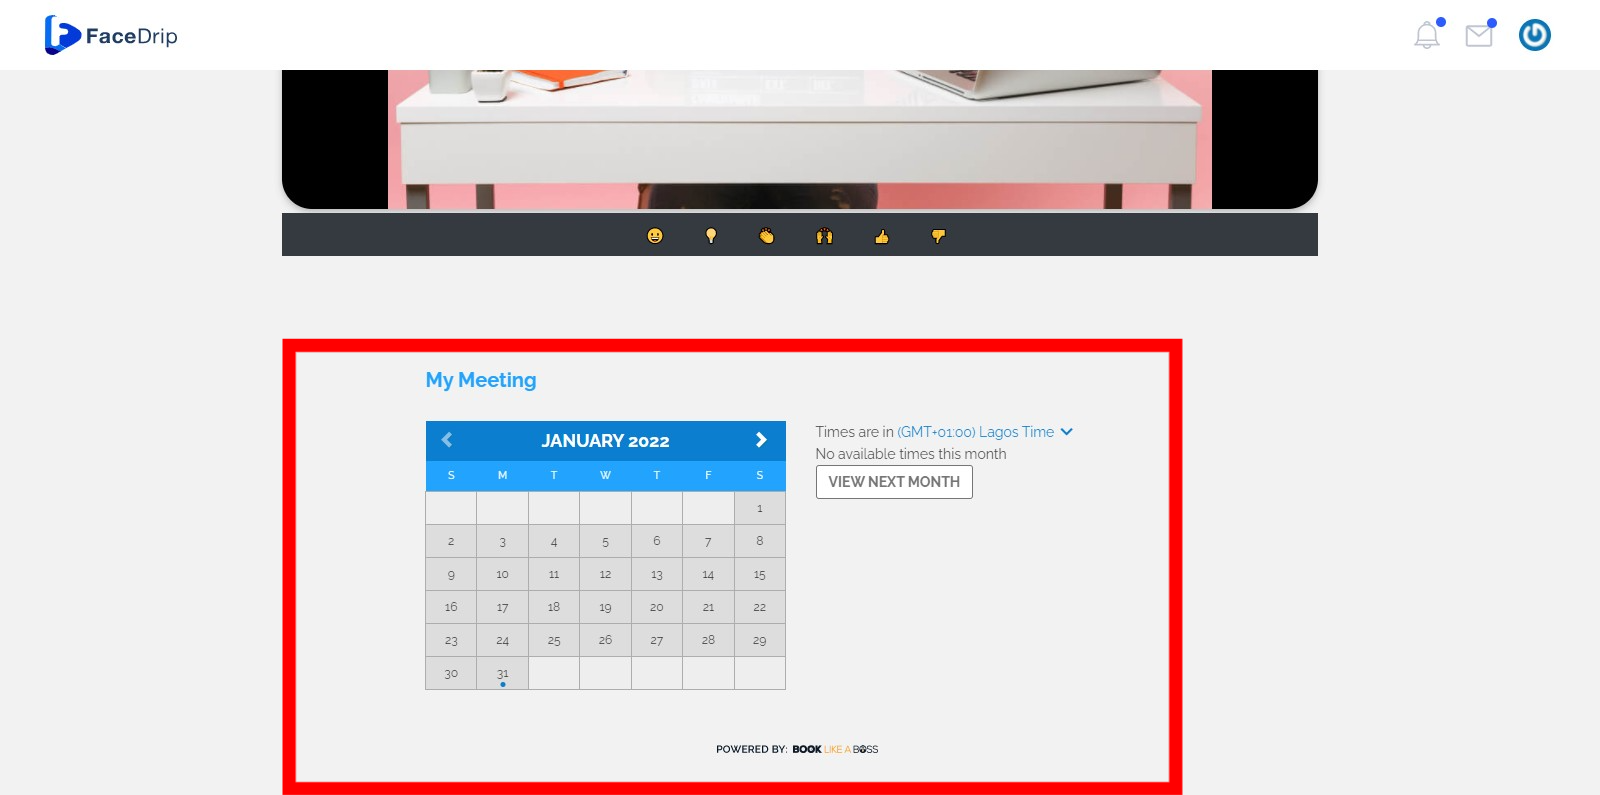
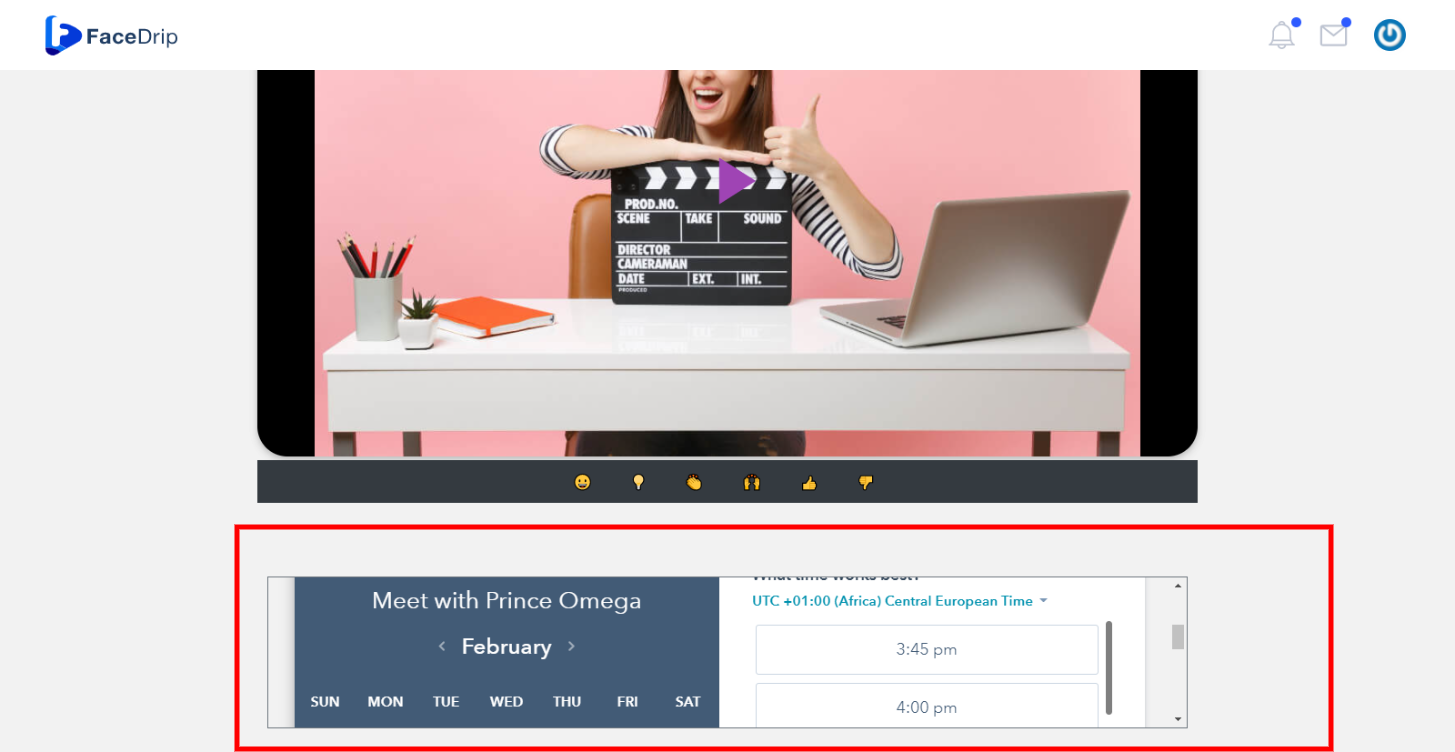
How To Create Hubspot Calendar CTA Type
Click on the Hubspot Radio button if you want to use Hubspot

and in the box below input Your Hubspot Meeting Link

Please follow this link on How To Set Up HubSpot Calendar Type And Create A Meeting Spot.
Upon successfully adding the Calendar CTA type for Hubspot to the video (Follow this link on how to add CTA to Video), you will find the Hubspot modal on the video view page as shown below
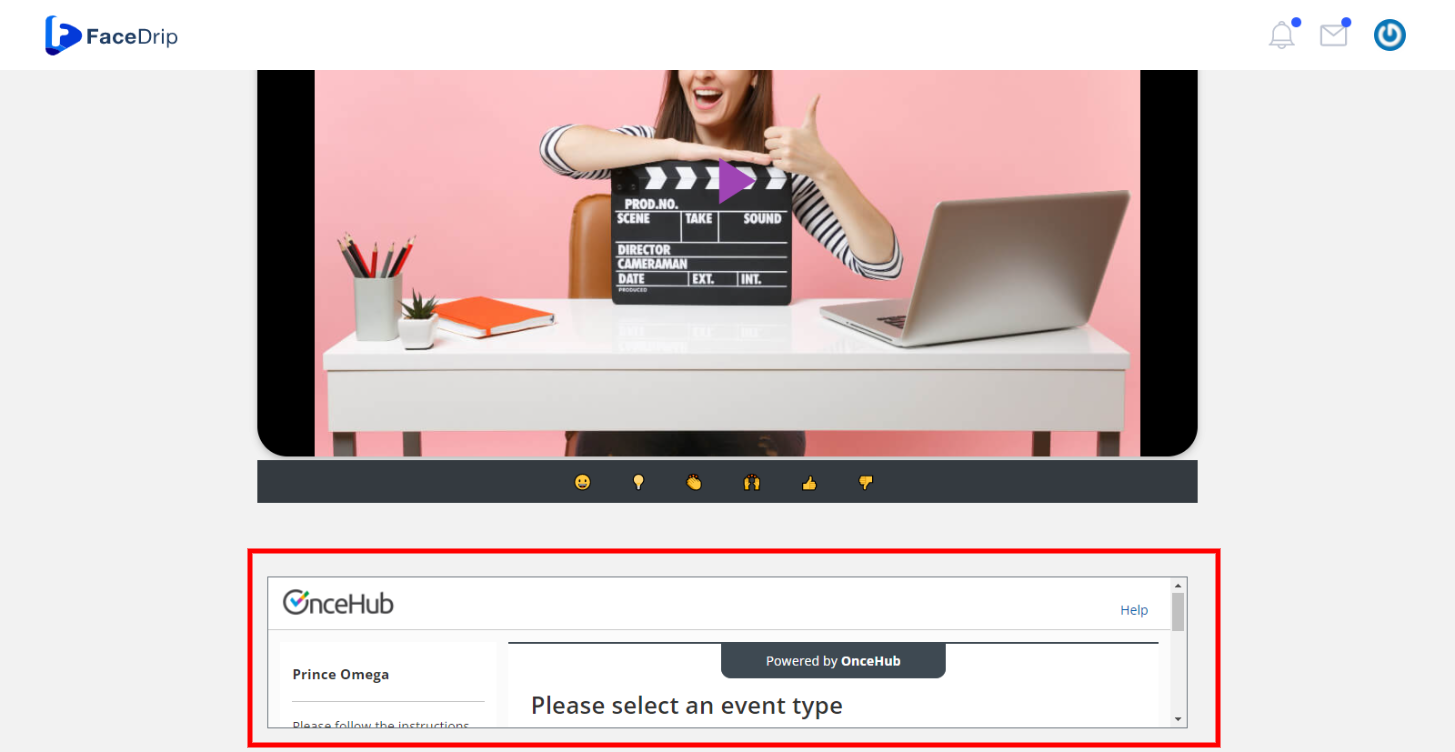
How To Create ScheduleOnce Calendar CTA Type
Click on the ScheduleOnce Radio button if you want to use ScheduleOnce

and in the box below input Your ScheduleOnce Booking Link.
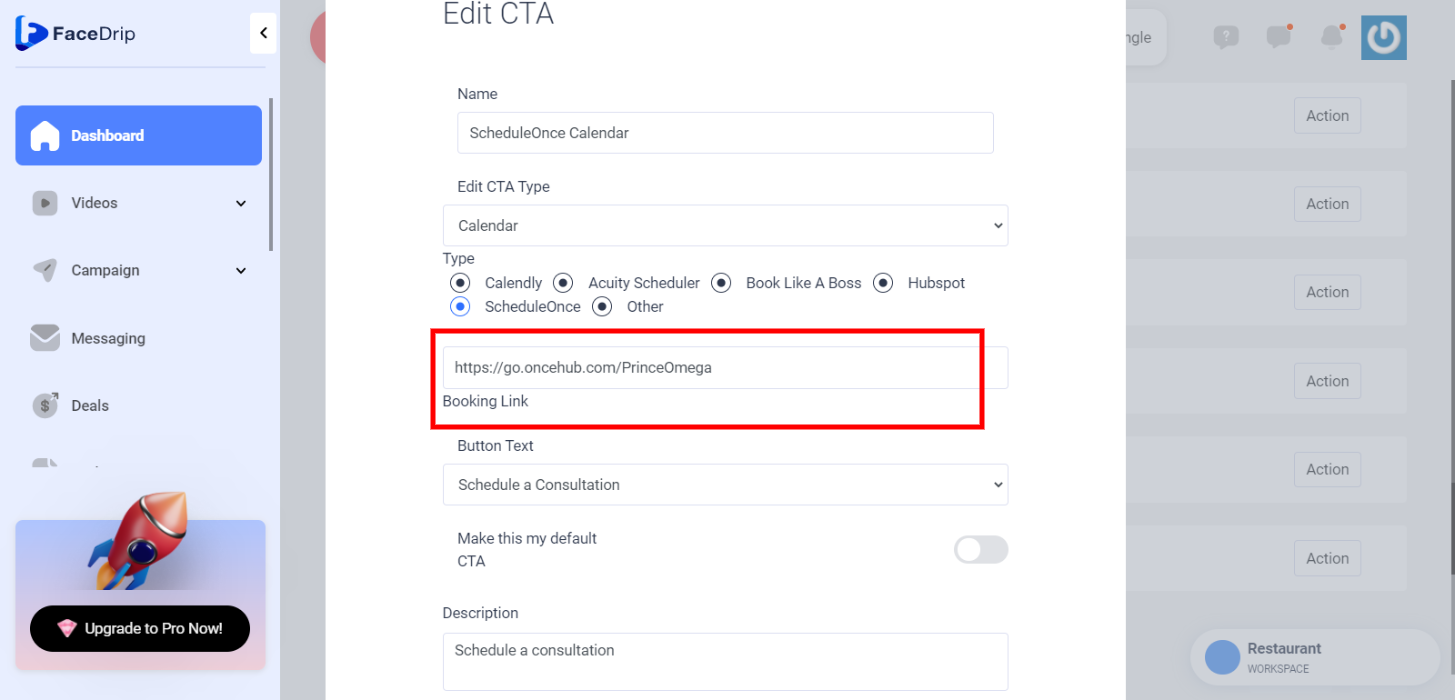
Please follow this link on How To Set Up ScheduleOnce Calendar Type And Create A Meeting Spot.
Upon successfully adding the Calendar CTA type for ScheduleOnce to the video (Follow this link on how to add CTA to Video), you will find the ScheduleOnce modal on the video view page as shown below
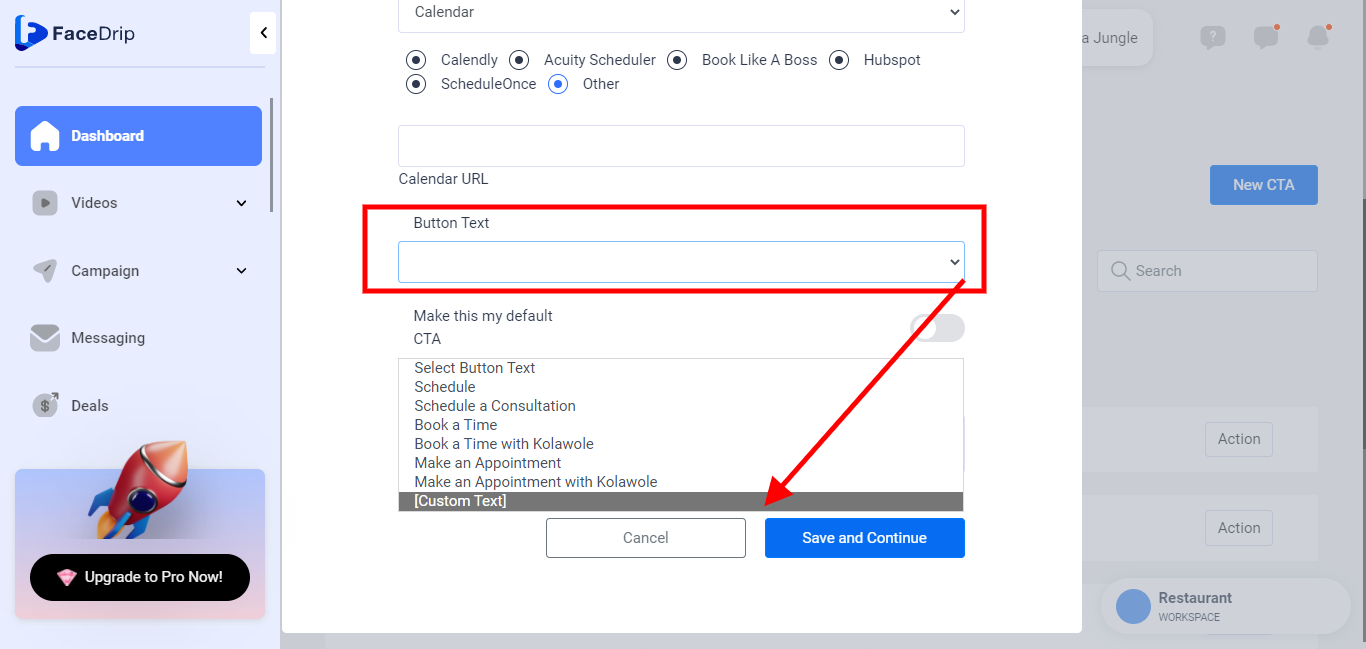
How To Create Other Calendar CTA Type
Click on the ‘Other’ Radio button if you don’t want to choose any of the options above and in the box below input Calendar URL.

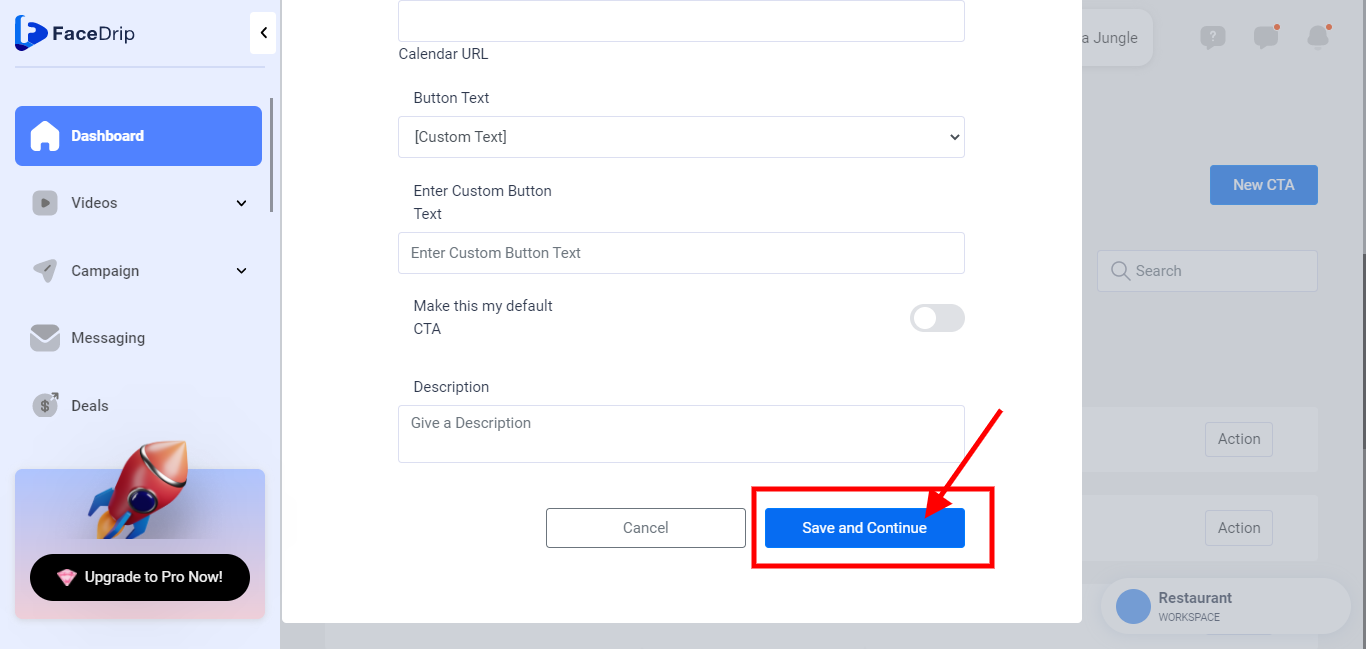
After choosing your calendar type, continue with other details:
Under Button Text, click on the Select Button Text and choose from the default button texts OR choose the [Custom Text] which is the last on the list to create your preferred Button text.
* If Custom Text was selected for the Button Text, Click on the Enter Custom Button Text that appeared below and input your preferred text.
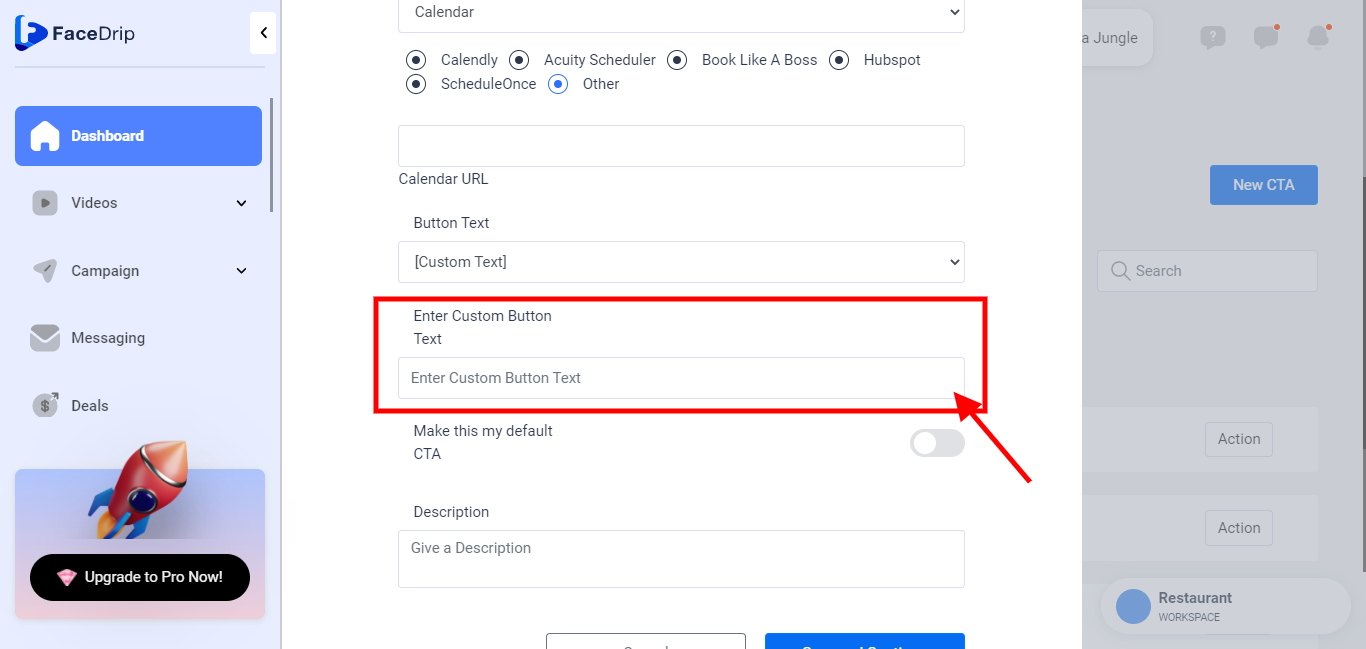
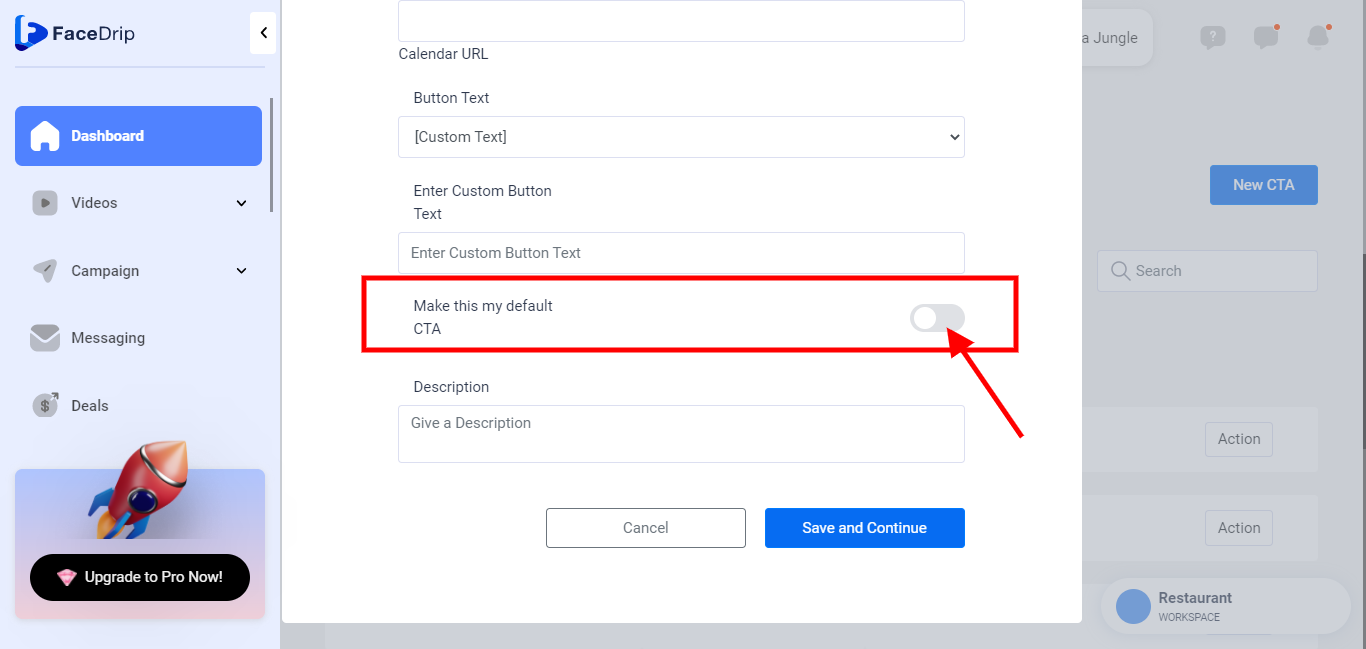
You can make the selected button text your default CTA by Clicking the toggle button by the right to check (turn on) else leave it unchecked (turned off).
Under Description, click the Give a Description Box and input a short description for the CTA.
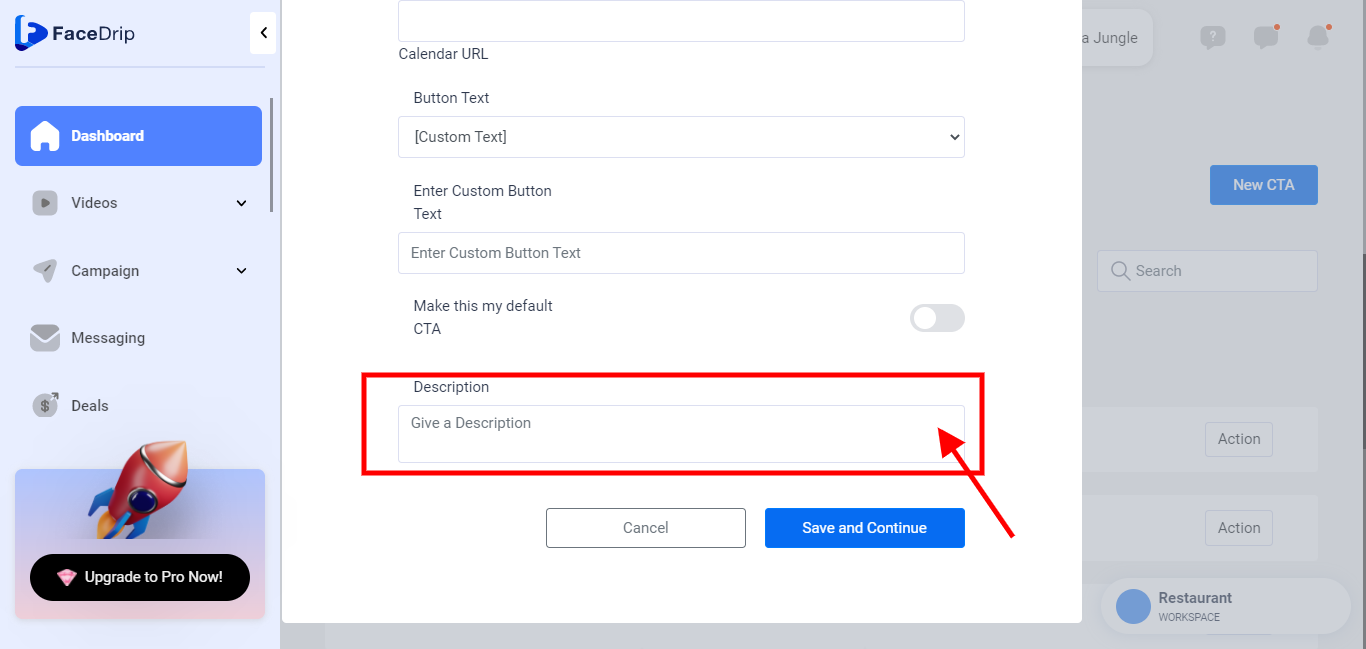
Now Click on the ‘Save and Continue‘ Button.
Your Calendar CTA type has been created successfully!
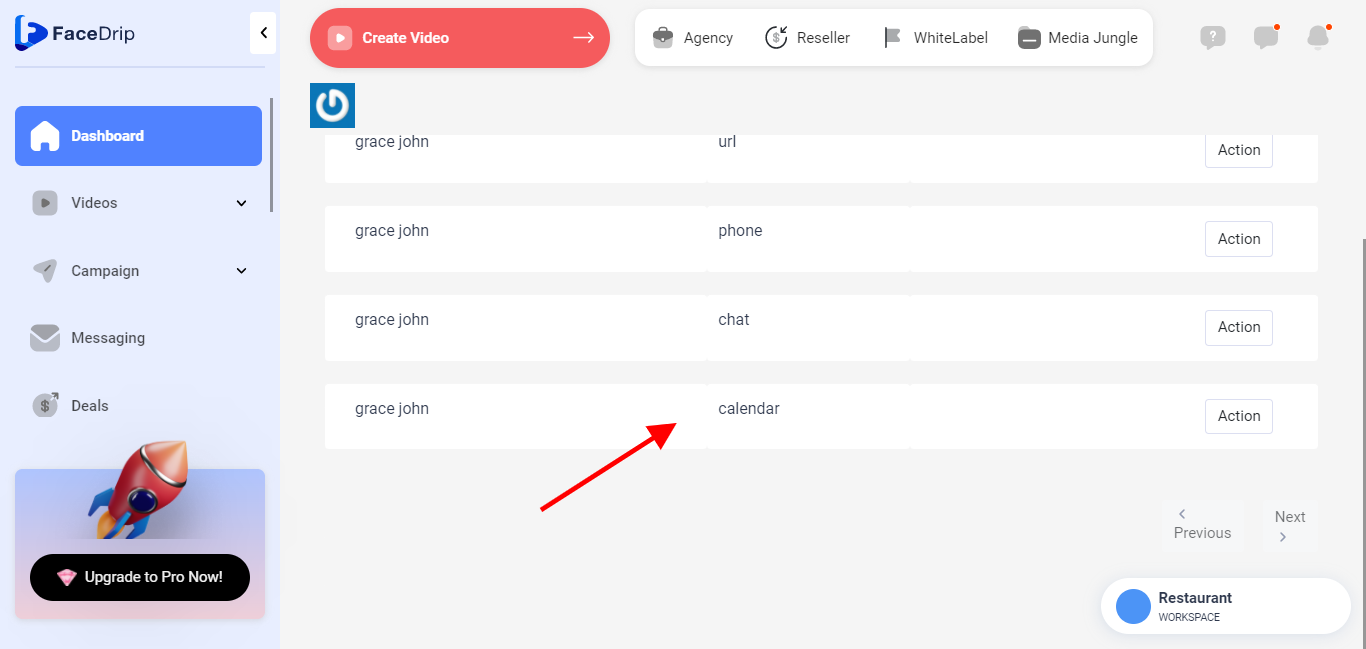
View Video Page
