Log in to your Facedrip account.
STEP 1: Click on the “Agency” on the top side menu bar of your dashboard

STEP 2: Click on “Workspace” in the options below.

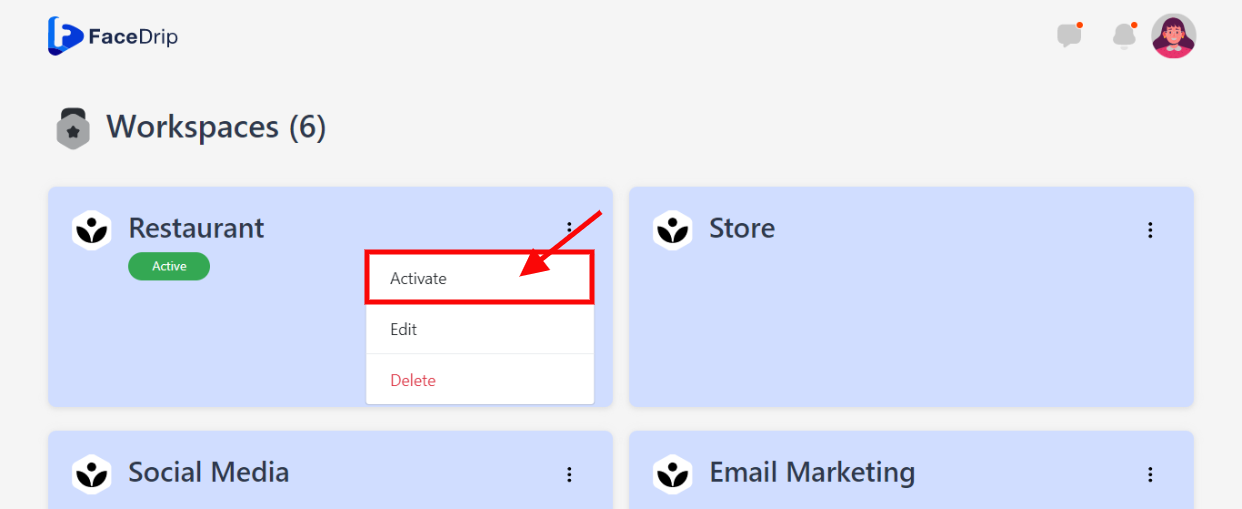
STEP 3: Choose the workspace you want to Connect Mandrill SMTP and click the “activate workspace” button. (follow this link on How To Create New Workspace)
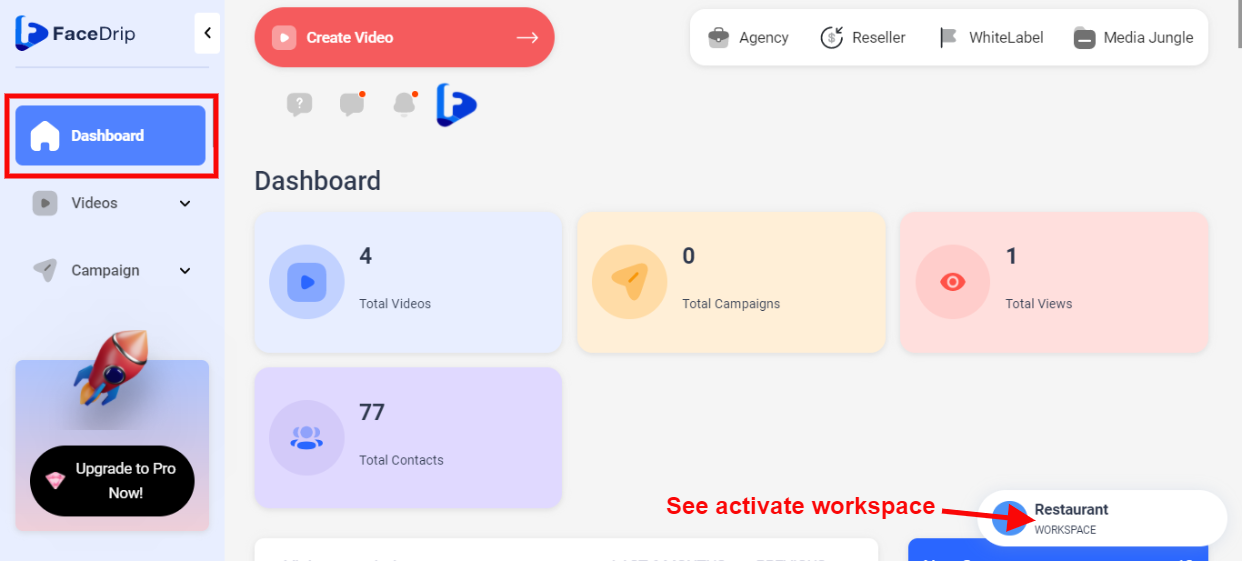
Your workspace will be activated successfully! (PS: Go back to your dashboard module to see the active workspace).
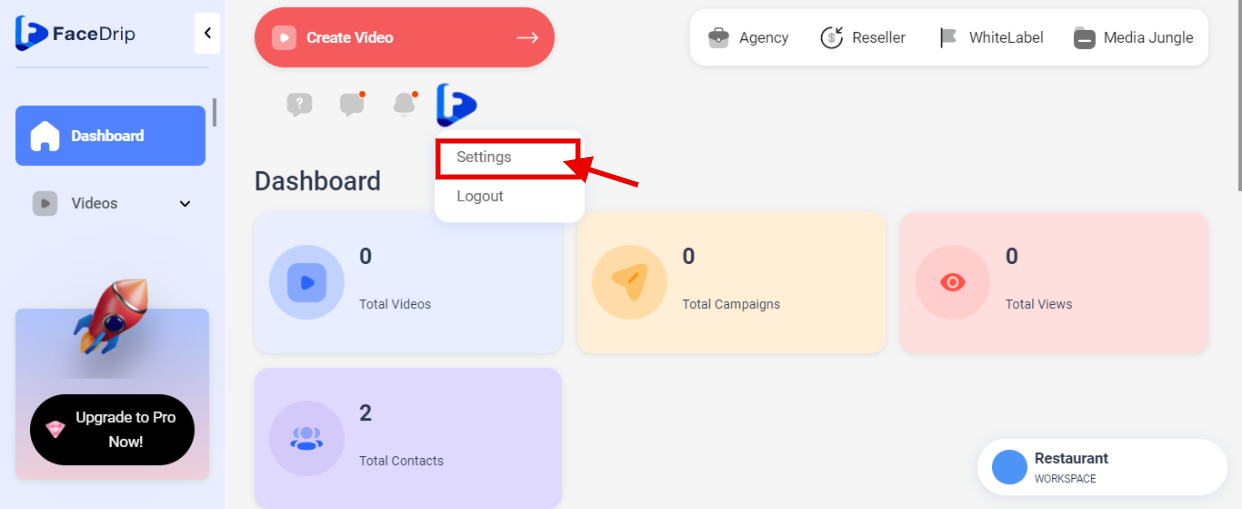
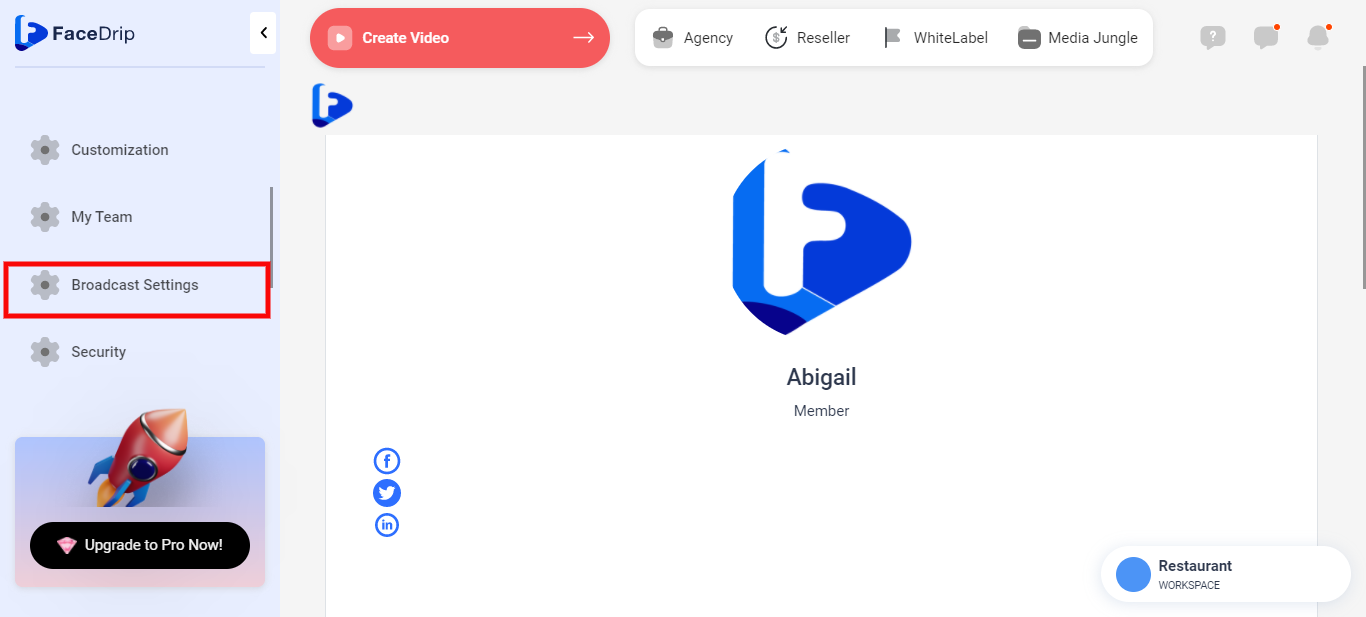
STEP 4: Click on the “Blue Icon” by the top left-hand corner
![]()
STEP 5: Click on “Settings” in the drop-down options.
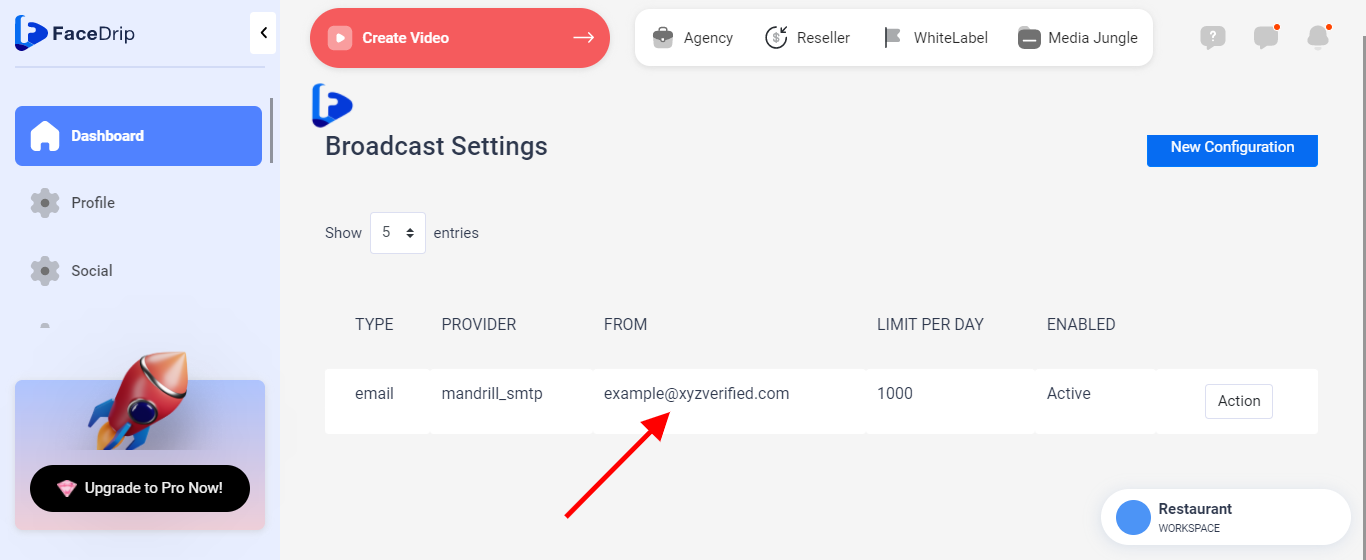
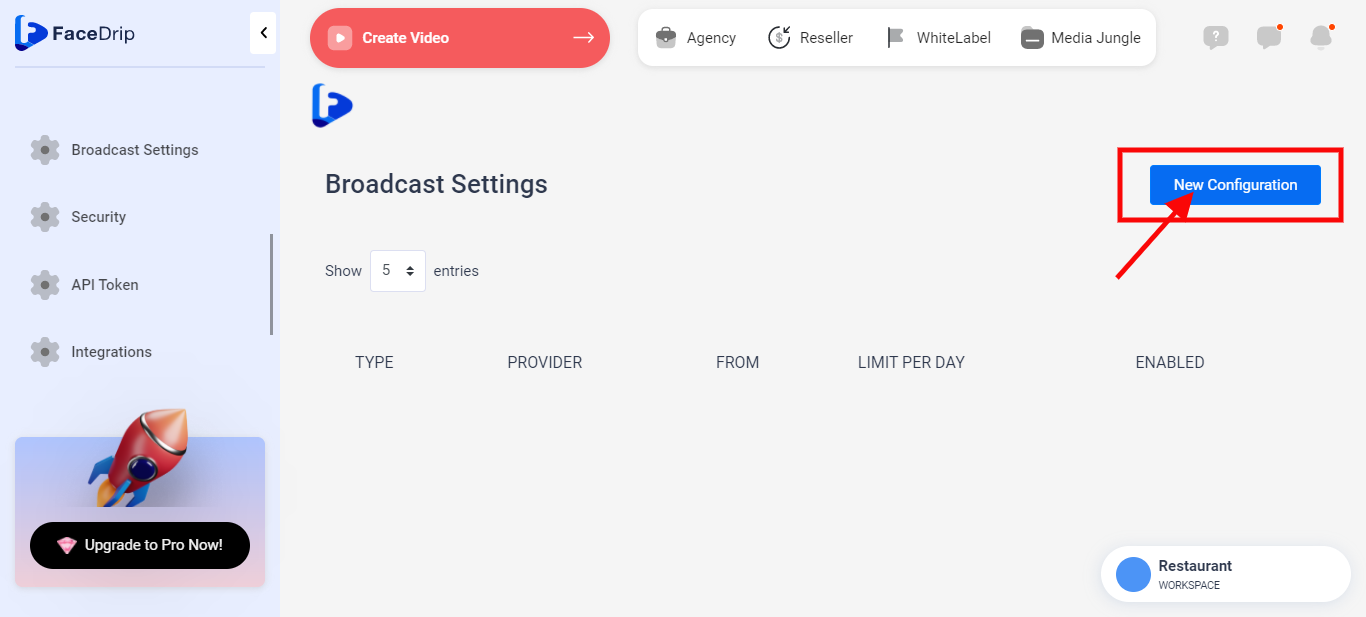
STEP 6: Click on “ Broadcast Settings”
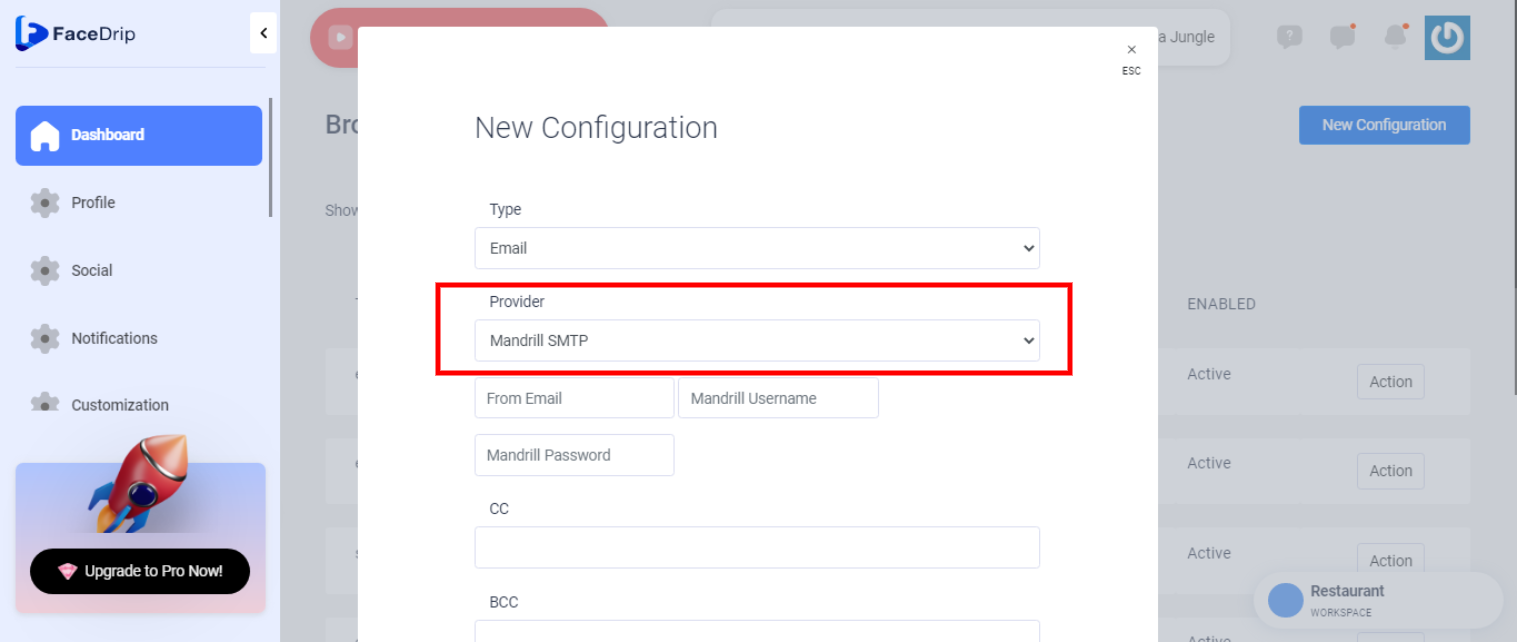
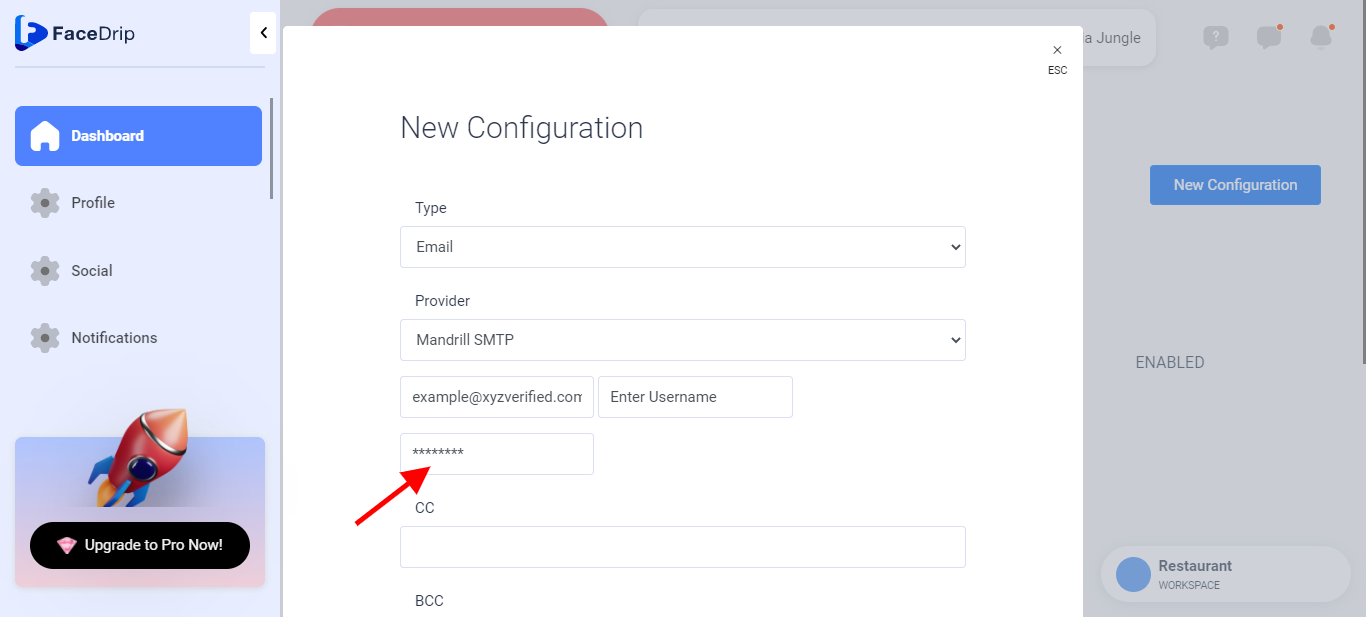
STEP 7: click on the blue “New Configuration “ button
STEP 8: Enter details for the respective fields in the new configuration page
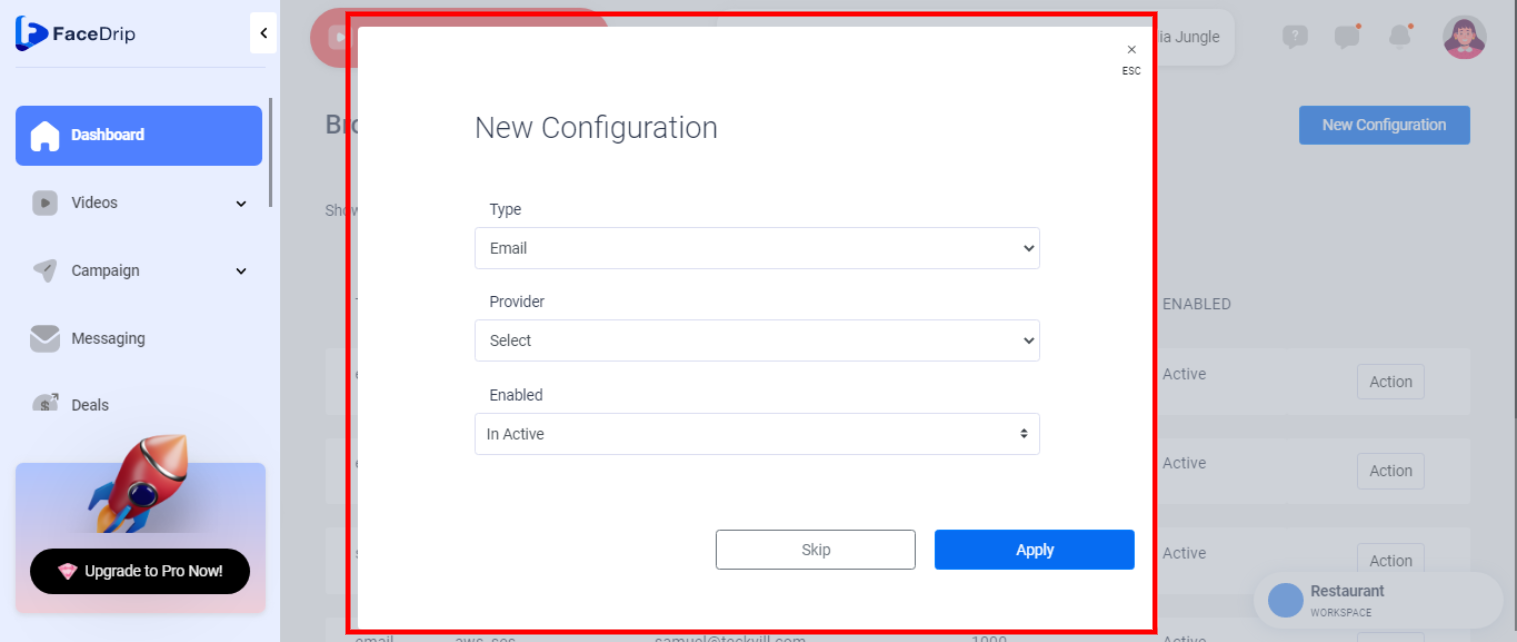
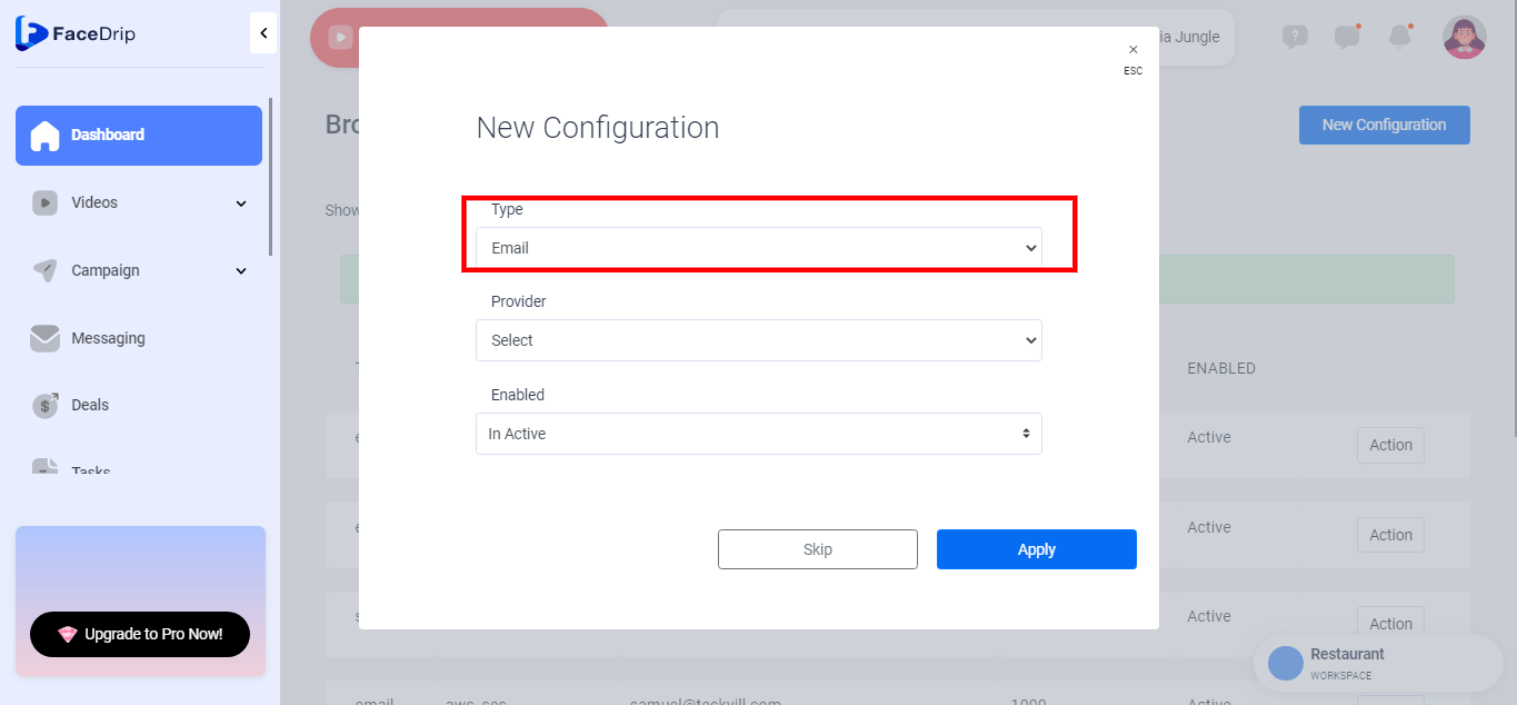
==> Type: select email as your broadcast type from the drop-down options
==> Provider: select Mandrill SMTP as your broadcast provider from the drop-down options.
==> Email: Input your mandrill ” Email address “. Enter your email for the verified domain. kindly follow this link on How To Verify A Domain In Mandrill
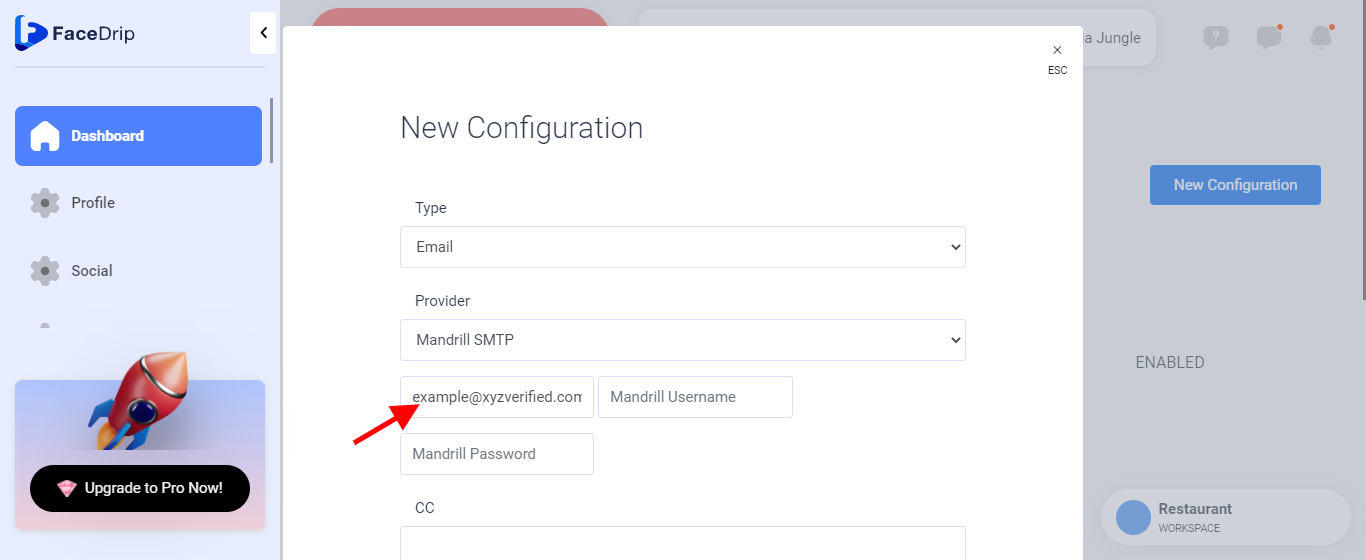
For example, if your verified domain is “xyzverified.com”. Then your email should be “example@xyzverified.com”.
==> Username: Input your mandrill ” Username “
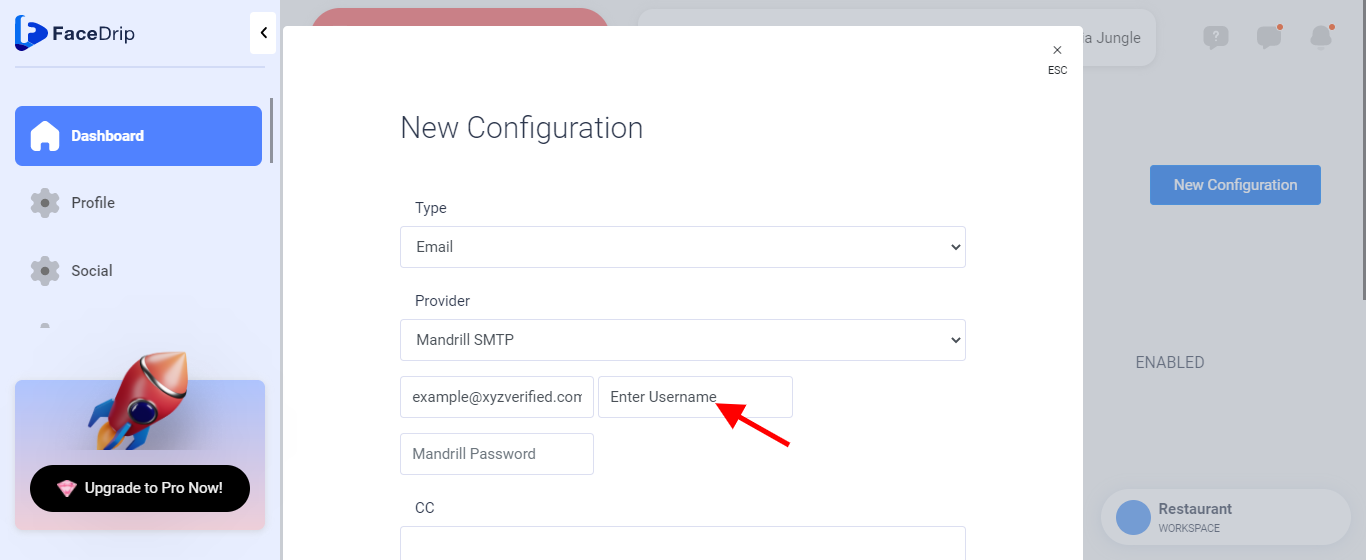
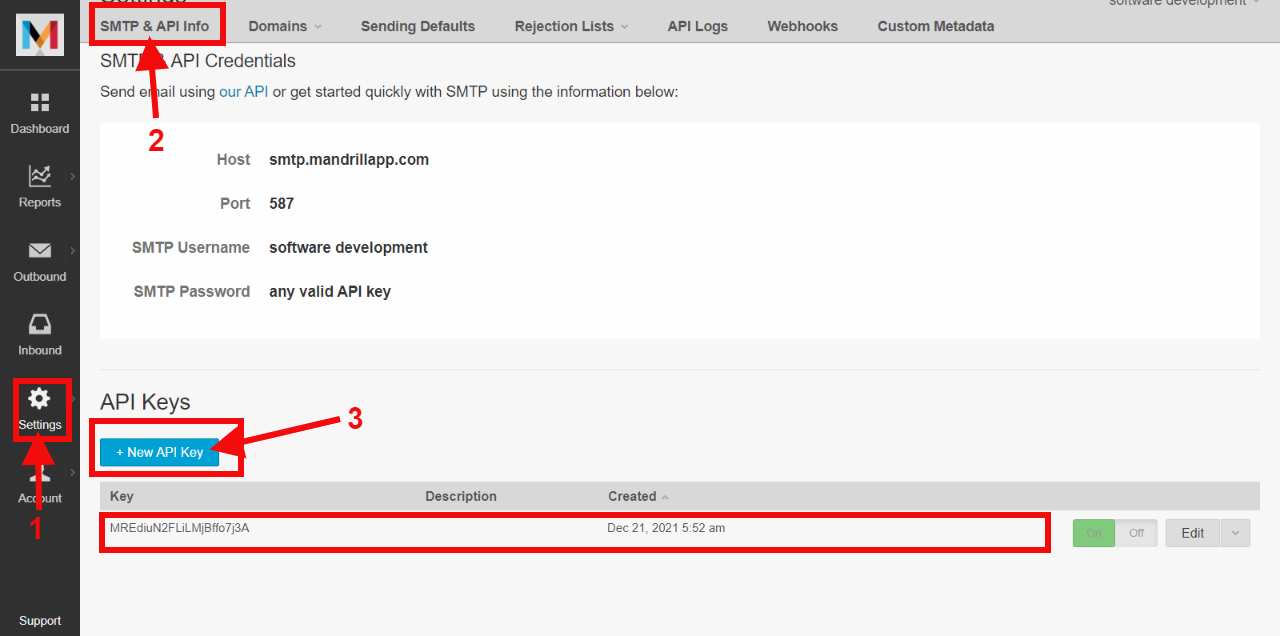
You will find your username in the middle section of Settings>>SMTP & API Info
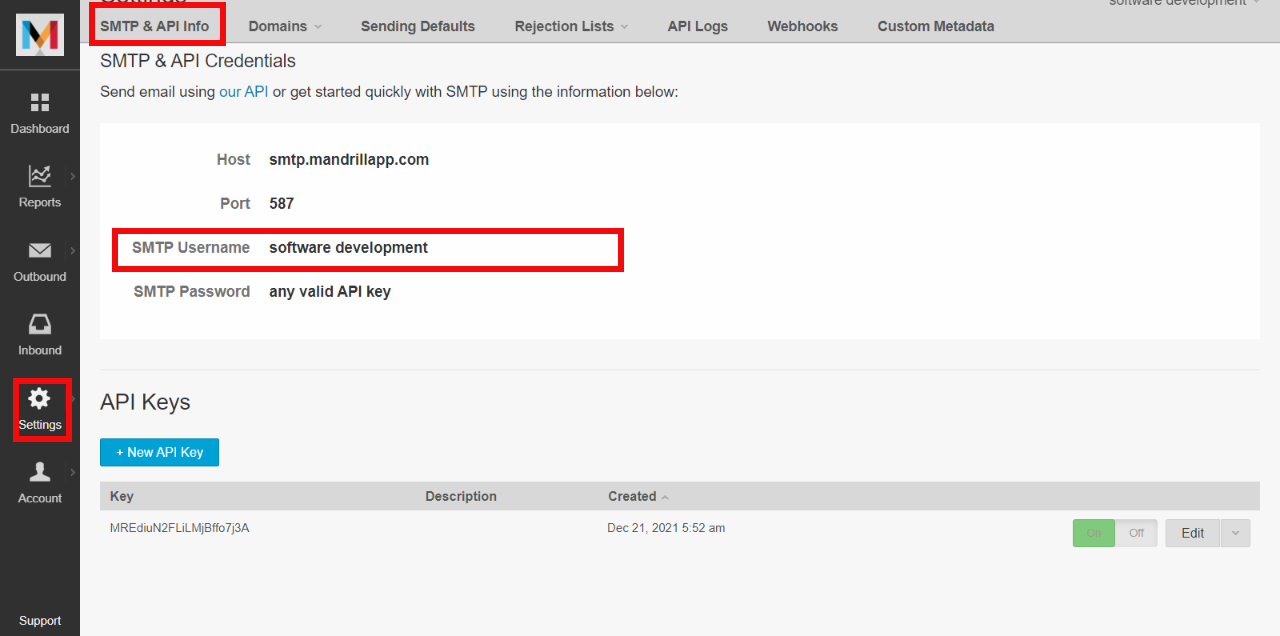
==> Password: Input your mandrill ” Password “
Your password is any valid API Key. Go to API Keys in the middle section of Settings>>SMTP & API Info
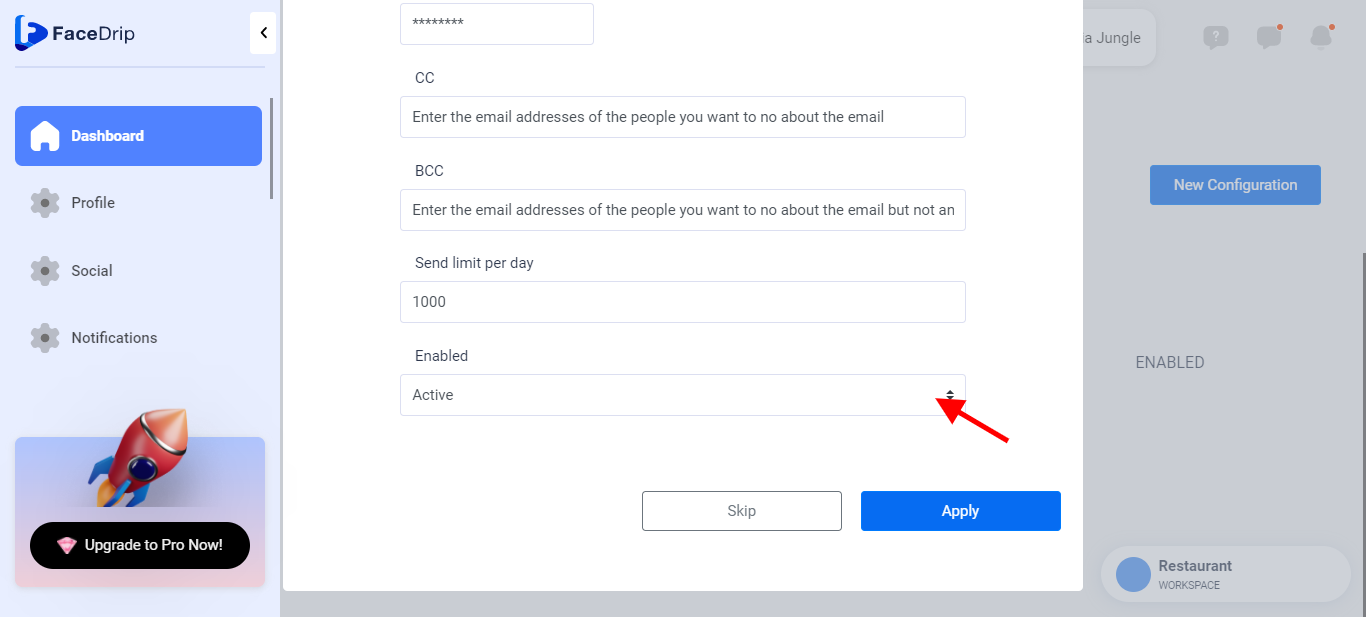
Once you have successfully connected your preferred, Mandrill SMTP provider. Kindly enter values for the CC, BCC, send limit per day and Enable it by selecting the active. option.
==> for the CC field(“cc” means carbon copy): enter the email addresses of the people you want to know about the email (remember that everyone will see their names)
==> for the BCC field (“bcc” means blind carbon copy): enter the email addresses of the people you want to know about the email but not announce to everyone else that they are getting a copy
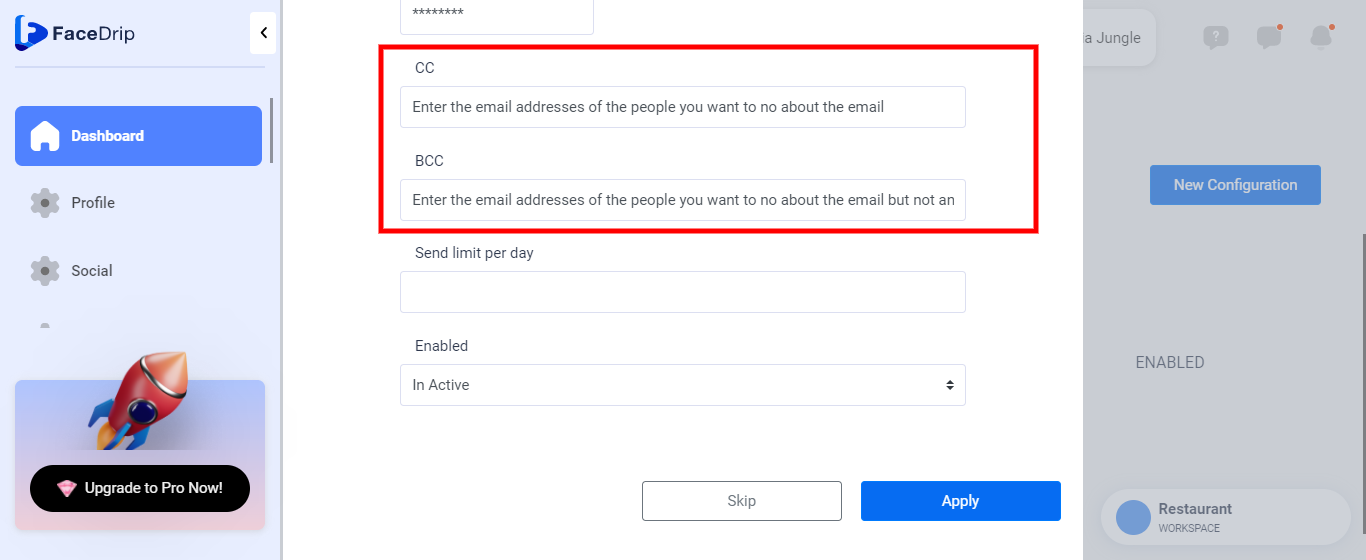
==> Send limit per day: Input the number of email messages you want to be sent per day.
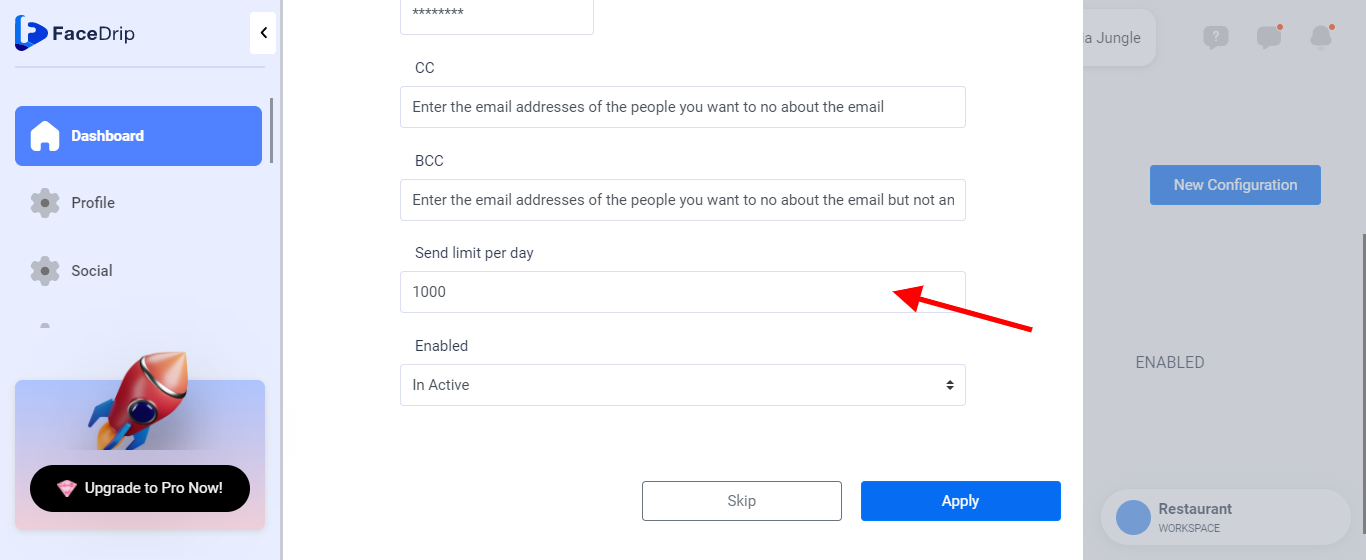
==> Select ” Active ” from the drop-down option to enable it
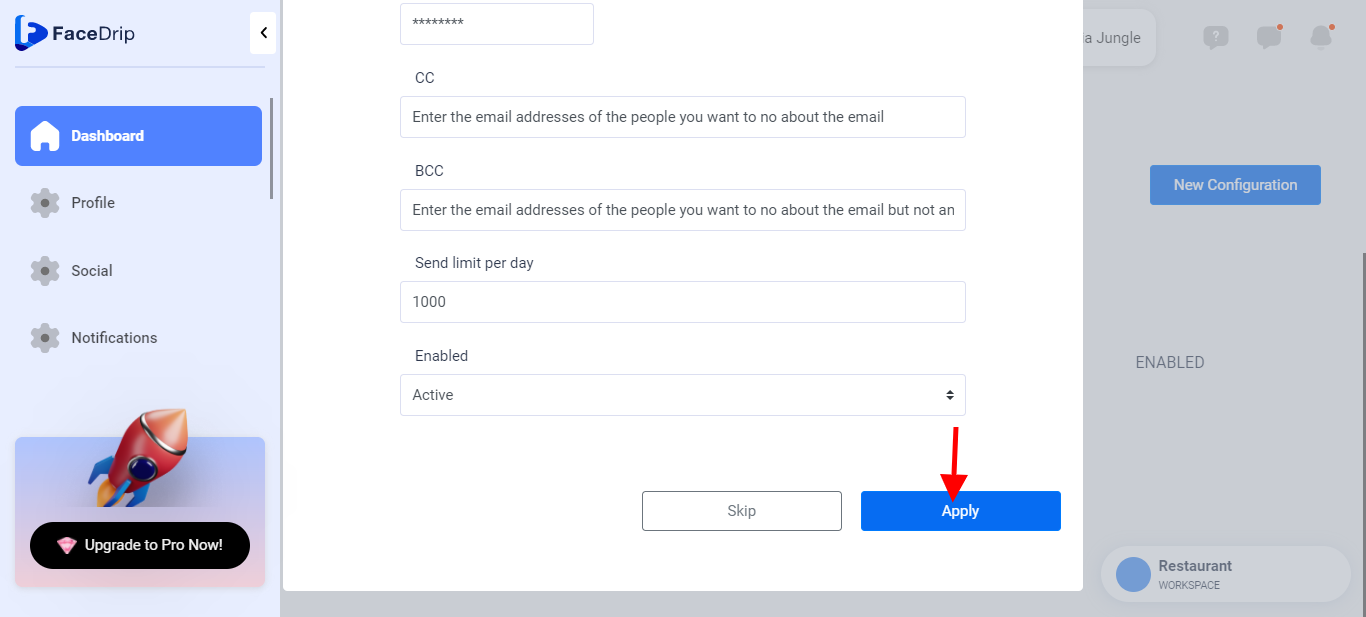
==> Click ” Apply ” to save your mandrill as a broadcast provide
A success message will pop saying “ Configuration was saved successfully “
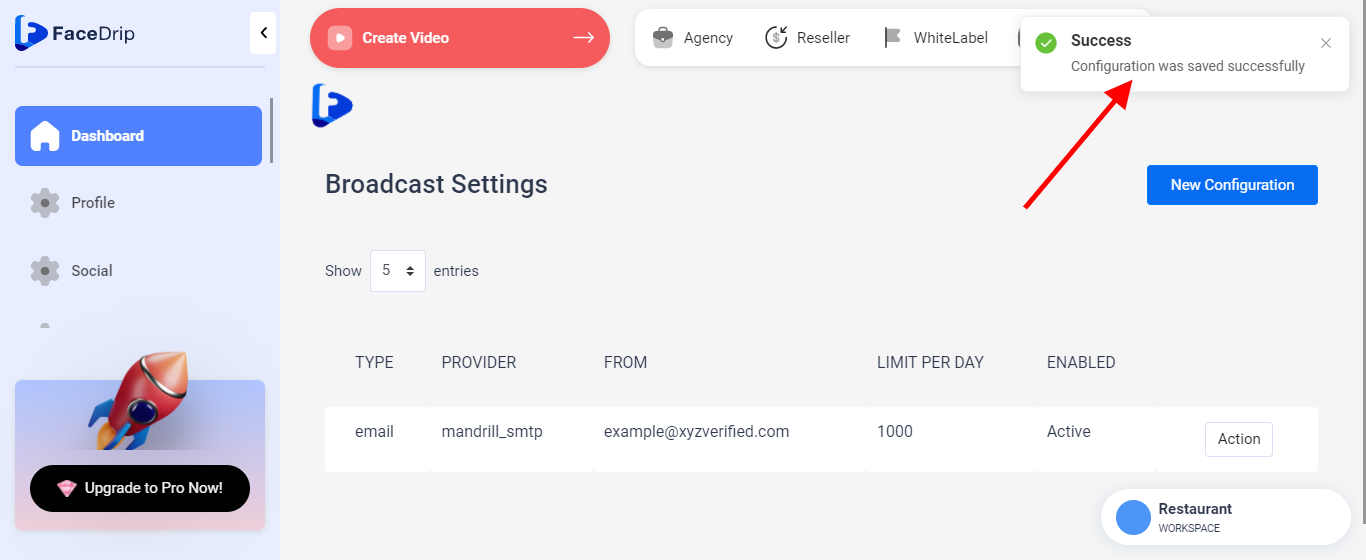
Your Mandrill SMTP Account has been added successfully