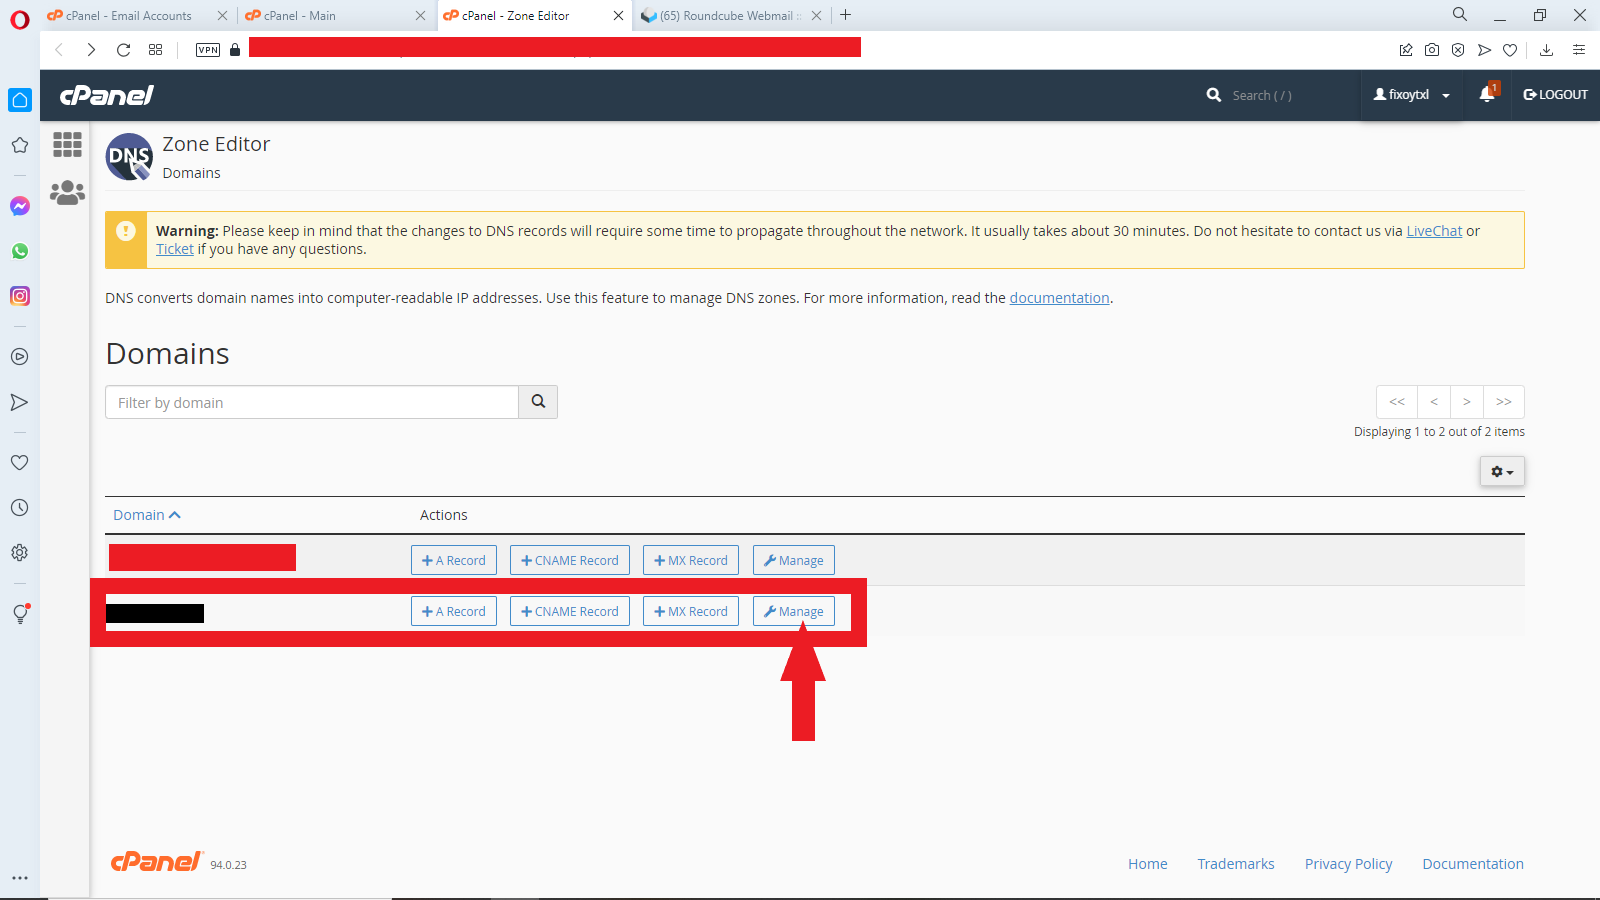
Step 1: Log in to your Cpanel
Step 2: Go to the DOMAINS section and click on “Zone Editor”

Step 3: In the list of domains in the table, go to the domain you want to update the DNS record and click on “manage”
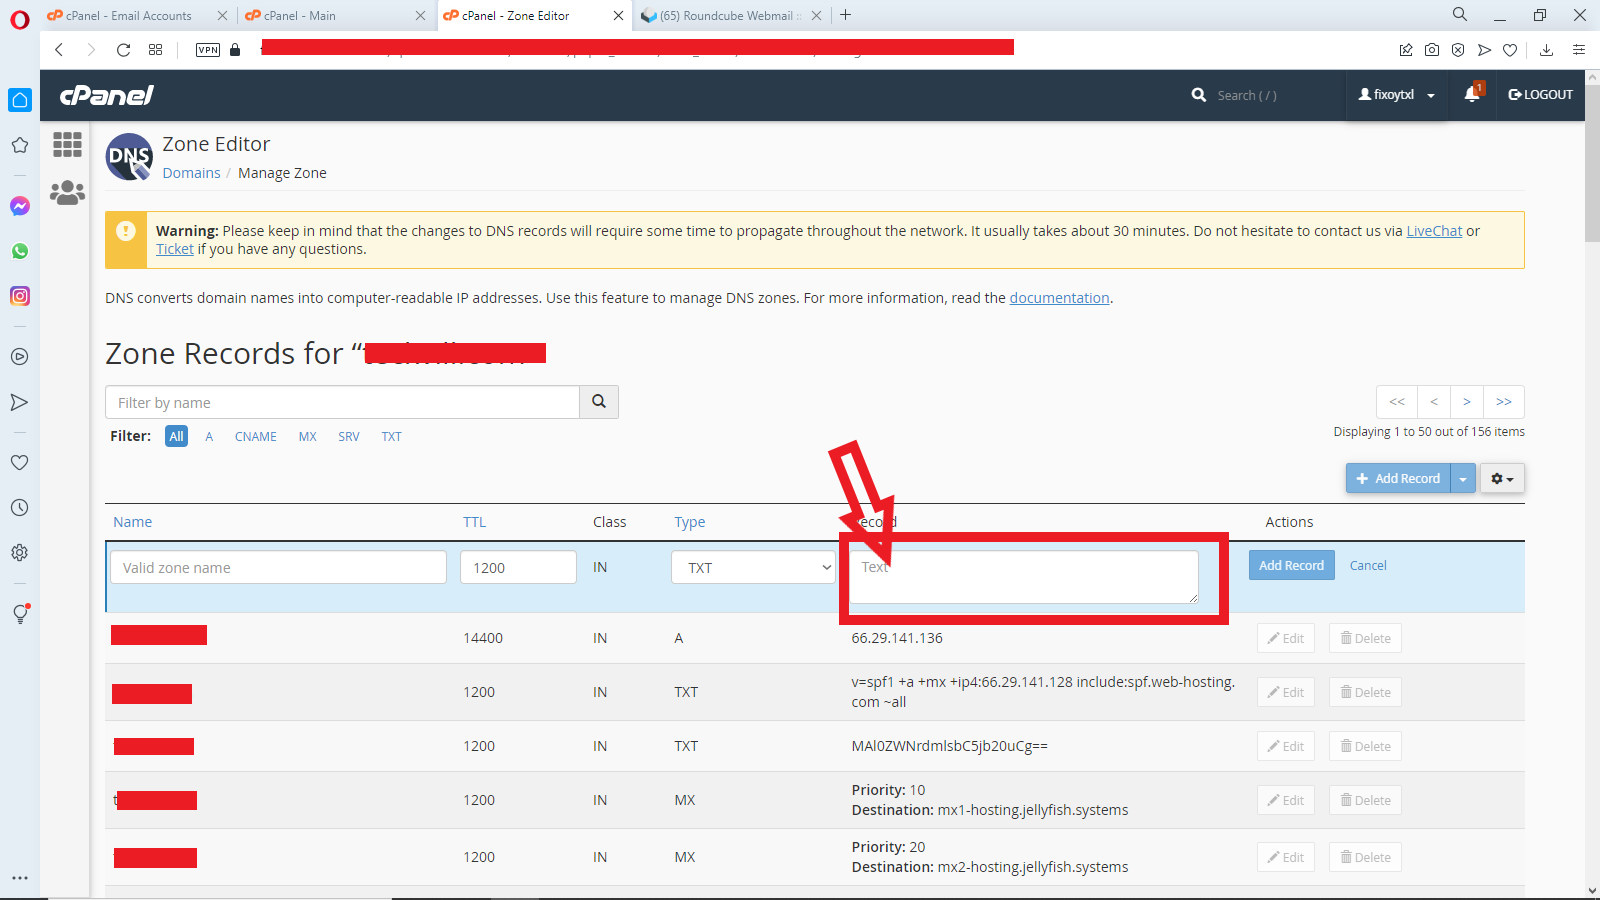
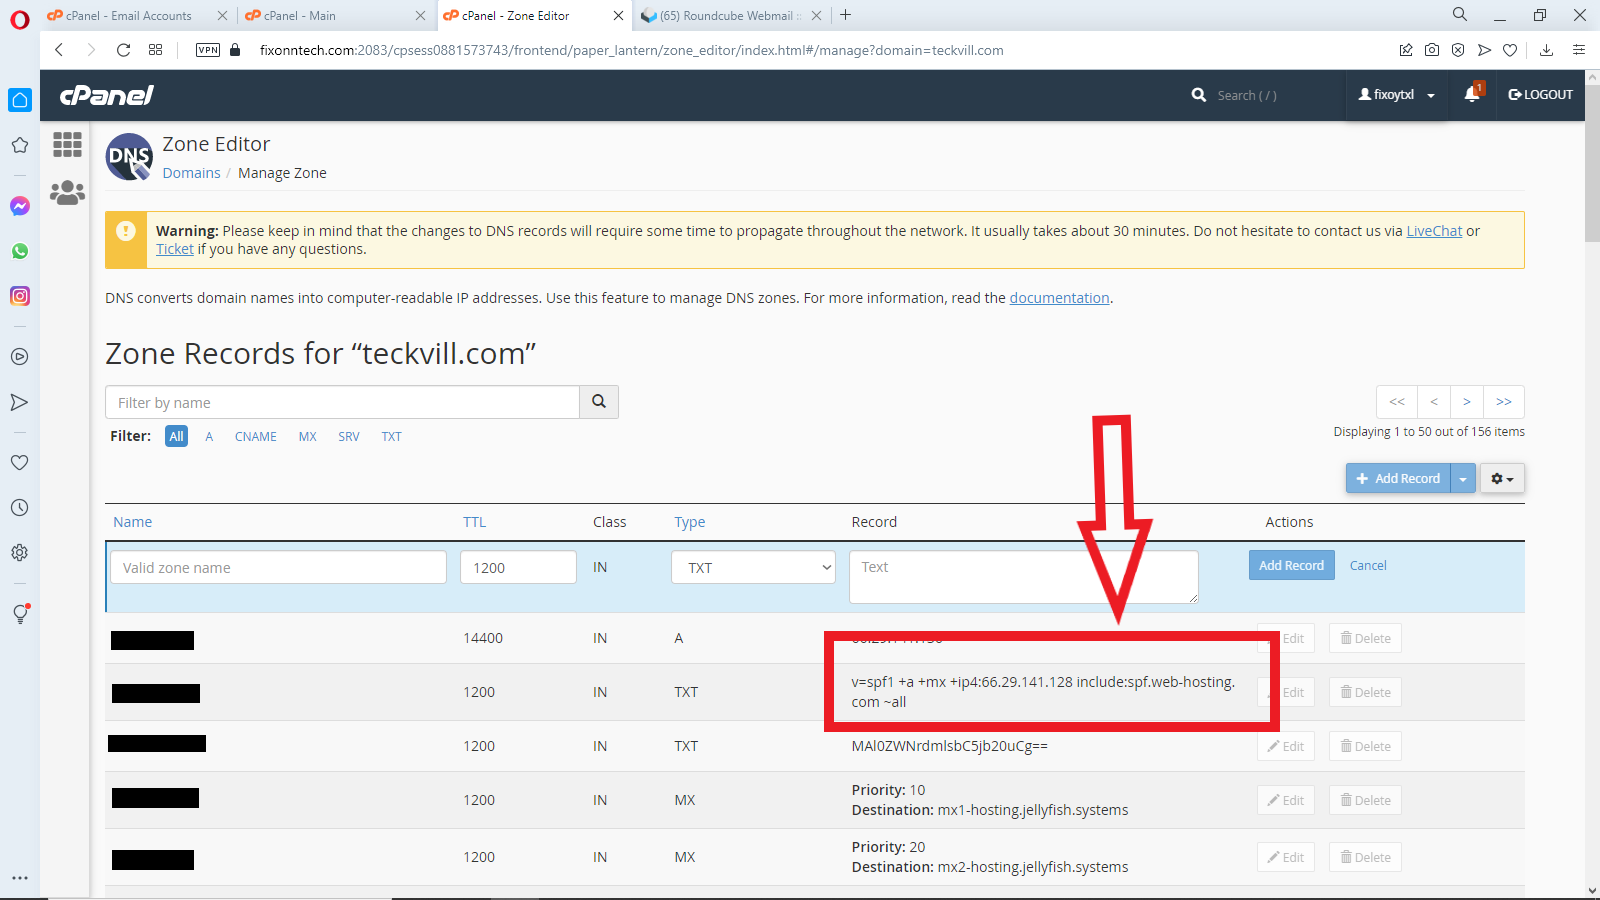
Step 4: Click the “add record” drop-down menu, select the “Add TXT Record” option and create a TXT record
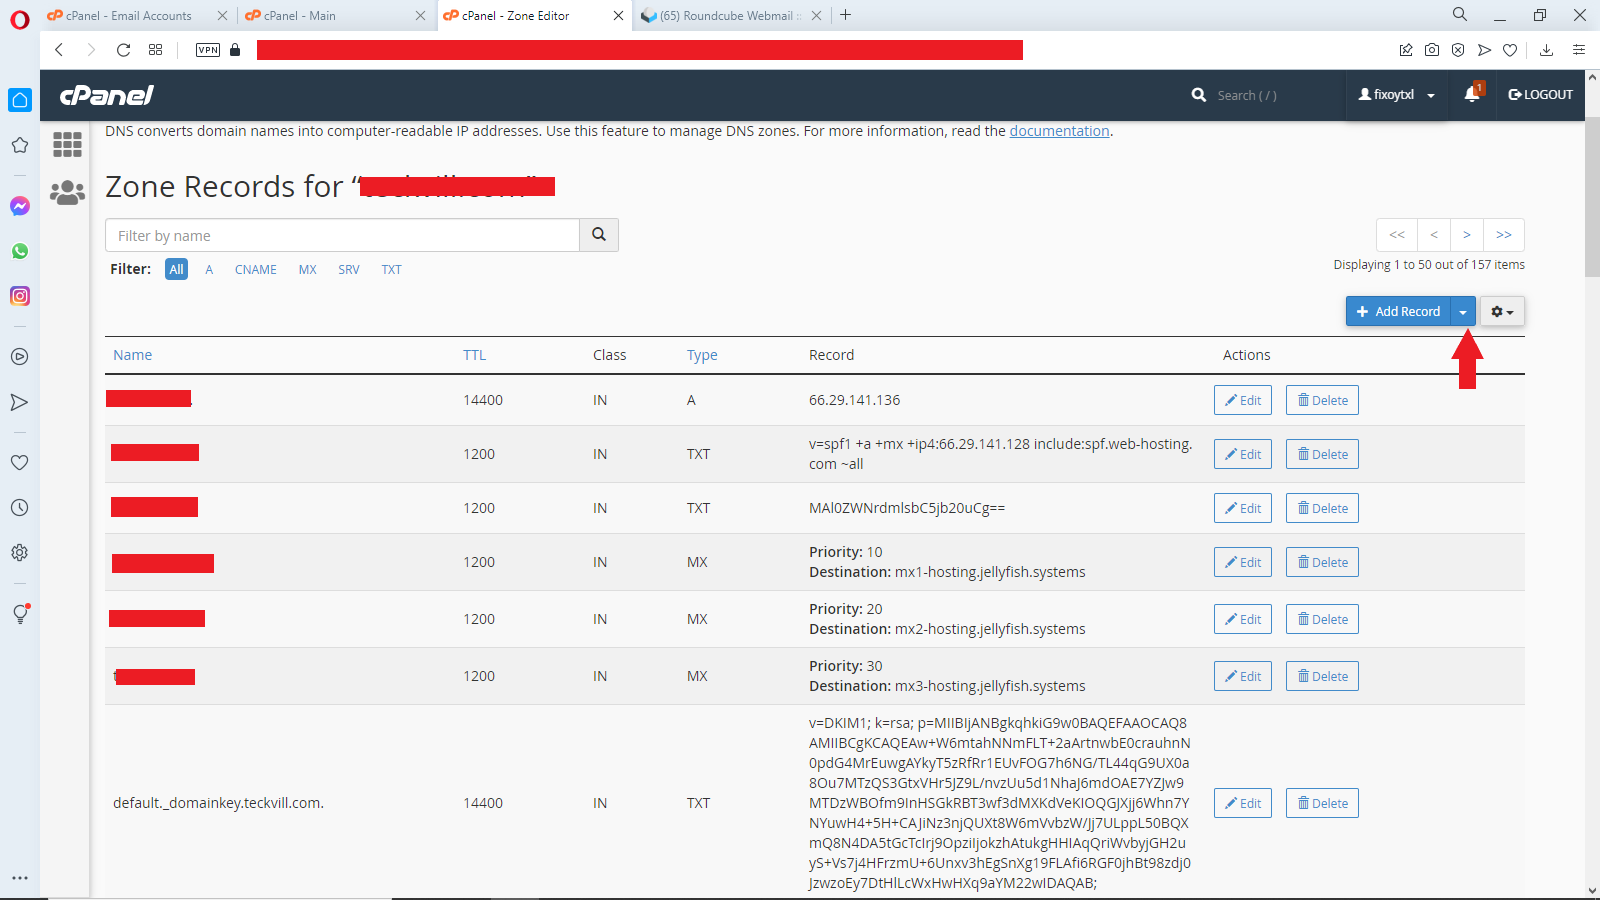
ZONE NAME: Enter mandrill._domainkey.yourdomain.com (just replace yourdomain.com with the domain you’re setting up)

RECORD: Paste the DKIM values.
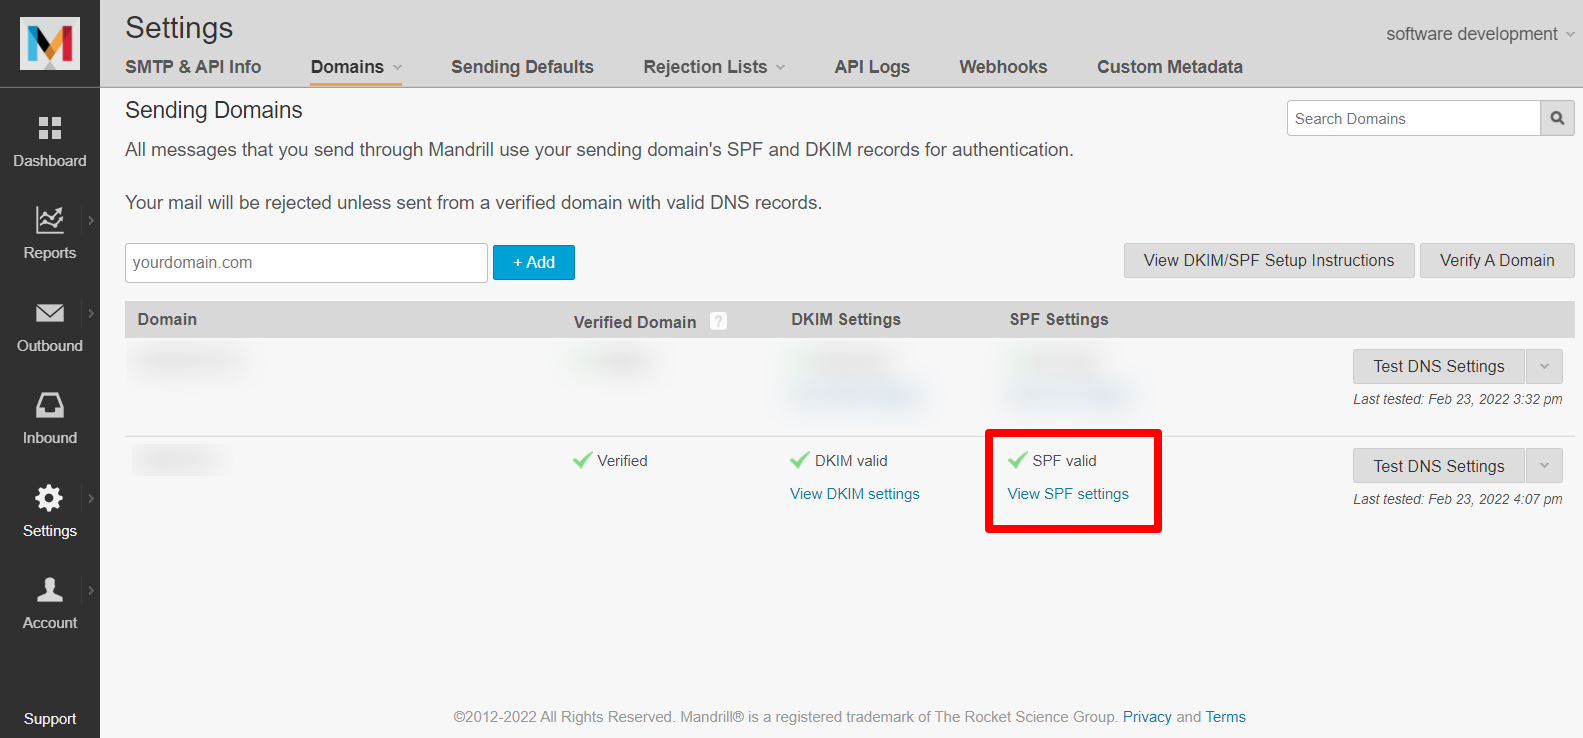
You will find the DKIM value by clicking on the “View DKIM settings”
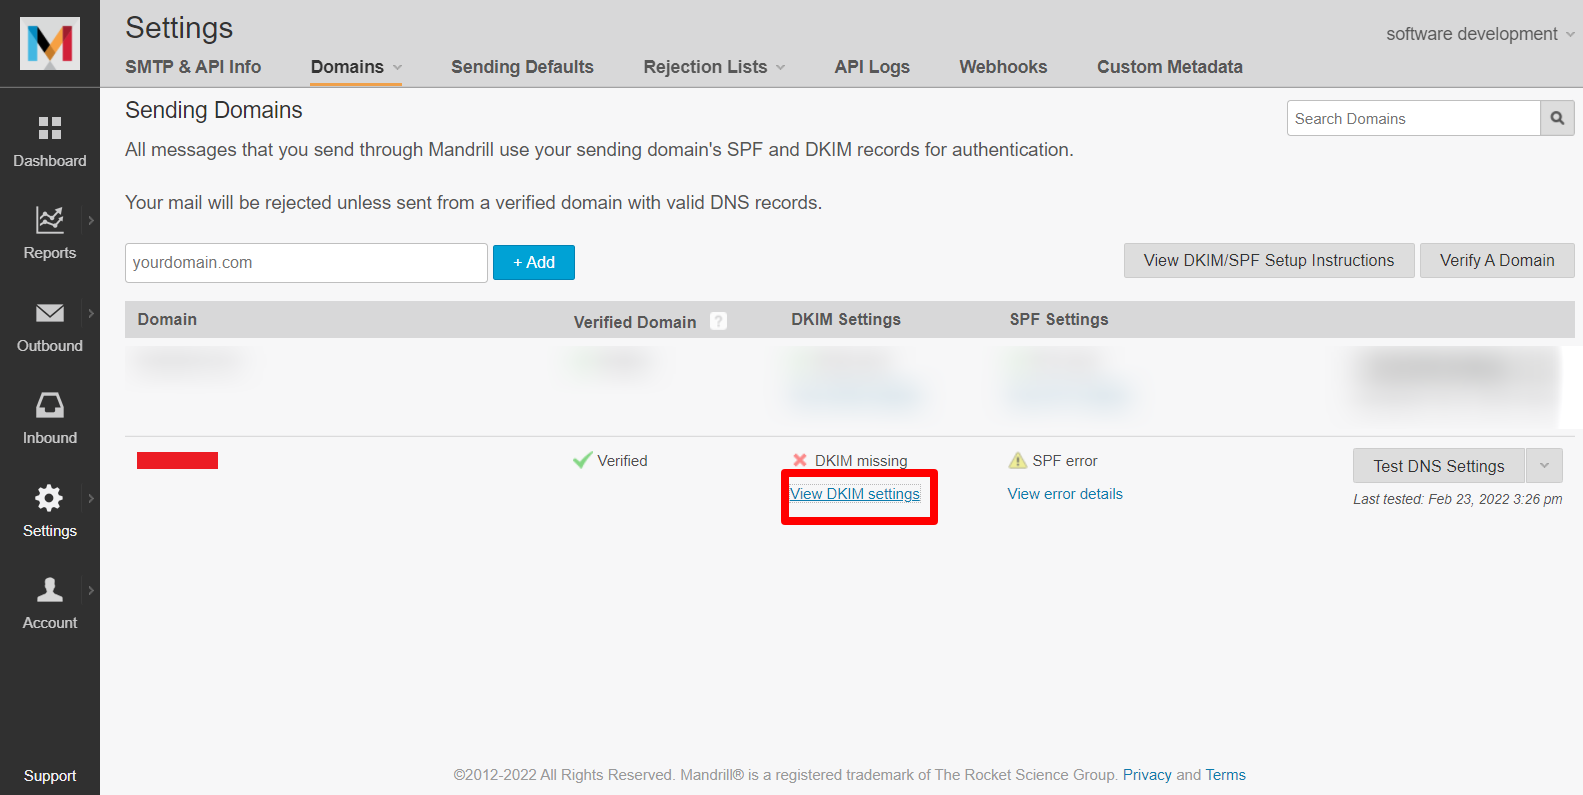
Once you have pasted the DKIM Record, Save the TXT Records. Then go ahead to Test DKIM by clicking on “View DKIM settings”
If testing is passed, it reads valid
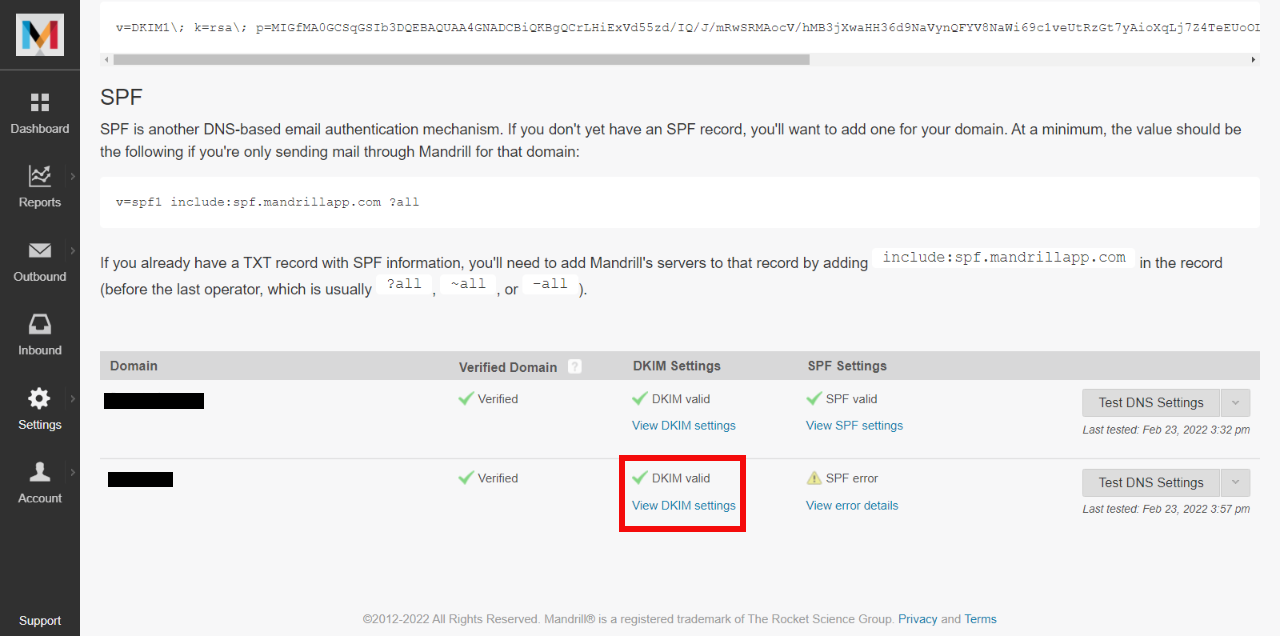
Step 5: Add SPF information to TXT Record. You’ll need to add Mandrill’s servers to that record by adding include:spf.mandrillapp.com in the record (before the last operator, which is usually ?all, ~all, or -all).
Once that is done, go ahead and Test SPF
If testing is passed, it reads valid